Have you ever needed to enhance multiple videos but found manually configuring settings for each clip tedious and time-consuming? With Nero AI Video Upscaler 2026, you can now batch import multiple videos, apply saved presets, and enhance your footage efficiently—all in one streamlined workflow. The new Enhance Detail Model ensures maximum sharpness and detail, making your videos look better than ever.
Guide
1: Batch Import Videos
Drag and drop multiple videos or an entire folder into Nero AI Video Upscaler.
All files are automatically prepared for processing.
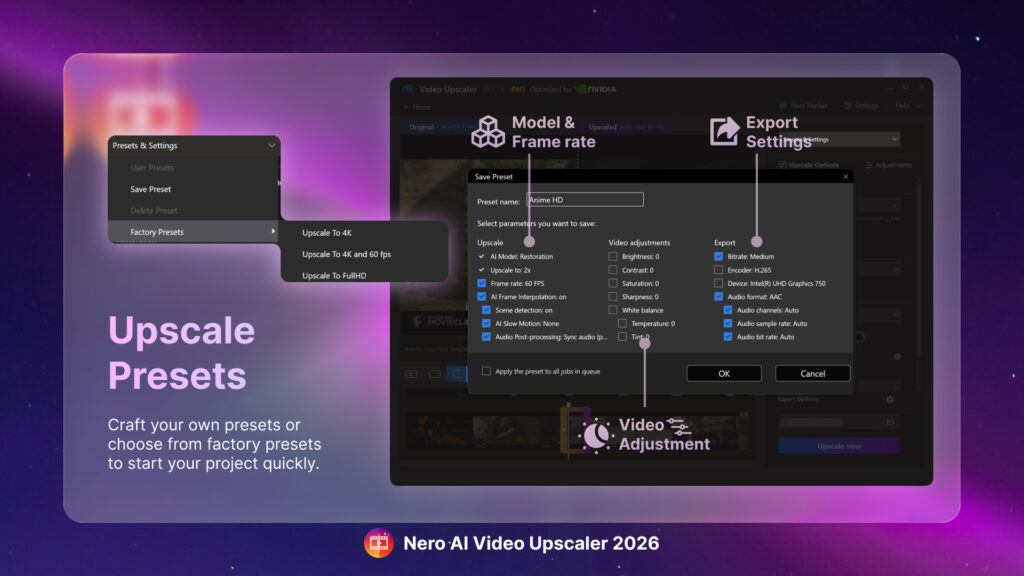
2: Select AI Model and Presets
Clicking Edit to update the settings
Choose the AI model for enhancement (e.g., Enhance Detail Model for maximum clarity).
Apply a saved preset or create a new one, including resolution, frame rate, AI frame interpolation, output format, and AI model settings.
3: Start Batch Processing and Export
Click Start Queue to process and export all imported videos at once.
💡Tip: Presets ensure consistent results and save time for future projects.
1. Which AI model should I choose for faster processing?
Use the Fast model whenever possible—it’s explicitly designed for quicker upscaling, offering a good compromise between speed and quality.
2. How can I avoid upscaling more than necessary?
Use Clip Selection to upscale only specific portions of a video instead of the entire file. This greatly reduces processing time.
Always run a Preview on a short segment (1–3 seconds) to fine-tune settings before processing the full video.
3. Can I queue multiple videos to process them efficiently?
Yes—use Batch Processing to queue several videos. You can let the software run in the background, or even overnight, to save active work time.
4. How can I improve hardware utilization to speed things up?
Ensure your system meets or exceeds the recommended hardware specs, especially a modern GPU with sufficient VRAM (e.g., NVIDIA RTX 3060 or AMD RX 6700 XT with 12 GB VRAM for 4K–8K upscaling).
Close all unnecessary apps to free up memory and reduce system load. Pro-tip: Restart your PC before launching a large upscaling job.
Confirm your GPU drivers and DirectX 11 (or higher) support are up to date to avoid bottlenecks.
Enable hardware (GPU) acceleration if supported—users note significant speed increases with compatible NVIDIA/AMD cards.
5. How should I structure my workflow for the fastest turnaround?
Import your video.
Use Clip Selection to isolate the relevant section.
Pick the Fast AI model.
Set desired output resolution.
Run a Preview to confirm your choices.
Add to Batch Queue and process when idle.
Quick Summary Table
Strategy
What to Do
Choose Fast model
Prioritize speed if high-detail isn’t necessary
Use Clip Selection
Upscale only needed parts, not whole video
Run a Preview
Test settings on a short segment before full processing
Utilize Batch Processing
Queue up jobs and let them run in the background
Maximize Hardware
Enable GPU acceleration, use recommended hardware specs, close other apps
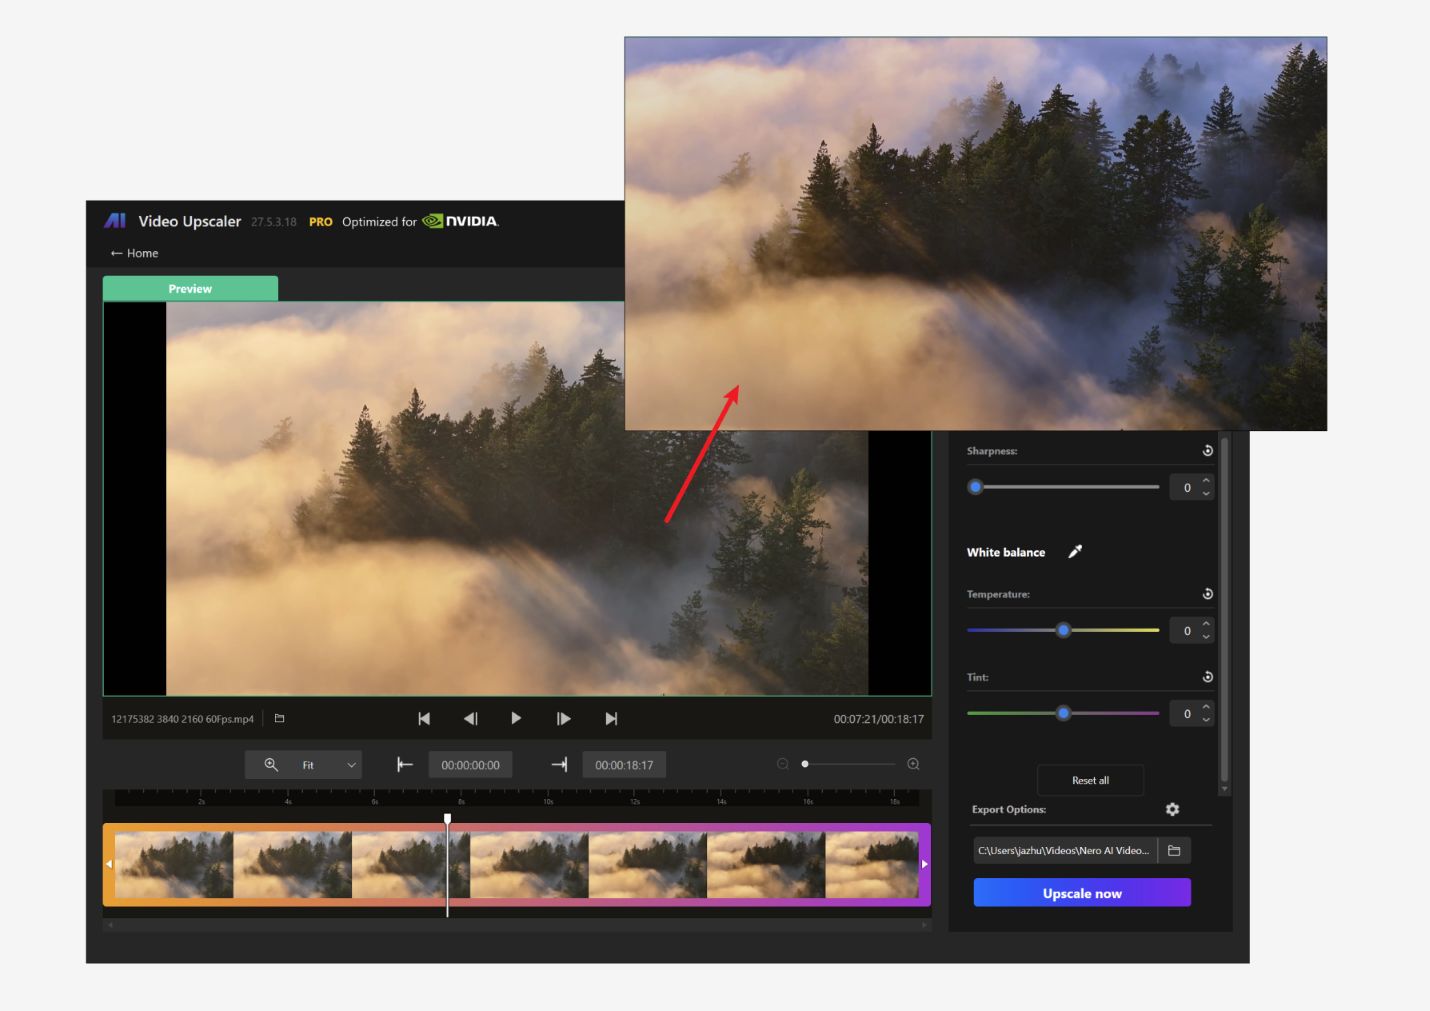
In today’s video enhancement landscape, fine-tuning your video’s look is just as important as upscaling its resolution. With the latest update to Nero AI Video Upscaler, you can now adjust brightness, contrast, saturation, sharpness, and white balance directly within the app—all from a dedicated Adjustments tab. This guide will walk you through how to get the most out of these new features.
1. Getting Started
Launch the App: Open Nero AI Video Upscaler on your PC. If you haven’t already, download and install the latest version from the official Nero website.
Import Your Video: Drag and drop your video file into the app. Once imported, you’ll see a preview window with the original footage.
2. Navigating to the Adjustments Tab
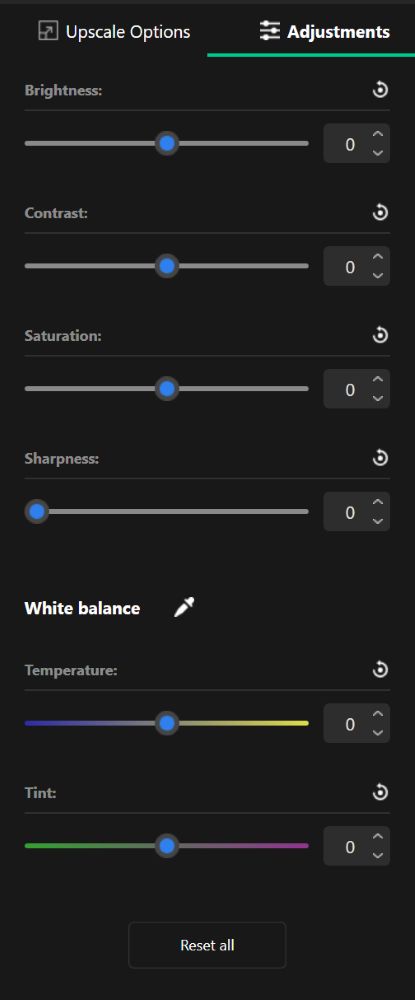
Find the New Tab: After importing your video, look for the new “Adjustments” tab in the main interface. This tab is designed to provide easy access to all the adjustment sliders.
User Interface Overview: The interface now displays a series of sliders labeled as follows:
Brightness
Contrast
Saturation
Sharpness
White Balance
A real-time preview window sits alongside these controls, allowing you to see the effects of your adjustments immediately.
3. Adjusting Video Parameters
Brightness
Purpose: Increase or decrease the overall lightness of your video.
Tip: If your video appears too dark or overexposed, gently adjust the slider until you achieve a balanced look.
Contrast
Purpose: Enhance the difference between light and dark areas.
Tip: Increasing contrast can add depth, but too much can cause loss of detail in the shadows or highlights.
Saturation
Purpose: Boost or tone down the intensity of the colors.
Tip: Adjust saturation to make colors pop or to create a more subdued, natural look.
Sharpness
Purpose: Improve clarity by enhancing edge definition.
Tip: Increase sharpness if your video appears slightly blurry, but avoid over-sharpening to prevent an artificial look.
White Balance
Purpose: Correct color temperature and remove unwanted color casts.
Tip: Use this slider to ensure whites appear neutral, which in turn balances the overall color accuracy of your footage.
4. Previewing and Finalizing Your Adjustments
Real-Time Preview: As you adjust each slider, monitor the preview window. This helps you decide whether to make further tweaks or stick with the current settings.
Export Your Video: Proceed to upscale your video (if needed) and then export the final version in your preferred format and resolution.
Tips for Best Results
Start Small: Make incremental adjustments rather than large leaps. Small changes can significantly impact the overall quality.
Monitor on Different Screens: If possible, view your preview on multiple displays to ensure consistent quality.
Final Words
The new Color Adjustment feature in Nero AI Video Upscaler makes it easier than ever to enhance not only the resolution but also the visual quality of your videos. Whether you’re correcting a dark indoor shoot or giving vibrant life to an old family video, these tools empower you to achieve professional-looking results with just a few clicks.
Embrace the new features, experiment with your settings, and let Nero AI Video Upscaler bring your videos to a whole new level of clarity and style.
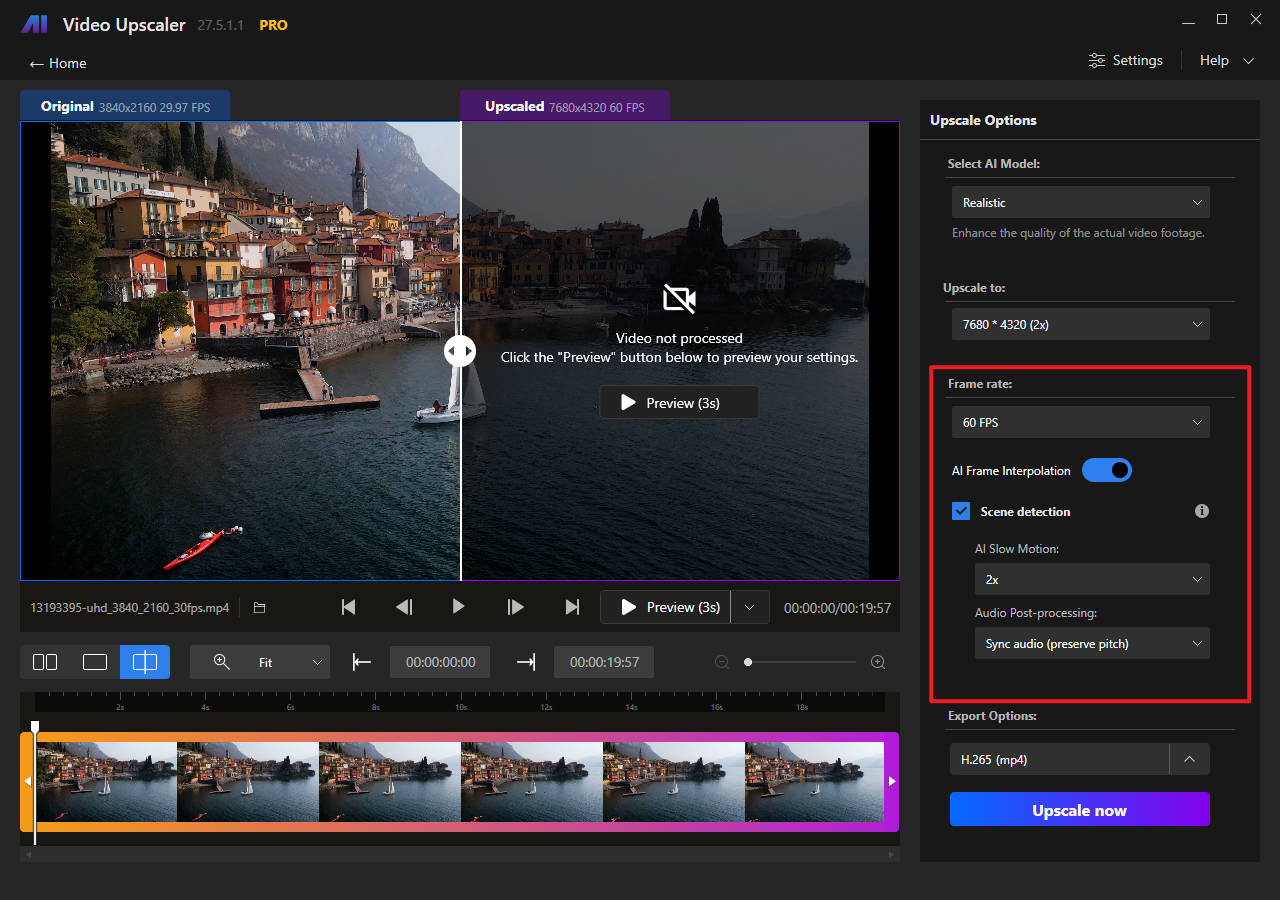
Nero AI frame interpolation is a technique that uses artificial intelligence to create additional frames between existing frames in a video. This process enhances the smoothness of motion by filling in the gaps between frames, making the video appear more fluid and visually appealing.
AI frame interpolation will be enabled automatically if you select a frame rate higher than the original.
The scene detection switch is used to avoid strange frames generated by interpolation when the scene changes. If there is no scene change in your video, you can turn off this option to speed up the frame generation.
AI slow motion
AI slow motion can only be enabled when the AI frame interpolation is enabled.
Select the time scale factor from 2x to 8x and choose the audio post-processing method to start processing.
Audio post-processing method:
Keep original audio: do not process the audio and keep the original length, please note that the audio will lose synchronization with the video.
Remove audio: remove audio track, suitable for the users who want to process audio separately.
Sync audio (preserve pitch): slow down the audio pace and keep the audio pitch, please note that the audio may sounds strange when the speed is low.
Sync audio (do not preserve pitch): slow down the audio pace and the audio pitch become lower than the original.
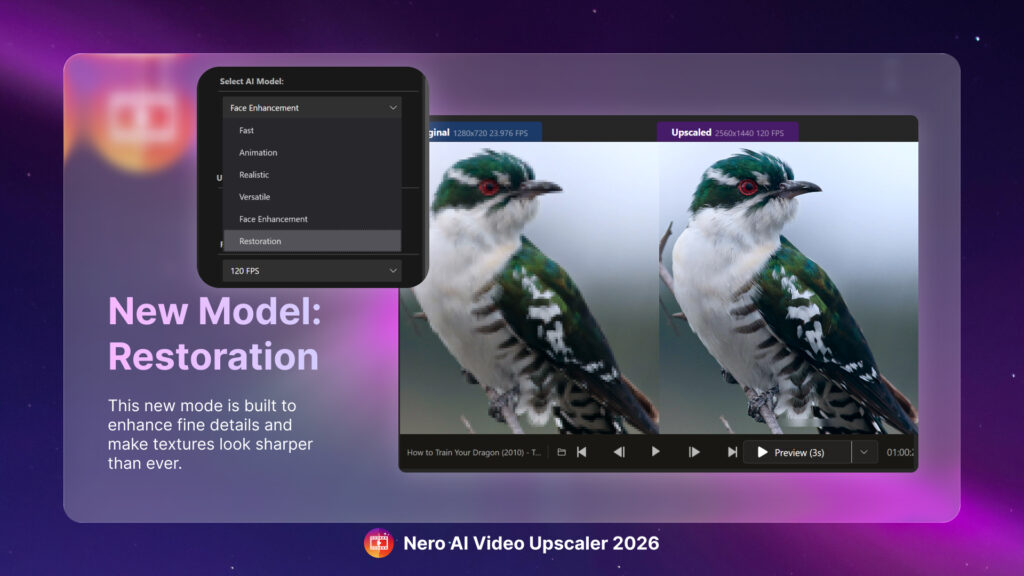
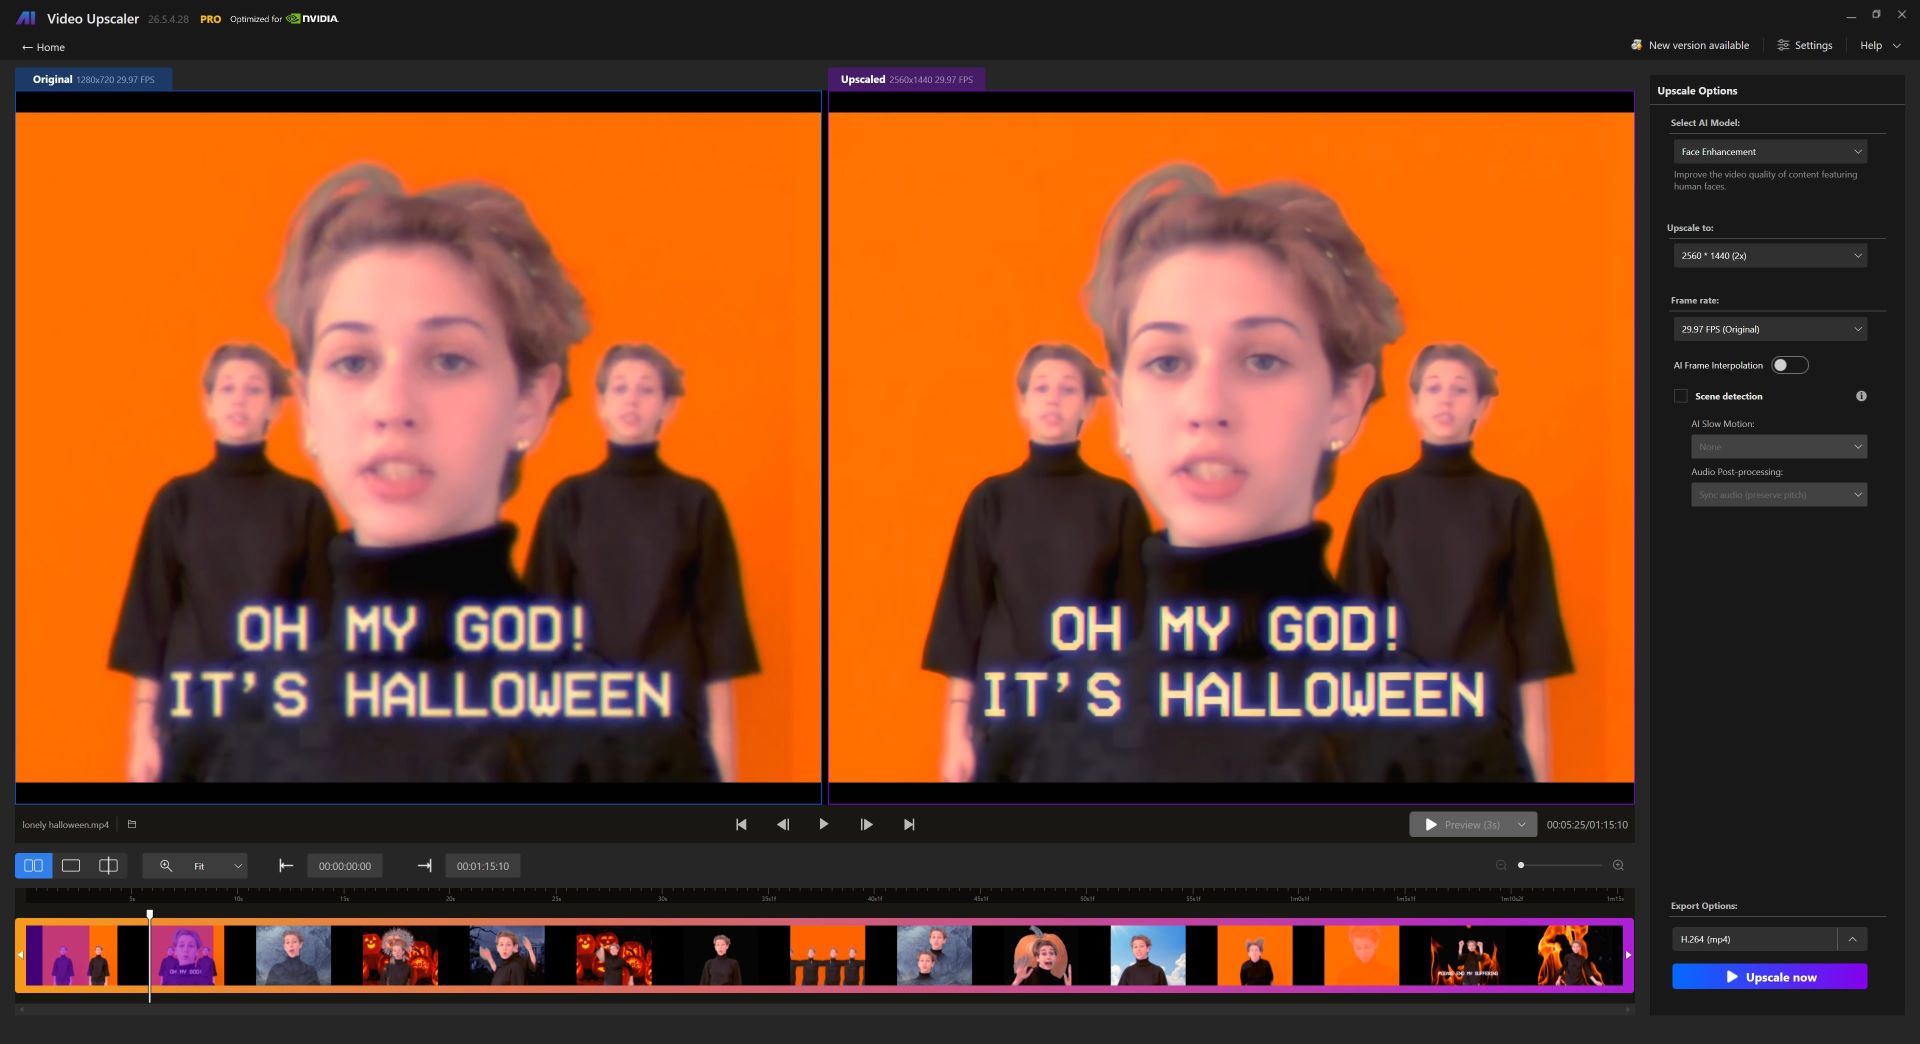
Face enhancement model
The face enhancement model will come as the first online update for both Nero AI Video Upscaler lifetime and subscription versions.
This model is focused on enhance the blurry details on the faces in the video.
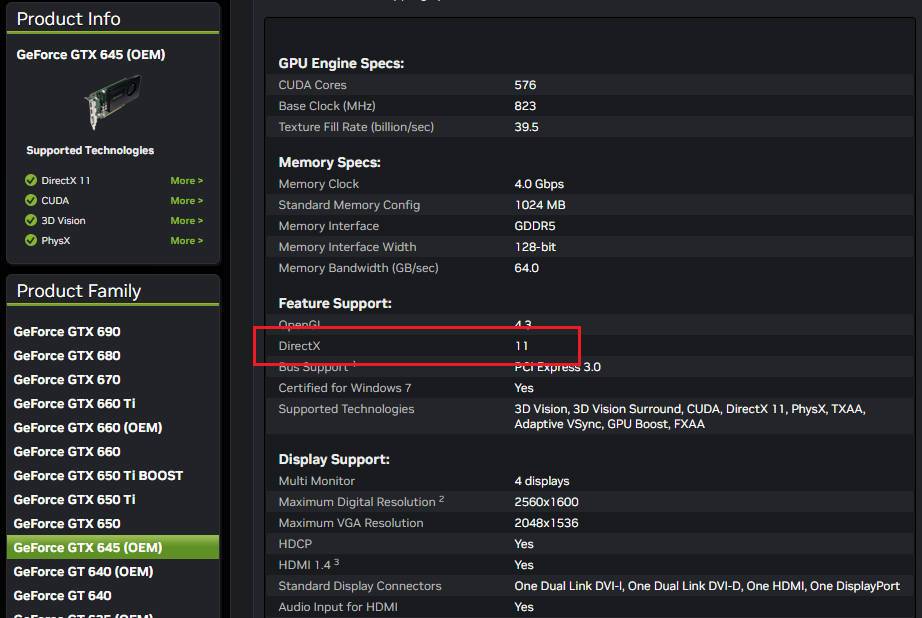
Firstly, you need to make sure that your graphic card can support DirectX 11 although most of the modern graphic cards are able to support it.
Please check your graphic card’s specification on the vendor’s website.
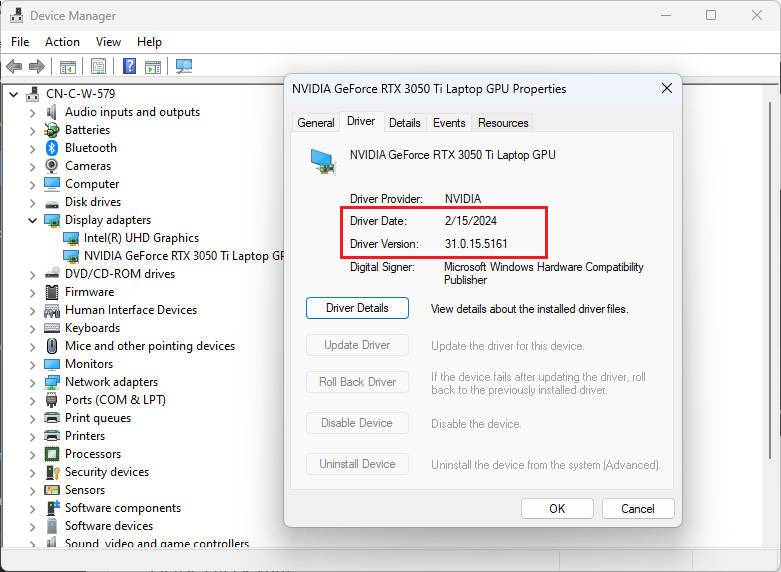
Update the hardware driver
Please check your graphic card’s driver version in the Windows Device Manager and compare to the latest version on the vendor’s website to make sure the latest version of the driver is already installed on your system.
Check DirectX version
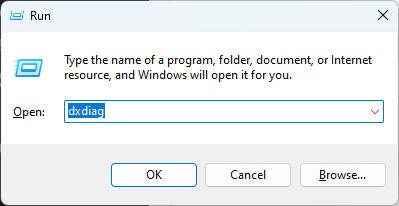
Use “Windows logo key + R” to open the run dialog box and enter “dxdiag” to open DirectX Diagnostic Tool.
Check if the DirectX version is equal or higher than DirectX 11.
If the version is lower than DirectX 11, please use the Window Update to update your system.