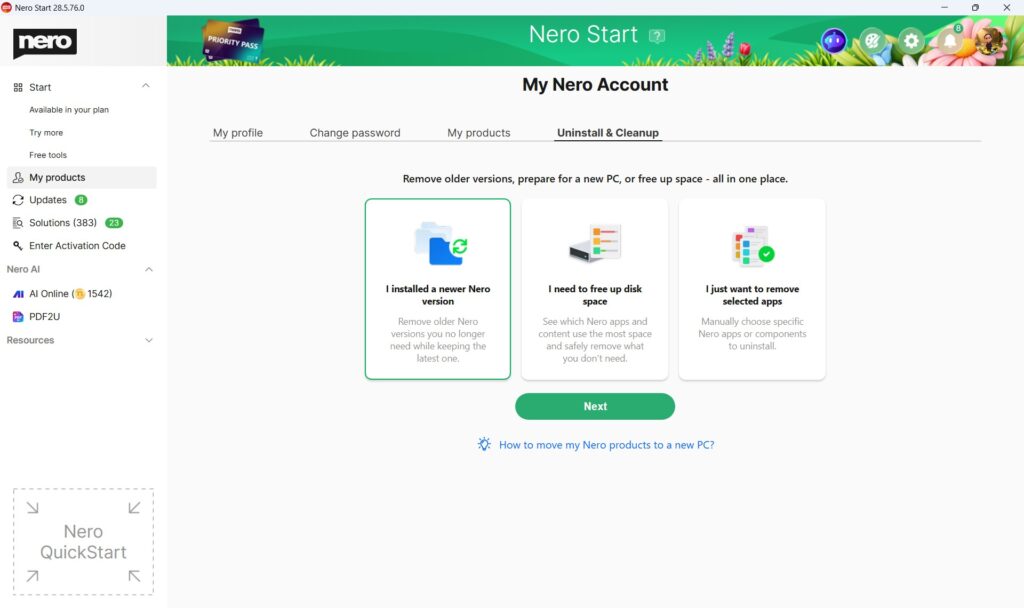
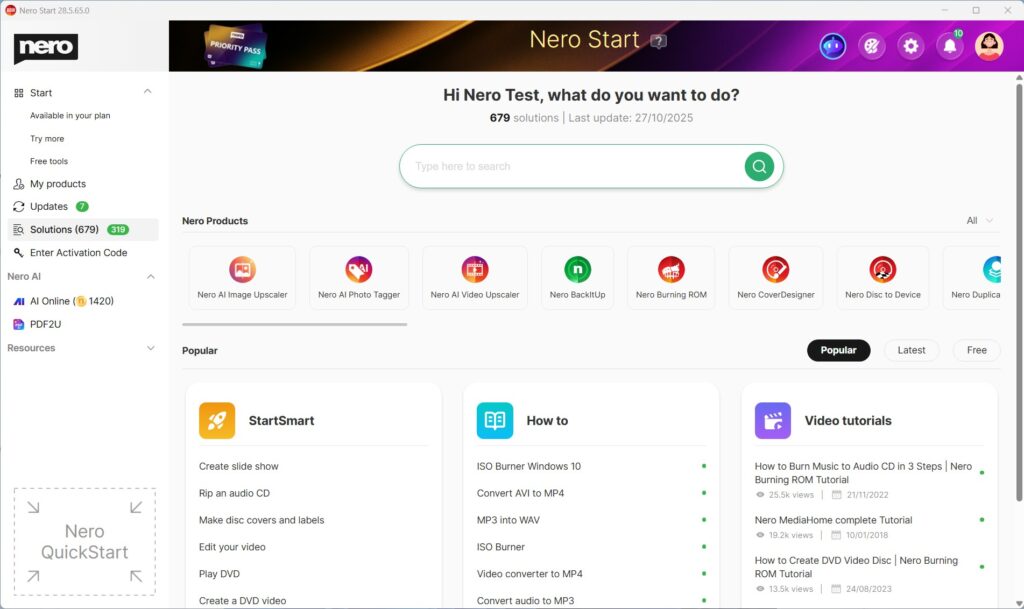
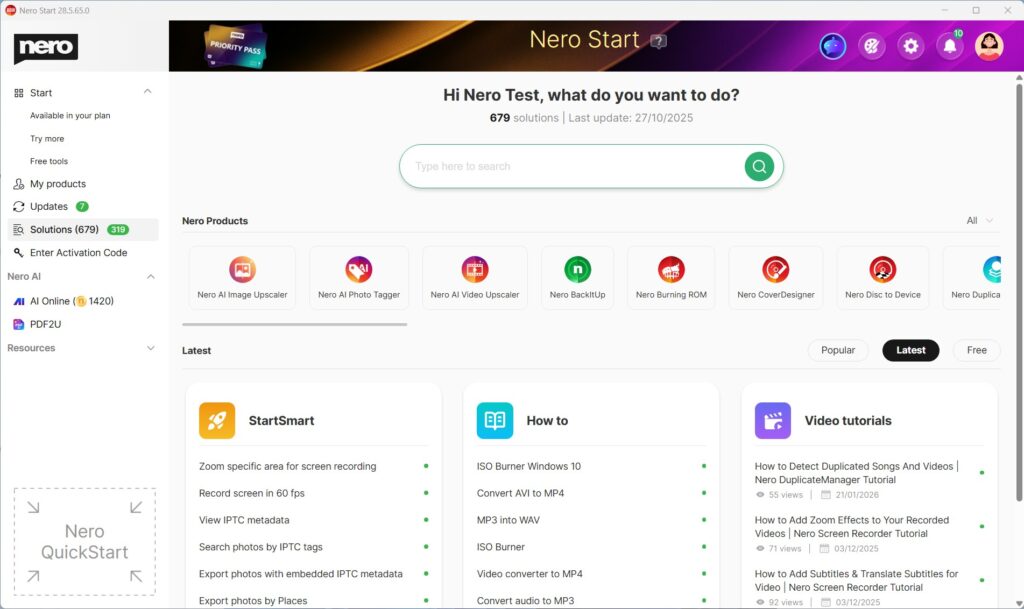
Solutions helps you complete common tasks by offering three types of help in one place:
StartSmart – Guided use cases that take you directly into the right Nero app to start your job.
How to – Step-by-step help articles for detailed instructions.
Video tutorials – Short videos that show the workflow.
When you search for a use case, Solutions can show all three (StartSmart + How to + Video tutorials) so you can choose what works best for you.
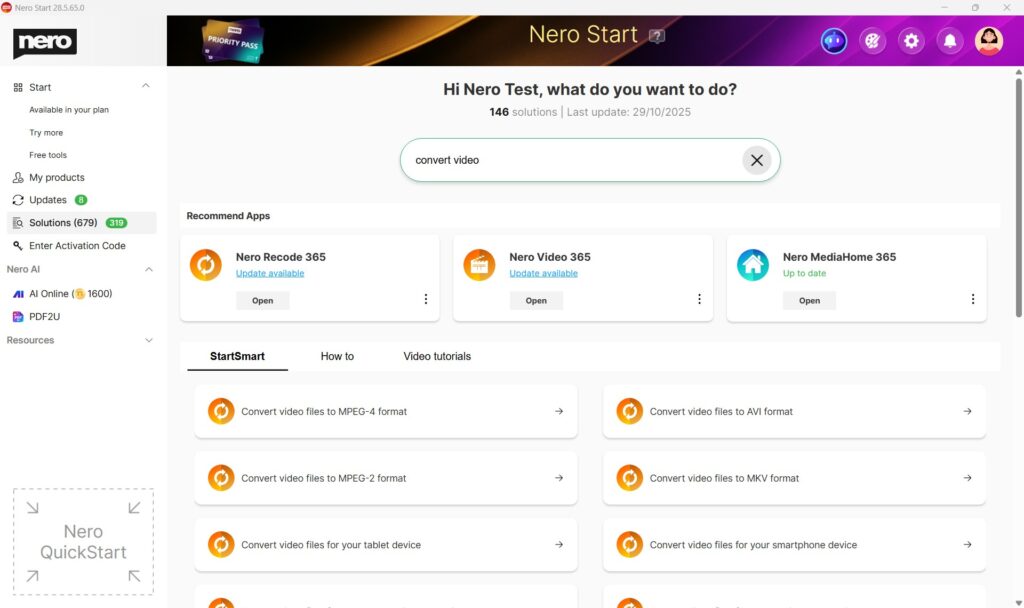
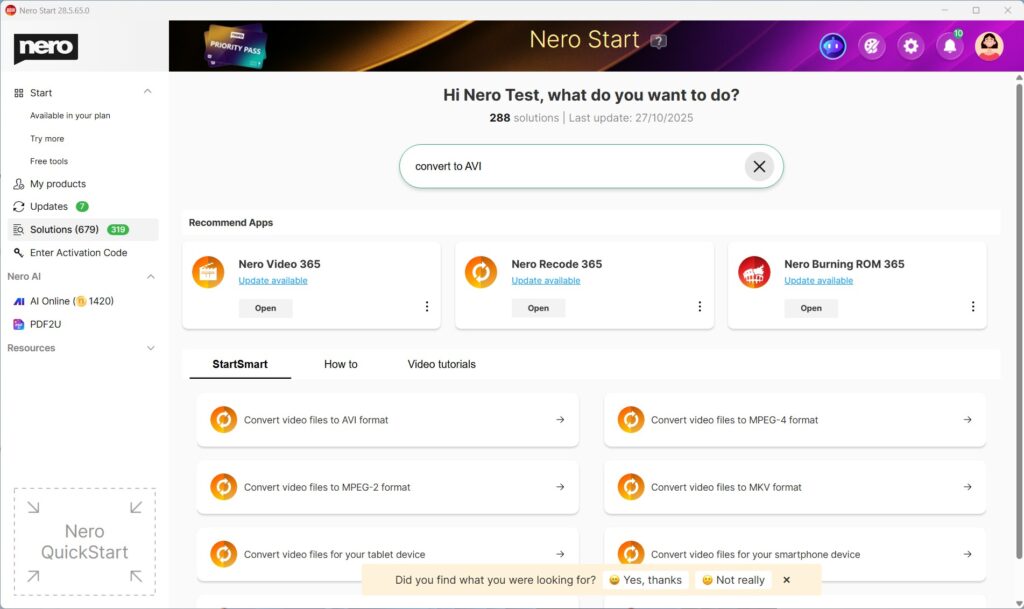
Find what you need with Search
Open Nero Start.
Go to Solutions.
Use the Search field.
Type what you want to do (e.g. convert video, rip CD, backup, edit)
Review results across:
StartSmart (start immediately),
How to (read steps),
Video tutorials (watch a demo).
Select the result you want.
Tip: The most relevant results are always listed at the front.
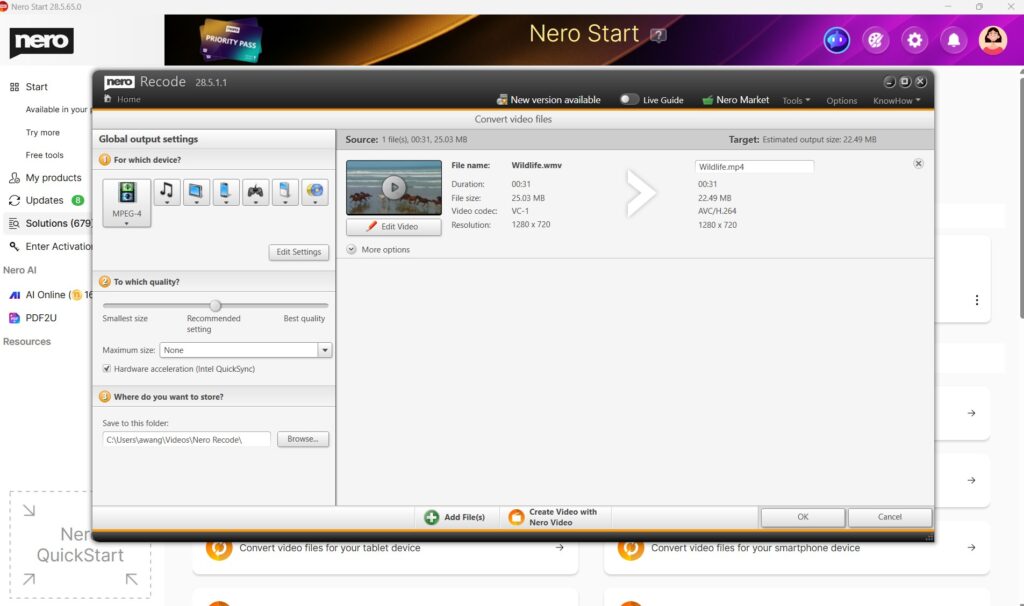
Use StartSmart to start a task right away
Open Nero Start > Solutions.
Choose a use case from StartSmart that matches your goal.
Select Open (or Install if the required app isn’t installed).
Follow the guided steps to begin.
Use “How to” for step-by-step instructions
Open Nero Start > Solutions.
From How to, choose an article for your use case.
Follow the instructions in the article.
Use Video tutorials to learn by watching
Open Nero Start > Solutions.
From Video tutorials, click a topic
You can start the watching of video demo.
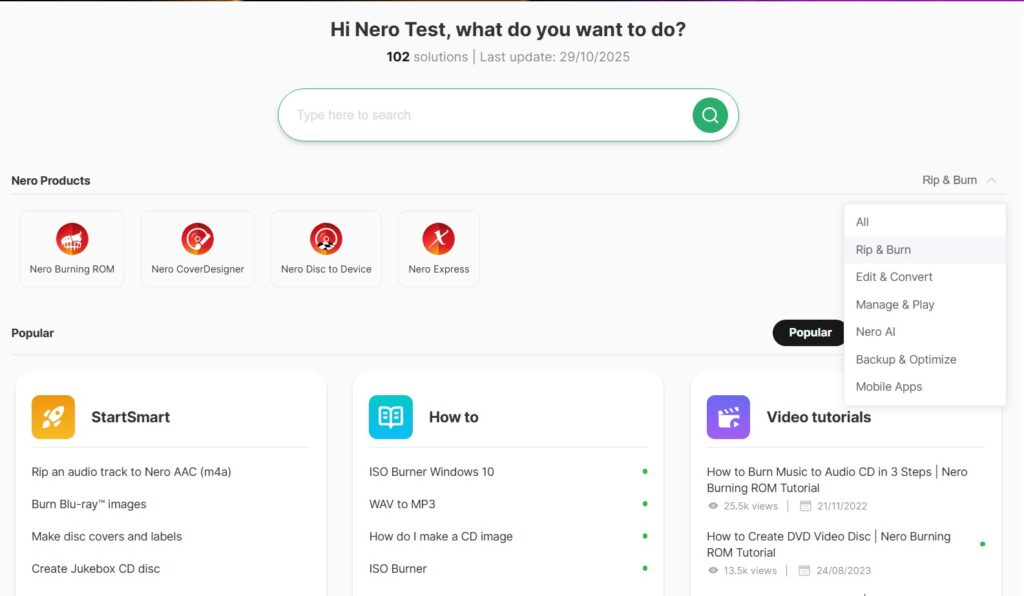
Refine results with Filters and Sorting
Apply filters
Open Solutions.
Select Nero Product Category
Or select a dedicated product
Change sorting
Open Solutions.
Select Popular, Latest or Free.
Solutions will list all info based on your requirement.
Troubleshooting
I can’t find what I need in Solutions
Try a simpler keyword (e.g., “convert” instead of “convert MP4 to AVI”).
Clear filters and search again.
In the feedback area, just feel free to submit what case you were looking for to Nero – we will collect your feedback and make improvements in future updates.
StartSmart doesn’t open the app
Make sure the required Nero app is installed.
If prompted, select Install and try again after installation.
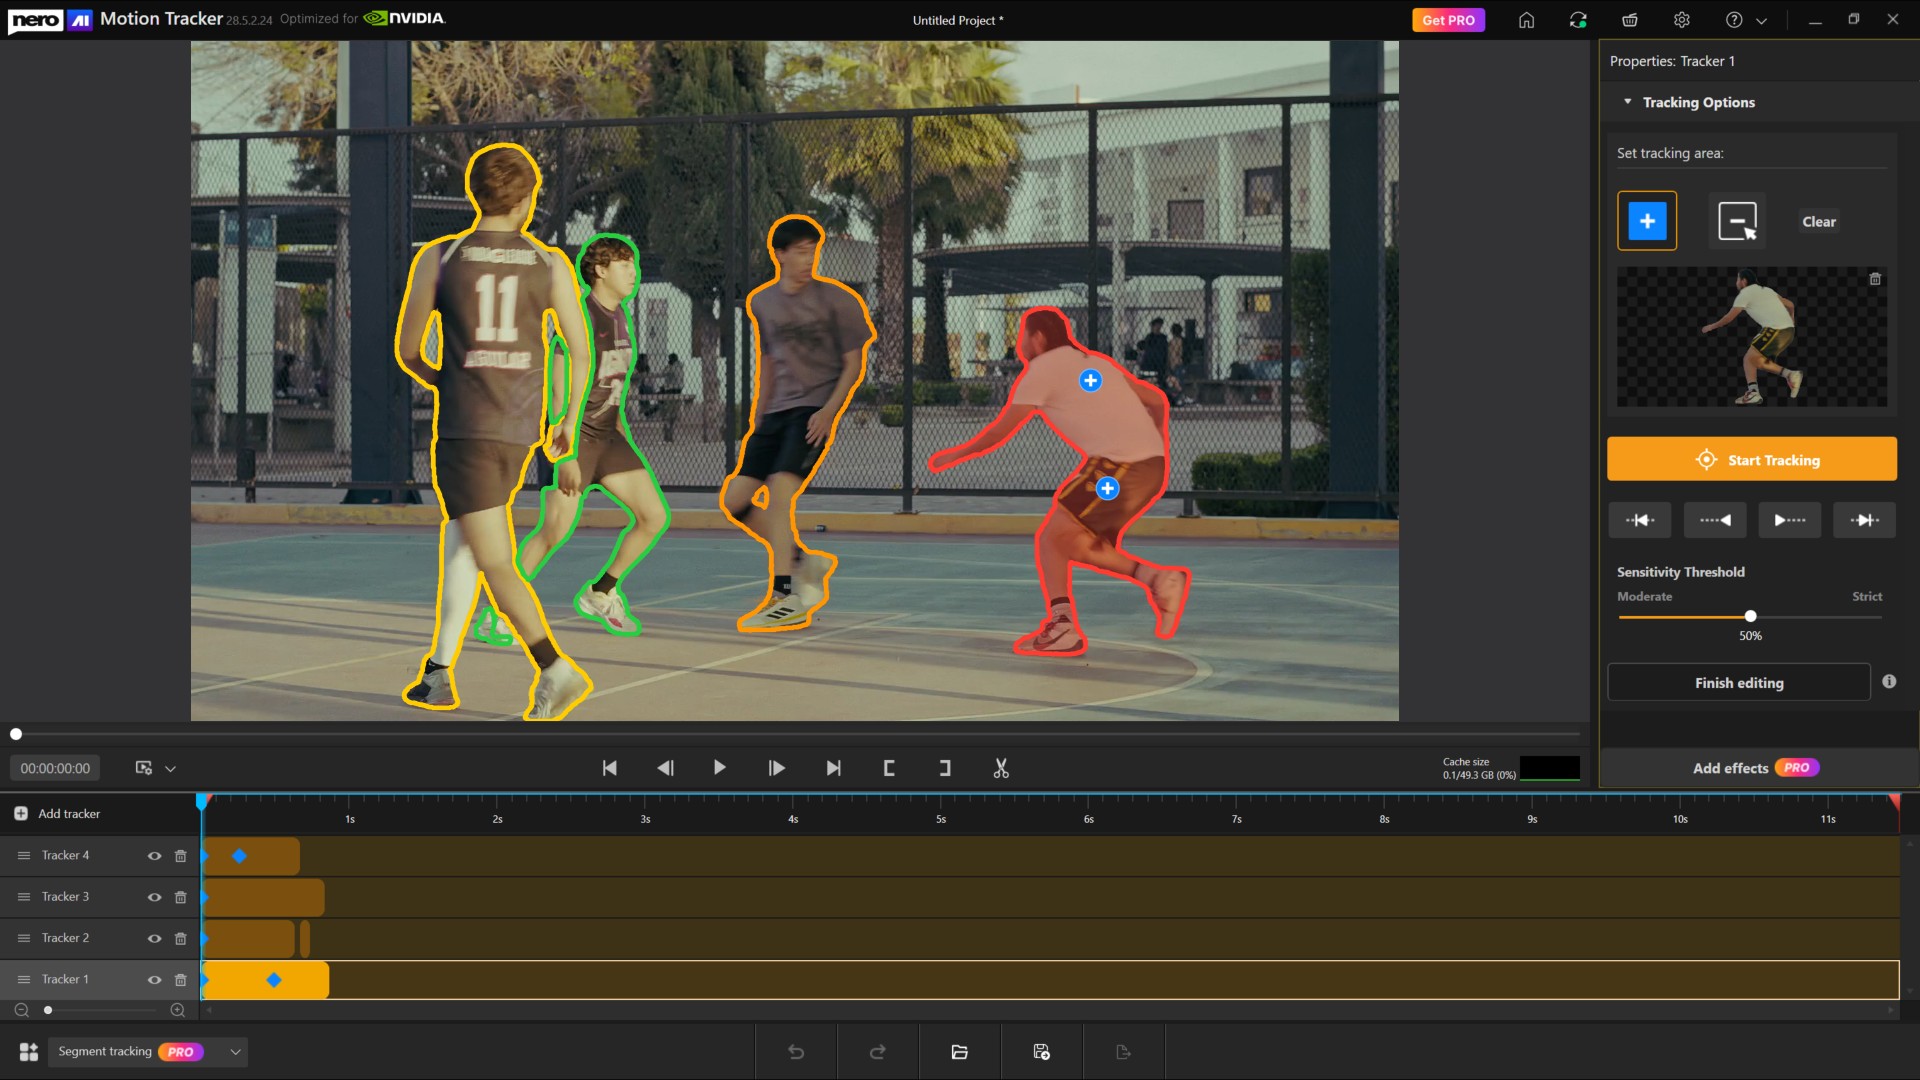
Video editing is evolving, and so are the tools you need to stay ahead. While standard tracking works for simple geometric shapes, real life isn’t always square.
That is why the highlight of the latest Nero Motion Tracker update is Segment Tracking.
This powerhouse feature allows you to track irregular objects—like a running pet, a dancing silhouette, or a complex prop—and generate dynamic masks that adapt frame-by-frame as the shape changes. Here is your deep-dive guide to mastering this new technology.
The Star of the Show: Segment Tracking
Segment Tracking is designed for precision. Unlike standard “Zone” tracking which draws a box, Segment Tracking analyzes the video pixel-by-pixel. To give you total control, we have refined the Set Tracking Area controls into a simple “Include/Exclude” workflow.
1. How to Define Your Object (Include vs. Exclude)
Once you enter Segment Tracking mode, you will see the “Tracking Options” control panel. Think of this as telling the AI exactly what matters and what doesn’t.
Add Tracking Area (Include):
Select this tool when you want to include a part of the image in your mask.
Click on your subject. A small (+) marker will appear, telling the tracker: “Keep this.”
Remove Tracking Area (Exclude):
Select this tool when the tracker accidentally picks up the background. You use this to exclude unwanted areas.
Click on the unwanted area. A small (-) marker will appear, telling the tracker: “Ignore this.”
2. Refining and Revoking Selection
Did you click the wrong spot? We have made correcting mistakes instant. You don’t need to switch tools to delete a point.
To Revoke: Simply click any existing (+) or (-) marker on the preview screen again. When you hover over a marker, it will glow blue to indicate it is ready to be removed. Clicking it revokes that specific selection instantly.
If you don’t want the tracking area, you can either remove the tracker from the timeline or click the “Clear” button to clear the selection and start from scratch.
3. Tracking Multiple Objects
Need to track two people or more objects?
Click “Add Tracker” button on the timeline to start a fresh track for a second item.
Smart Display:To keep your view clean, the markers for Object 1 are automatically hidden while you edit Object 2. (Only the outer boundaries are visible, so that they can be distinguished from each other.)
Ensuring Smooth Performance (Cache & Settings)
Because Segment Tracking analyzes pixels in high detail, it requires system resources. We have added a dedicated Performance & Cache System to keep your editing smooth.
Automatic Setup: When you first use Segment Tracking, a dialog will ask to set the Cache Location. By default, it smart selects the disk with the freest space.
The Cache Monitor:
Located under the preview, the Cache Size display shows your current usage (GPU Memory + System Memory + Disk Cache) versus the overall available size. It uses a color-coded progress bar:
Finish Editing (Per Object): Once you are happy with an object’s track, click Finish Editing.
What this does: This clears the high-resource cache for that specific tracker and locks it so it is no longer editable. This frees up resources for you to track other objects.
Note: A confirmation dialog will pop up to ensure you are ready to lock the tracker.
Advanced Settings: Click the Gear Icon on the title bar to toggle Hardware Acceleration (CPU/GPU) or manually set a Maximum Cache Size.
The Creative Finish: Effects & Pro Features
Once your tracking is done, click the Add Effects button. This automatically “Finishes Editing” for all trackers and moves you to the design page.
Note: Segment Tracking is a premium feature. You can do all the tracking and testing for free, but the Pro Purchase Dialog will appear when you click “Add Effects” if you are not a subscriber.
Creative Controls
On the Effects page, you can apply 5 post-effects to your masked objects or the background:
Original: No changes (great for preserving the subject while editing the background).
Image: Fill or Fit a custom image into the tracked area.
Blur: Adjust intensity to obscure faces or sensitive info.
Mosaic: Pixelate the area; adjust the “amount” to change block size.
Color: Tint the area using presets or a specific hex code.
Desaturation: Make the area black and white by adjusting saturation levels.
New Face Tracking & Zone Modes
While Segment Tracking is the new headliner, we have also optimized our standard tools. You can switch between modes using the Tracking Mode on the Home Screen or the Dropdown below the timeline.
(If you are launching Motion Tracker direct from Nero Video, you can also use this dropdown to switch back to your familiar Face/Zone Tracking mode.)
Face Tracking (Automated)
Now separated from Zone tracking for speed, this mode features Automatic Face Detection and Auto-Start. As soon as a face is detected in the footage, the system locks on and starts tracking immediately—no manual starting required.
Zone Tracking
The classic, reliable mode for tracking standard geometric shapes like rectangles and ovals.
⚠ Warning: Segment, Face, and Zone tracking use different engines. If you switch modes mid-edit, a warning will pop up indicating that current tracking results will be lost.
Ready to create professional, dynamic masks? Open Nero Motion Tracker and try the new Segment Tracking today!
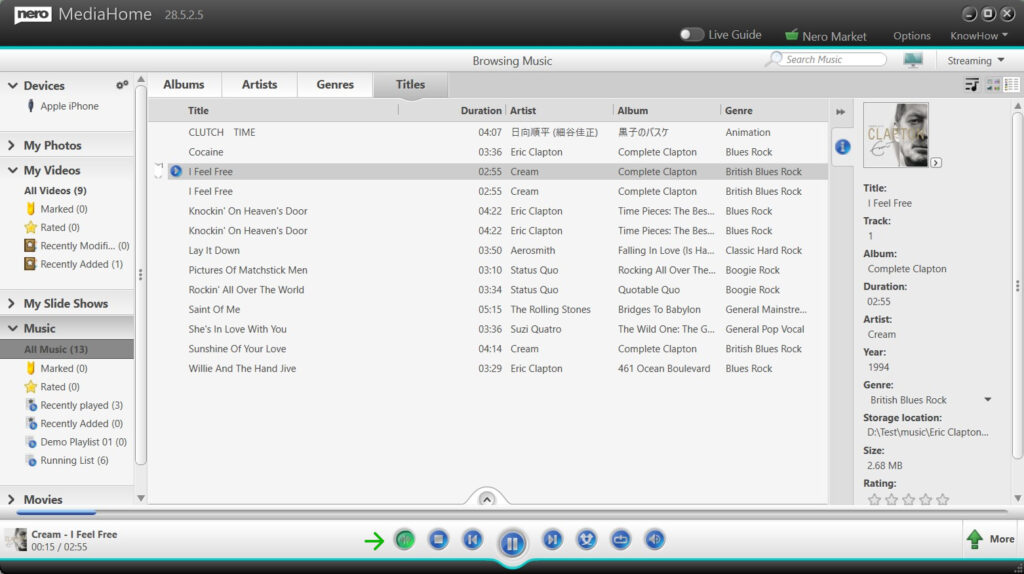
Audio normalization is a feature that balances the playback volume of different music tracks so they sound more consistent.
Audio normalization can be used in two different scenarios, depending on how you listen to or export your music.
1. Music Normalization During Music List Playback
Example: turn on audio normalization
If you listen to music directly in Nero MediaHome:
Open your music list.
Locate the Audio Normalization on/off button in the playback controls.
Turn Audio NormalizationON.
Once enabled, music normalization will be applied automatically during music list playback, helping to keep volume levels balanced between tracks.
You can turn this option off at any time.
2. Music Normalization When Exporting Music to External Devices
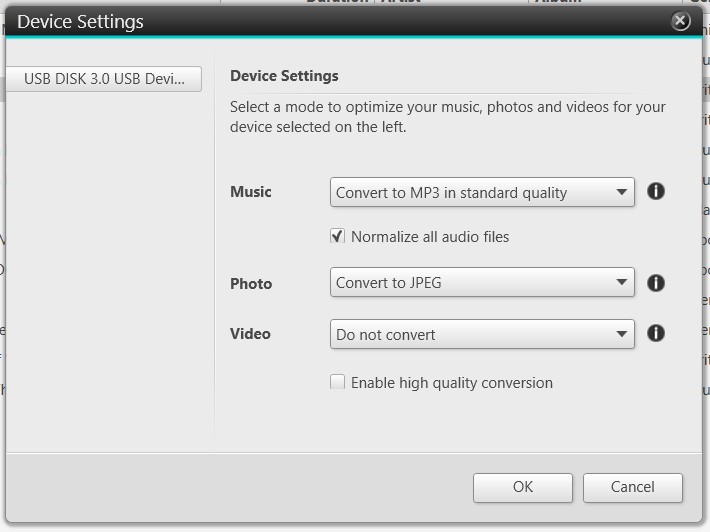
Example: Normalize all audio files in Device Settings
If you copy or export music from your Nero MediaHome library to an external device (for example, a USB stick or SD card for use in your car):
Connect the external device to your computer.
Open Device Settings in Nero MediaHome.
Enable the option Normalize all audio files.
(Optional) Select your preferred output music format, such as MP3.
OK to start the process.
During export, Nero MediaHome will balance the volume of all music files as they are written to the external device, ensuring a more consistent listening experience on other players.
Additional Notes
Music normalization is optional and user-controlled.
Original music files in your library remain unchanged.
The feature is especially useful for mixed playlists, older music collections, and in-car listening.
Have you ever needed to enhance multiple videos but found manually configuring settings for each clip tedious and time-consuming? With Nero AI Video Upscaler 2026, you can now batch import multiple videos, apply saved presets, and enhance your footage efficiently—all in one streamlined workflow. The new Enhance Detail Model ensures maximum sharpness and detail, making your videos look better than ever.
Guide
1: Batch Import Videos
Drag and drop multiple videos or an entire folder into Nero AI Video Upscaler.
All files are automatically prepared for processing.
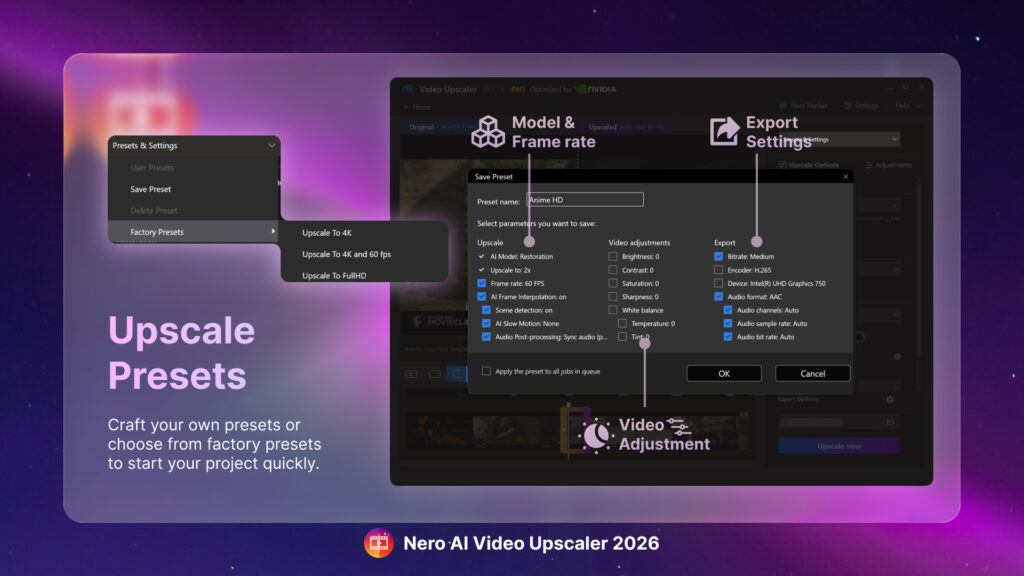
2: Select AI Model and Presets
Clicking Edit to update the settings
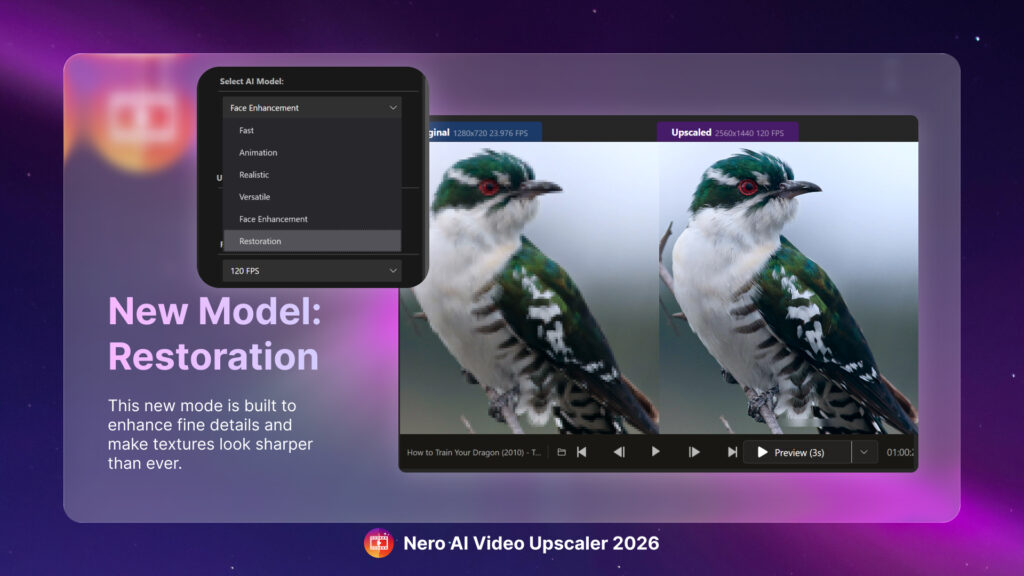
Choose the AI model for enhancement (e.g., Enhance Detail Model for maximum clarity).
Apply a saved preset or create a new one, including resolution, frame rate, AI frame interpolation, output format, and AI model settings.
3: Start Batch Processing and Export
Click Start Queue to process and export all imported videos at once.
💡Tip: Presets ensure consistent results and save time for future projects.