Image Upscaler 2027 Released!
Release Platform:
- Official Website (Windows Installer) — v29.5.3.0 (Jun 25, 2026)
- Microsoft Store — v3.1.2 (Jun 4, 2026)
- Steam — v2.1.1 (Jun 1, 2026 )
- macOS — v2.0.16 (Jun 19, 2026)
Note: Version numbers and release timing may vary across platforms due to individual store review processes.
Bigger. Sharper. Faster.
Meet the Next Generation of AI Image Upscaler
This release delivers one of the biggest upgrades to our AI Image Upscaler yet — bringing larger upscale capabilities, smarter clarity recovery, and dramatically improved batch productivity.
Whether you’re restoring old memories, improving blurry photos, or processing large creative projects, the new generation engine is built to help you do more in less time.
🚀 New 8× Upscaling
The new 8× upscale mode allows dramatically larger image enhancement while preserving texture, edges, and natural detail.
An 4K image can now be enlarged up to 32K resolution*, making it ideal for:
- Large-format printing
- Posters and banners
- Professional design assets
- Ultra high-resolution workflows
Compared to previous versions, the new engine delivers cleaner edges, better texture reconstruction, and improved detail stability.
🖼️ Ultra Large Output Support — Up to 1024 MP
This generation also introduces support for outputs up to 1024 megapixels.
The upgraded processing pipeline is optimized for extremely large images while maintaining:
- Stable detail reconstruction
- Better memory handling
- Smoother large-scale processing
- Improved export reliability
Perfect for creators working with:
- Large canvas artwork
- Commercial print assets
- High-resolution AI creations
- Professional production workflows
✨ New AI Models: Sharpen & Unblur
Different image problems require different AI solutions.
This release introduces two specialized enhancement models focused entirely on clarity recovery.
Sharpen
Designed for soft images that already contain details but lack crispness.
Sharpen improves:
- Texture visibility
- Edge definition
- Fine-detail contrast
- Overall image clarity
Great for:
- Landscapes
- Product photos
- AI-generated artwork
- Screenshots and graphics
Unblur
Built specifically for blurry images caused by:
- Motion blur
- Camera shake
- Focus issues
- Compression artifacts
Unblur intelligently reconstructs lost structure while keeping results natural and readable.
Ideal for:
- Old phone photos
- Blurry portraits
- Moving subjects
- Low-quality scanned images
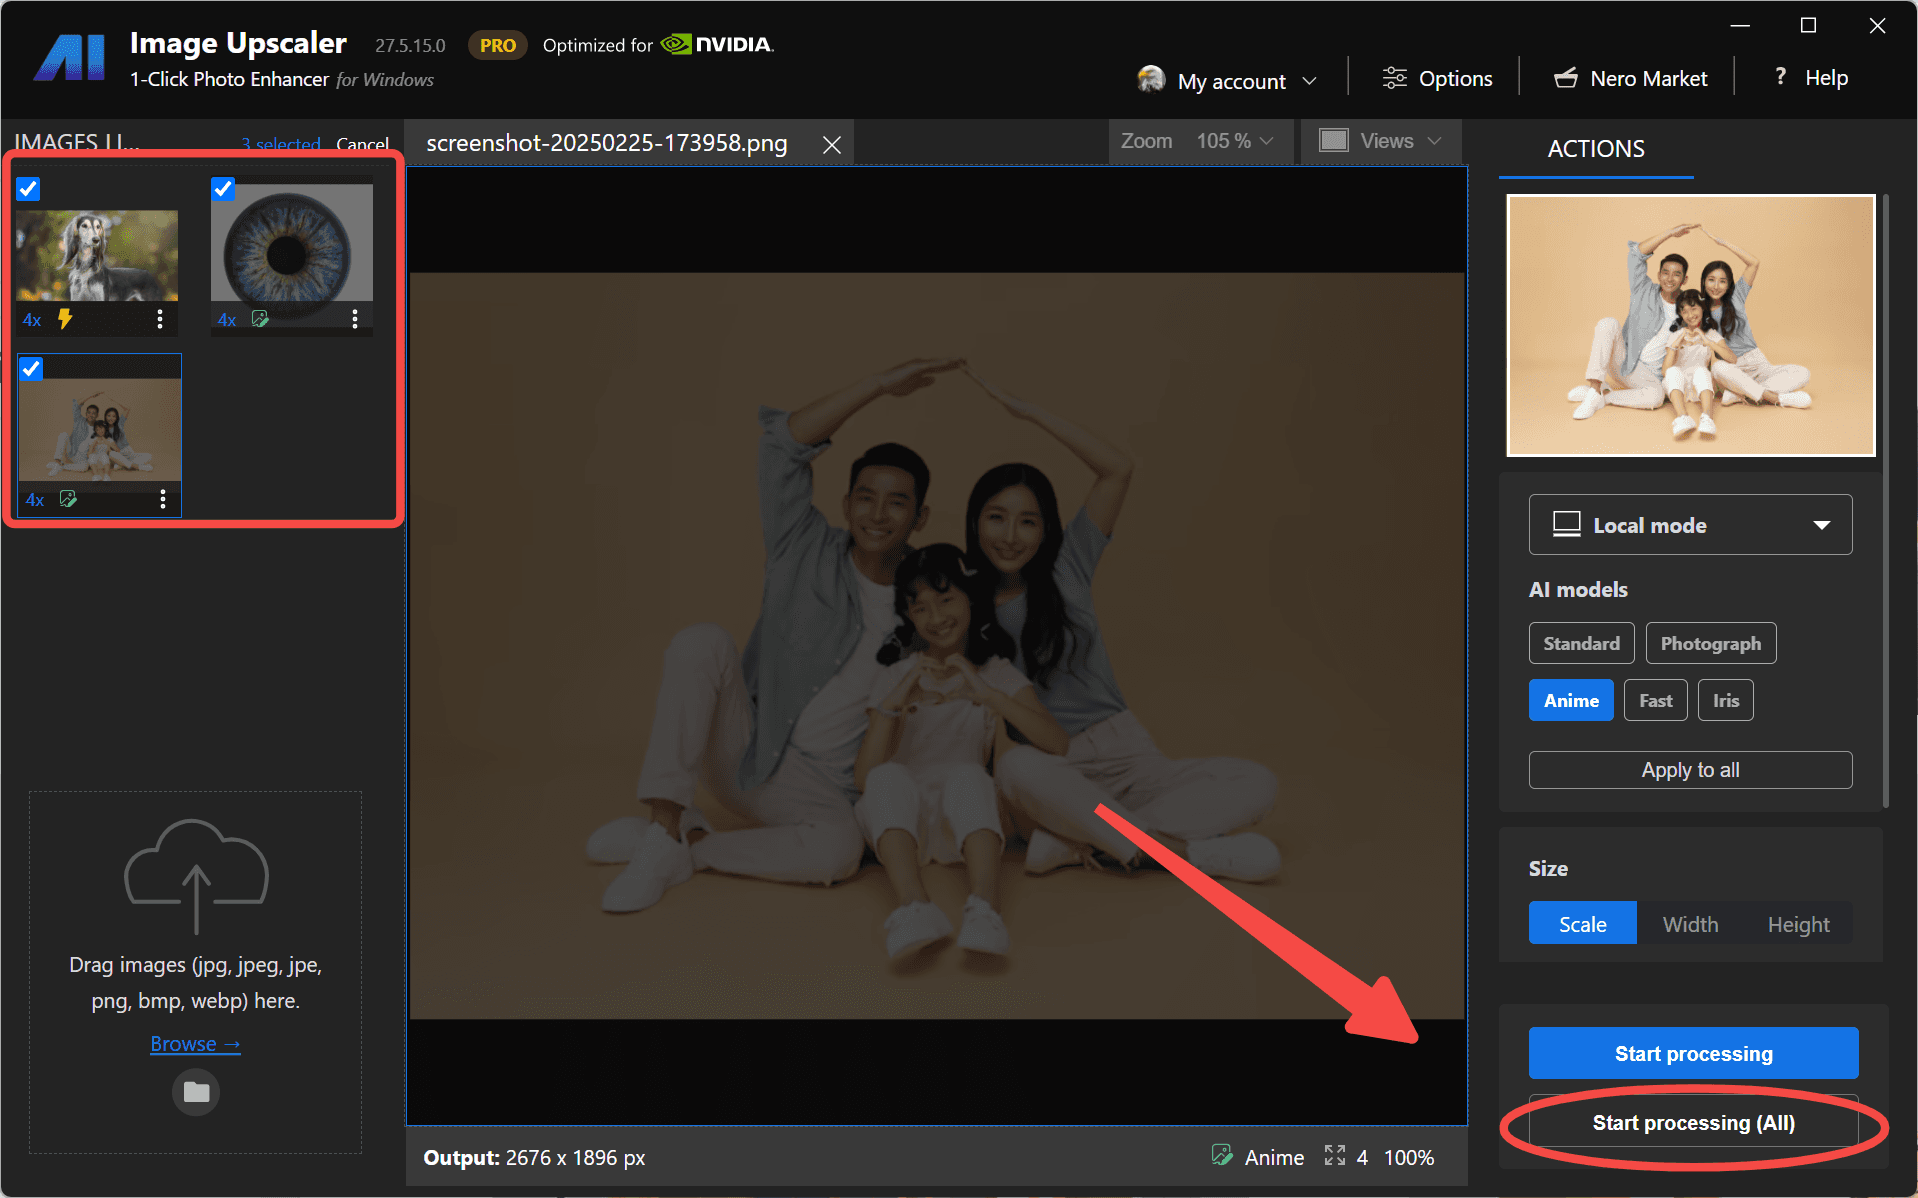
⚡ Much Larger Batch Processing
This release also delivers a major productivity upgrade for power users.
Previous versions supported processing up to 20 images per batch.
Now, the new engine supports up to 100 images in a single run — a massive 5× increase in batch capacity.
That means:
- Fewer interruptions
- Less repetitive setup
- Faster project completion
- Better workflows for large image collections
Whether you’re restoring entire albums or enhancing content libraries, batch processing is now dramatically more efficient than before.
Combined with backend optimizations and improved processing pipelines, large-scale tasks now feel smoother, faster, and more stable.
🔧 Designed for Heavy Creative Workloads
This update is focused on helping creators push further with AI image enhancement.
We improved:
- Maximum upscale capability
- Detail reconstruction quality
- Blur recovery accuracy
- Large-scale processing workflows
- Overall engine stability and efficiency
From casual photo restoration to professional creative production, this release gives you more power across every stage of the workflow.
Available Now
Update today to experience:
- Massive 8× image enlargement
- Dedicated Sharpen & Unblur AI models
- 5× larger batch processing capacity
- Faster and smoother large-project workflows
More images. More detail. Less waiting.


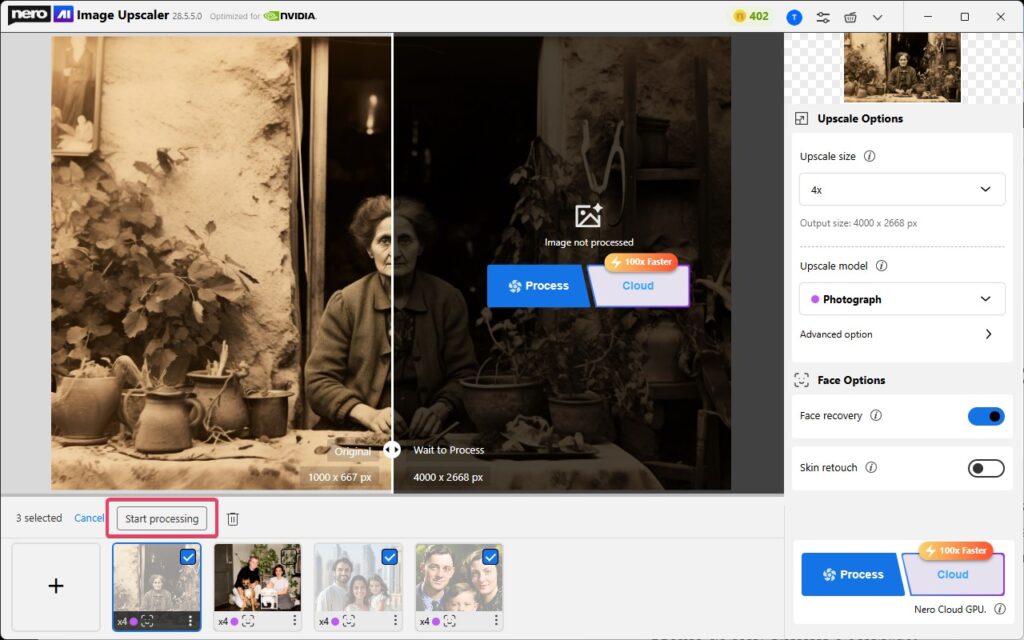
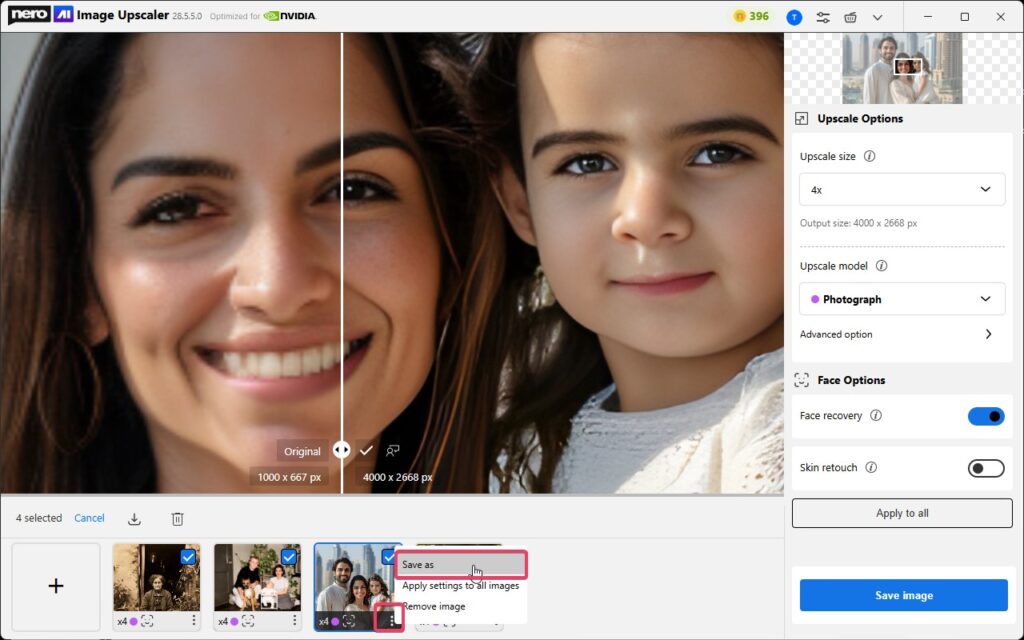
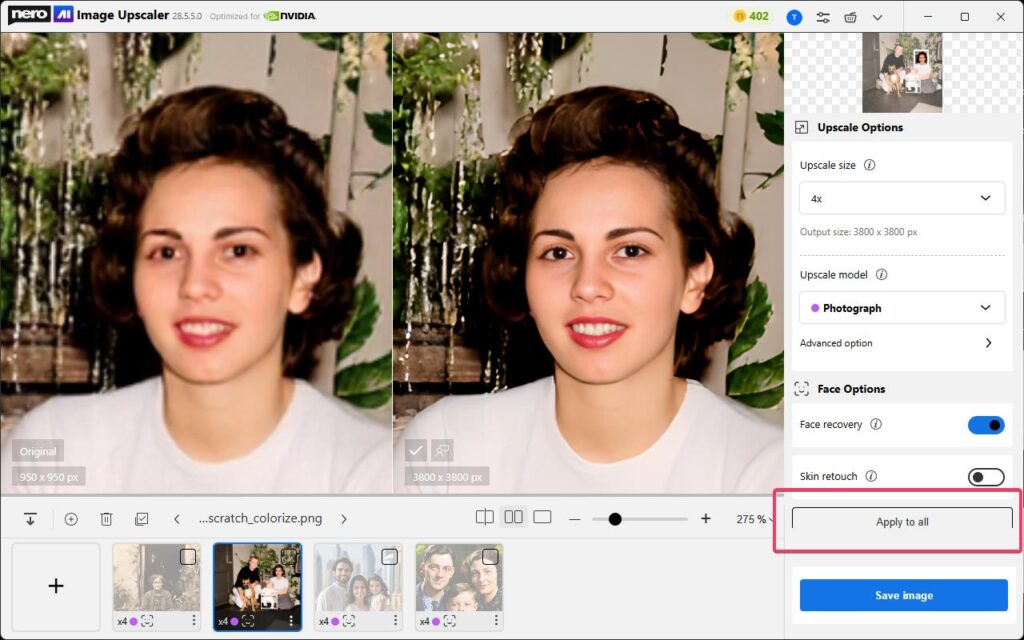 Or you can right-click the current image from the file list then click the [Apple settings to all images] button.
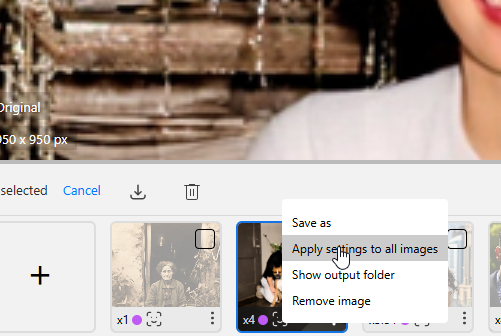 You can still modify individual images afterward if they require different models or adjustments.