How to batch process videos with the enhance detail model in Nero AI Video Upscaler?

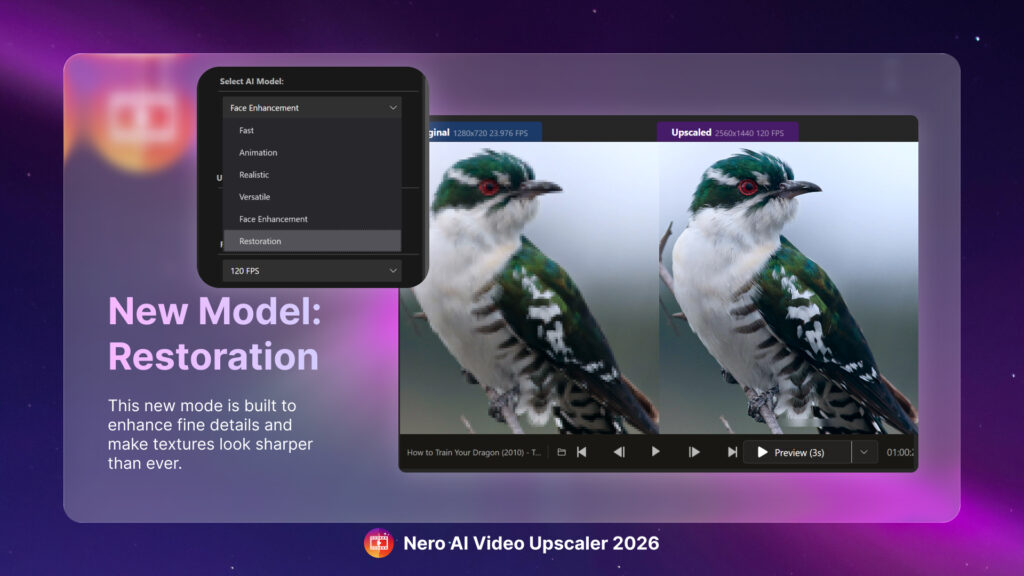
Have you ever needed to enhance multiple videos but found manually configuring settings for each clip tedious and time-consuming? With Nero AI Video Upscaler 2026, you can now batch import multiple videos, apply saved presets, and enhance your footage efficiently—all in one streamlined workflow. The new Enhance Detail Model ensures maximum sharpness and detail, making your videos look better than ever.

Guide

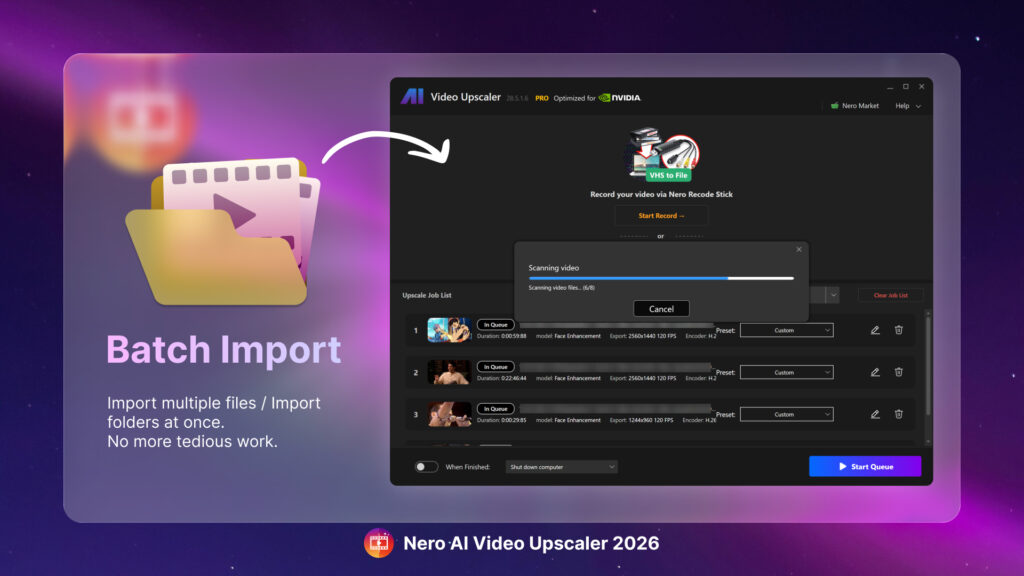
1: Batch Import Videos

  • Drag and drop multiple videos or an entire folder into Nero AI Video Upscaler.

  • All files are automatically prepared for processing.

2: Select AI Model and Presets

  • Clicking Edit to update the settings

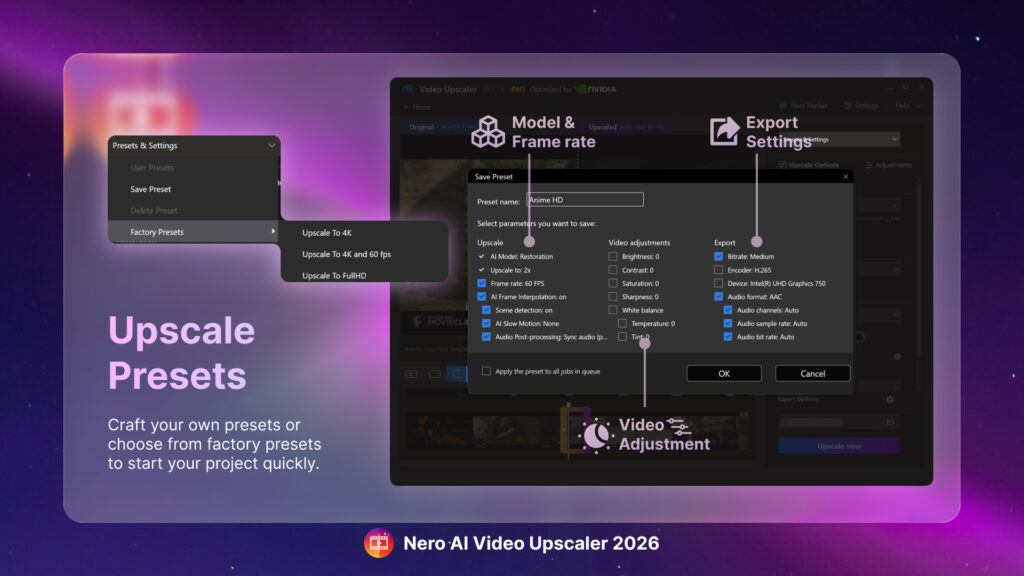
  • Choose the AI model for enhancement (e.g., Enhance Detail Model for maximum clarity).

  • Apply a saved preset or create a new one, including resolution, frame rate, AI frame interpolation, output format, and AI model settings.

3: Start Batch Processing and Export

  • Click Start Queue to process and export all imported videos at once.

💡Tip: Presets ensure consistent results and save time for future projects.

Continue reading How to batch process videos with the enhance detail model in Nero AI Video Upscaler?

How to Organize and Find Photos with IPTC Metadata in Nero MediaHome?

Sometimes you add location, captions, or copyright info directly on your camera, but after importing your photos into the application, that information isn’t visible or usable. With the new IPTC support in Nero MediaHome, all your metadata—including place details—can now be easily viewed, searched, and exported. This makes it simple to organize your library and make the most of the information you’ve already added.

Guide

First, add the folder as a watch folder in Nero MediaHome.

1: View and Edit IPTC Metadata

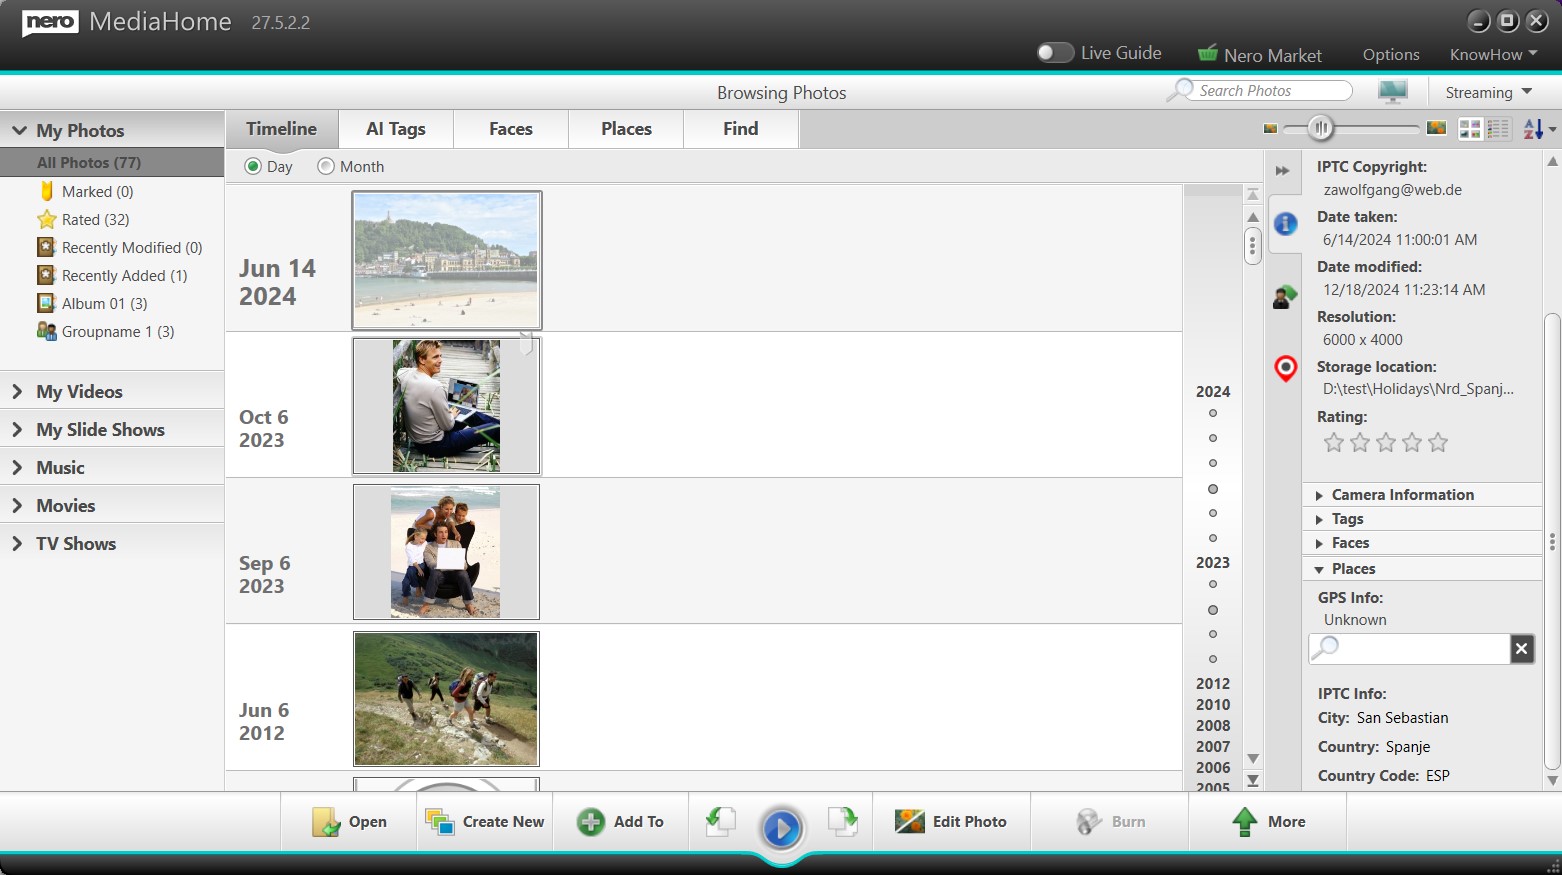
  • Select a photo in your Library.
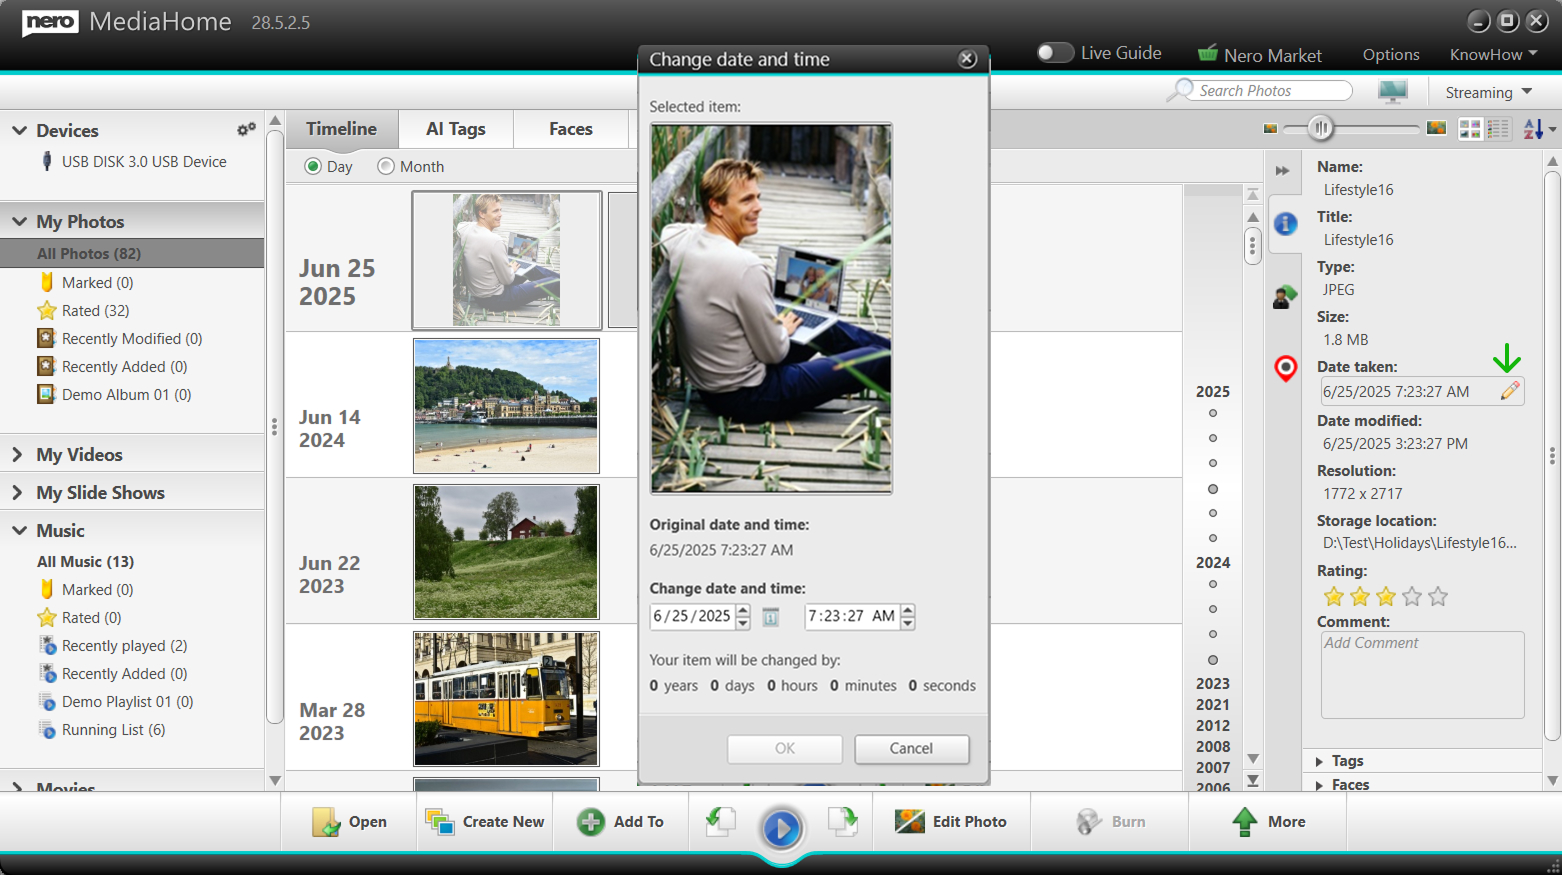
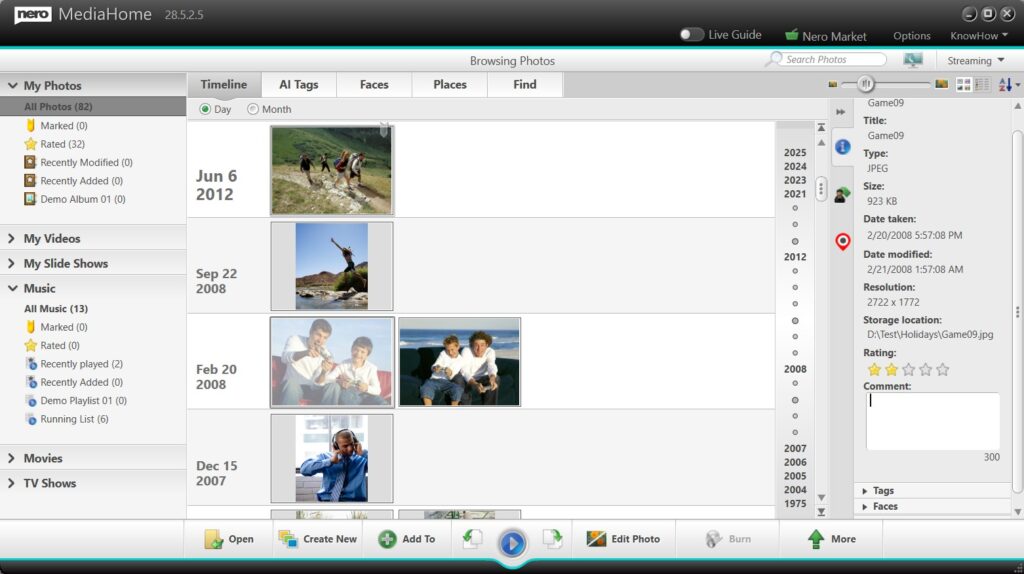
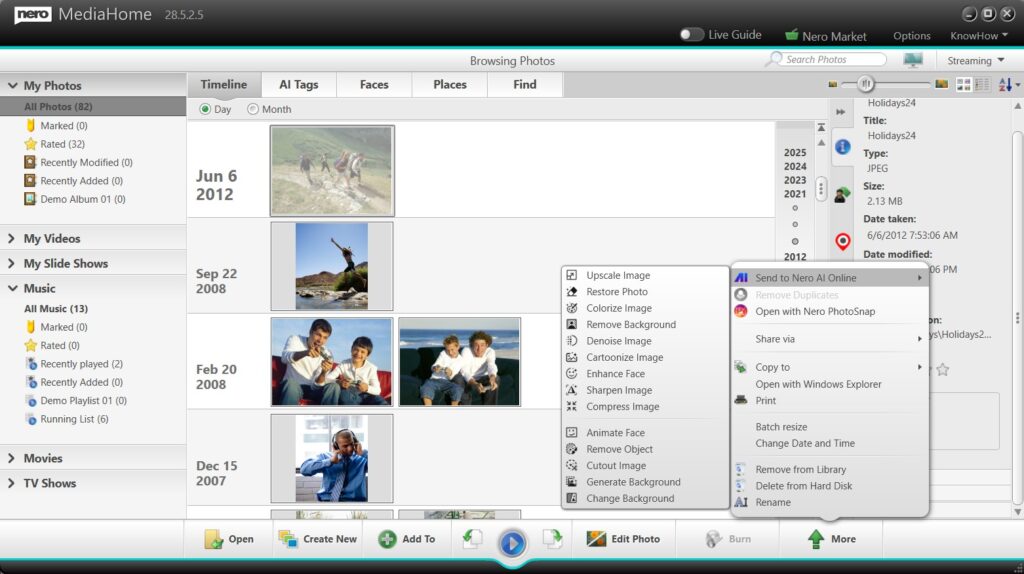
  • If IPTC metadata is available, basic fields will be listed in the right Info panel, e.g., location, title, copyright, creator.
  • Tip: Location information appears under the Places
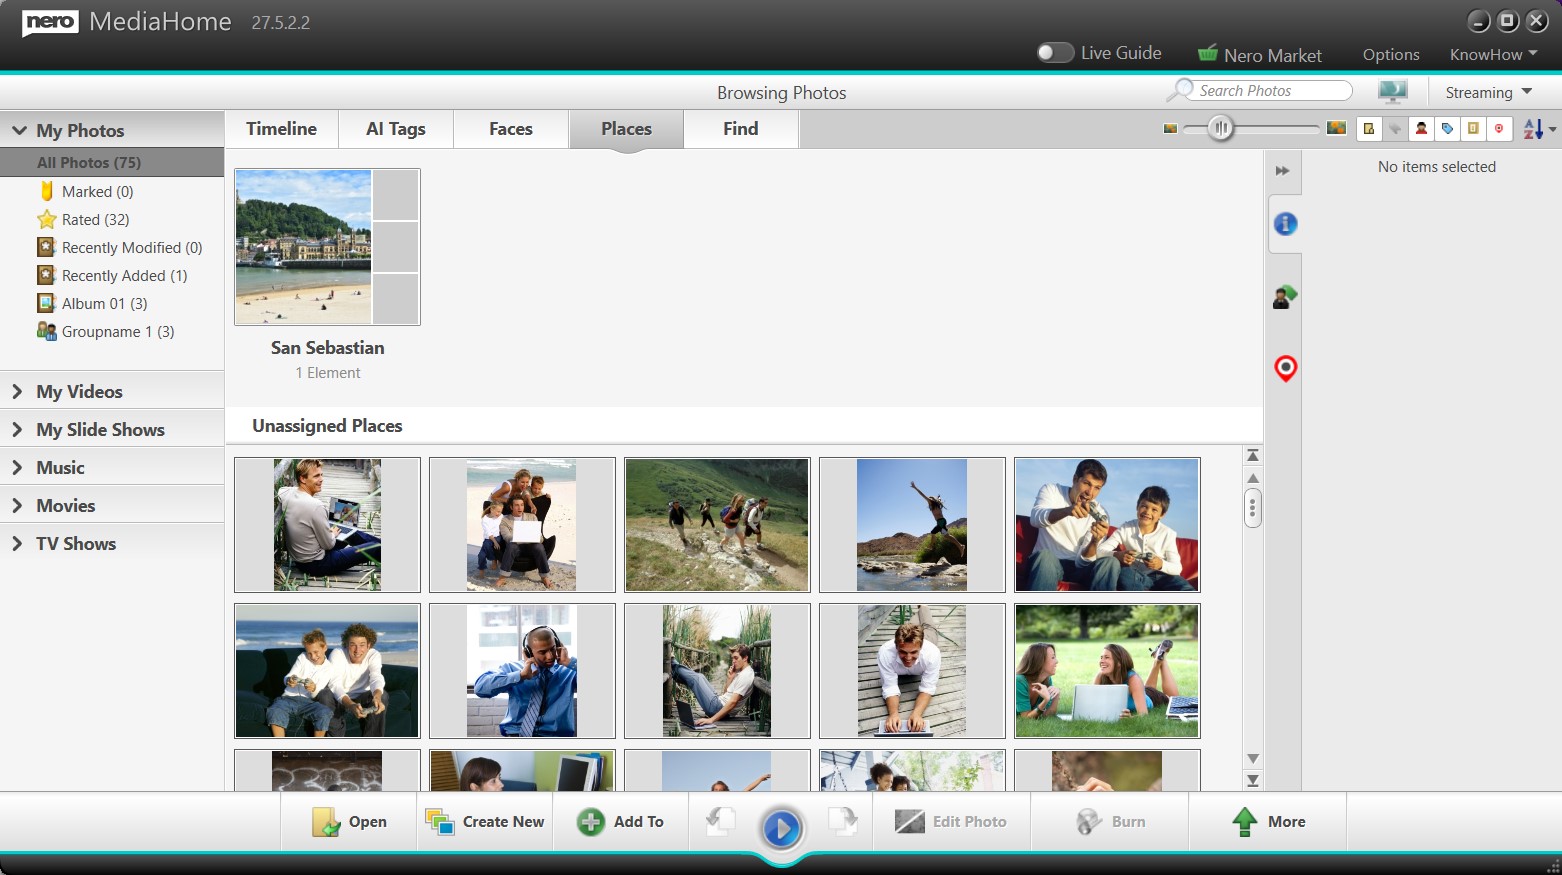
  • In Place tab, IPTC place info will be grouped together with any existing Places if available.
  • You can also edit IPTC metadata directly in Nero MediaHome and save your changes.

2: Search Photos by IPTC Tags

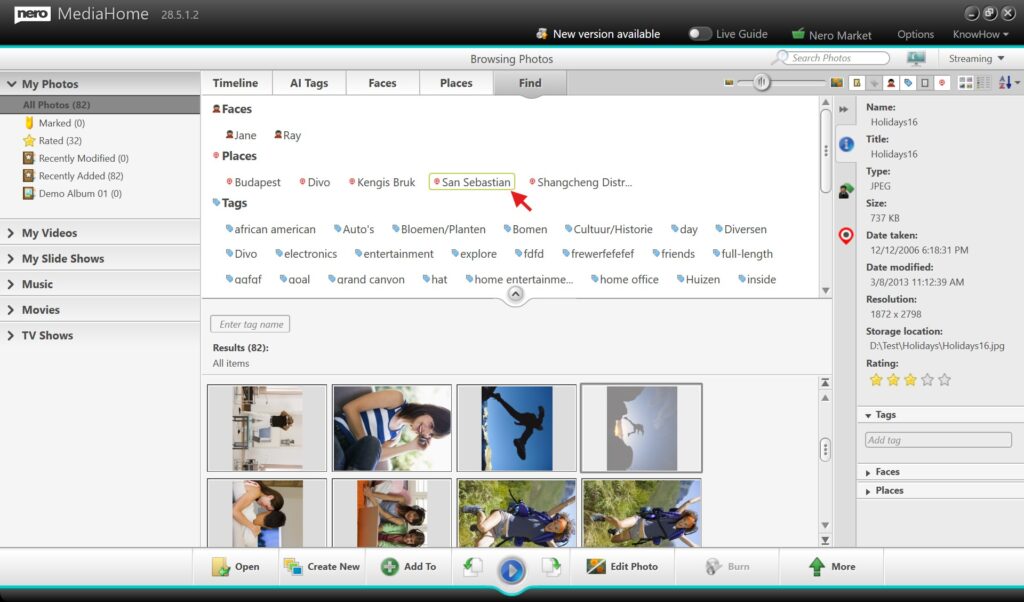
  • Open the Find
  • Select IPTC Place Tag (or other IPTC fields) to filter your photos.

Continue reading How to Organize and Find Photos with IPTC Metadata in Nero MediaHome?

How to Import and Export Playlists and Collections in Nero MediaHome?

Have you spent time creating playlists in one application only to find they can’t be used elsewhere? Or carefully organized photo and video collections in Nero MediaHome but were restricted to exporting only to external devices? The latest update addresses both: music playlists in popular formats—especially the universal m3u8 format—can now be imported and exported across apps. At the same time, photo and video collections can be exported directly to any local folder, providing greater flexibility for sharing, backup, and cross-device use.

Guide

1: Import Music Playlists

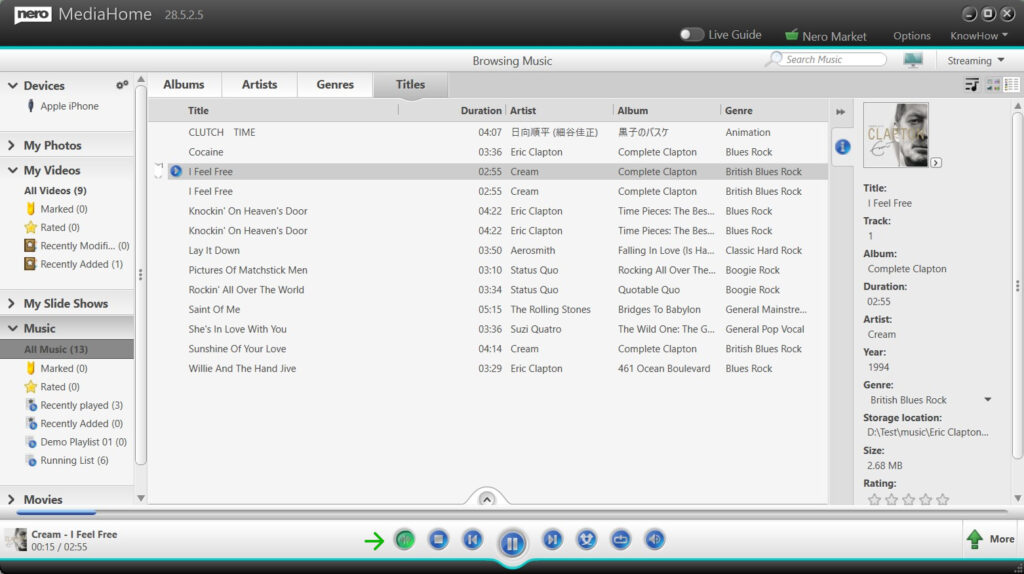
  • Go to the Music → Select All Music → right-click (context menu) → Import Music Playlist → select your playlist file.
    • Supported formats: m3u, m3u8, PLS, WPL
  • Imported playlists appear in your library, ready for playback, editing, or integration.

⚠️ Note: When importing playlists (e.g., m3u8), Nero MediaHome will only import files that are accessible:

  • If some files in the playlist cannot be accessed (e.g., stored in cloud services or unavailable drives), those entries will be automatically removed after import.

  • If none of the files are accessible, the entire playlist will not be imported.

2: Export Music Playlists

  • Go to Music → select an organized music playlist → right-click → Save Playlist to File → choose the destination folder or device.
    • Supported formats: m3u, m3u8

Tip: Supported playlist formats make your music lists usable across different applications.

3: Export Photo and Video Collections to Local Folders or Devices

  • Open your photo/video library → select a collection (by Faces, Places, or album).
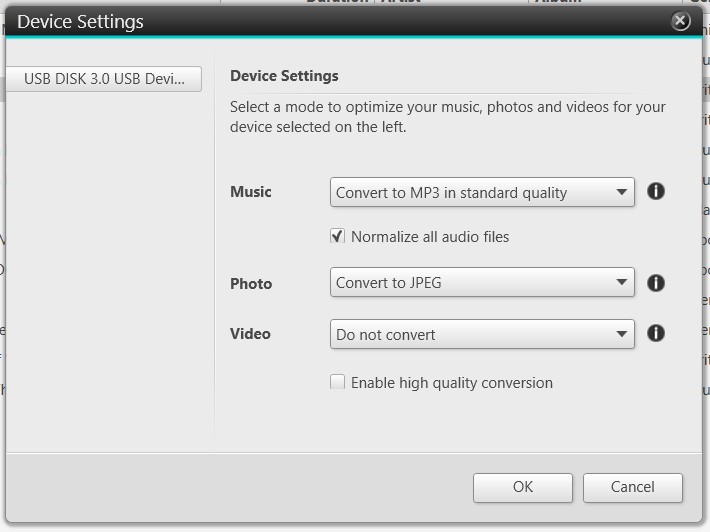
  • Click More → Copy to → browse to choose any local folder or select an external device.

Tip: Folder and album structure is preserved, keeping your collections organized.

Continue reading How to Import and Export Playlists and Collections in Nero MediaHome?

How to personalize your Nero Start?

With the latest update, you can customize how Nero Start looks and works. Follow the steps below to personalize your workspace:

Option 1: Product and Application Version Management

Steps:

  1. Go to the top bar in Nero Start.

  2. Click the Option button → select Customize View.

  3. In the Product and Application Version Management category, choose your preferred mode:

  • Smart Stacking Mode (Recommended): Automatically launches the latest active version with one click.

  • Manual Selection Mode (Advanced): Select which product/version to launch for full control.

Option 2: Organize Your Apps

Steps:

  1. Open the Option button → select Customize View.

  2. In the Application Organization category, choose how your apps are displayed:

  • Group by Functional Category: Organizes apps by function.

  • Grid View: Arrange apps in a flexible grid layout.

  1. Rearrange Apps:

  • If Group by Functional Category is selected, you can change the category order in the Customize View options.

  • To change an individual app’s position, go to Start view → right-click ‘…’ on the app → select Move.

  • Move the app to first/last or shift it left/right as needed.

Option 3: Change Banner Style

Steps:

  1. Go to the top bar → click the Banner Style icon.

  2. Select your preferred banner:

  • Nero Classic Red: Keep the classic look.

  • Frosted Purple Style: Refresh Nero Start with a modern frosted-glass effect (latest generation only).

Option 4: Customize Your Profile Avatar

Steps:

  1. Go to the top bar → click your Account icon.

  2. Click Edit to open the Change Avatar dialog.

  3. Choose an avatar:

  • Select from Pre-set

  • Upload Your Own Picture: Choose an image from your device.

  • ✨Try AI Online Avatar: Login with your Nero Account to create a brand-new avatar using the online AI tool.

    • If your account has credits, trying the new AI avatar is free!

Note: The AI process has been updated with the latest AI model, giving you better results – it’s worth trying again!

How to create tutorials with Auto Zoom in Nero Screen Recorder?

Have you ever recorded a tutorial, presentation, or software walkthrough, only to find that viewers struggle to follow your mouse clicks? Manually highlighting clicks in post-editing can be time-consuming and tedious. With the new Auto Zoom feature in latest Nero Screen Recorder, the editor automatically zooms in on your clicks, making it easier than ever to guide your audience and save editing time.

Guide

1: Record Your Screen

  • Select the screen or window to record.

  • Start recording and perform your actions as usual.

  • Tip: Enable 60 FPS recording for smoother playback, especially for fast movements or gameplay.

2: Try Auto Zoom

After recording, in the built-in editor:

  • From Right Panel → Zoom.

  • Click Auto Zoom button → Auto Zoom will track your mouse clicks and highlight them during playback.

  • Playback automatically zoomed clicks and confirm clarity.

  • In Zoom mode, you can manually adjust the Zoom level in Manual tab.

3: Add zoom area manually

  • From timeline → Enable Add zoom area.

  • Move mouse to the position which you want to zoom → clicking to add

4: Review and Edit

  • Playback zoomed clicks and confirm clarity.

  • Optionally, trim, annotate, or enhance your video.

5: Exportieren

  • Export your video in the desired format.

Continue reading How to create tutorials with Auto Zoom in Nero Screen Recorder?