Many Nero Users, especially enjoying streaming, keep putting this question
From Nero 2018 product generation you can stream Movies and TV shows with Nero from your PC to your smart TV.
Before Nero 2018 product generation Nero MediaHome could not differentiate between private videos, movies, and TV shows. With Nero 2018 this has changed for all Nero products including Nero MediaHome: Nero Platinum 2018, Nero Standard 2018, Nero Video 2018, Nero MediaHome 2018.
Moreover, prior versions of Nero MediaHome used to merge ‘photos’ and ‘videos’ into one media category, and could only be separated by filtering. Regarding this aspect, many users voted for a separate display of the two categories, anyway.
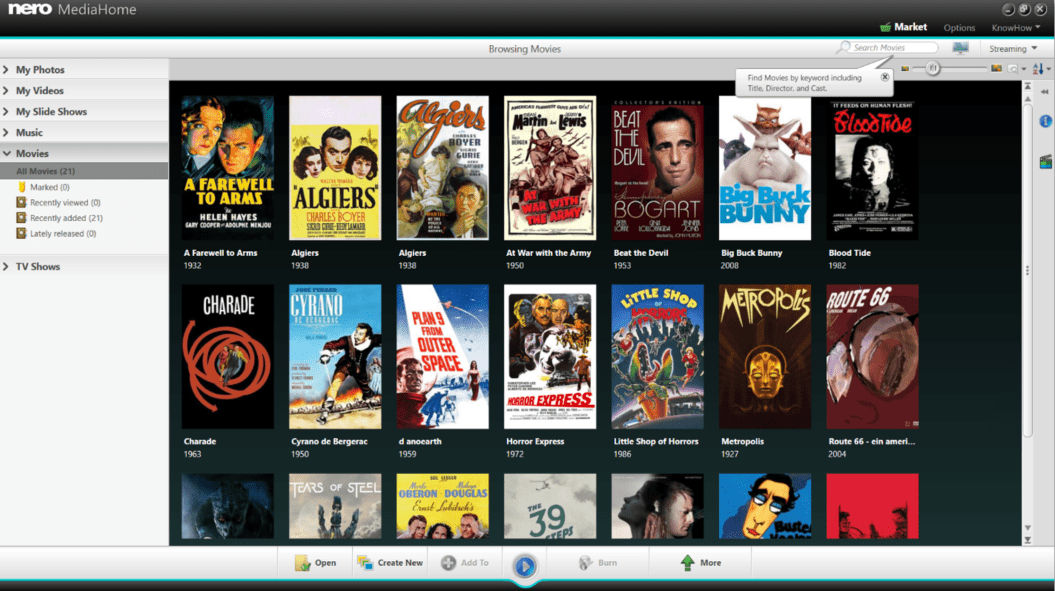
In order to make this happen, Nero MediaHome has seen a restructuring of its media category views while keeping the well-accepted workflows and features. Now, the following media categories are available:
My Photos
My Videos
My Slideshows
Music
Movies
TV-Shows
Having individual categories, now, lets a user more easily find and play media in Nero MediaHome, and also enables him to access his dedicated ‘Movies’ and ‘TV Shows’.
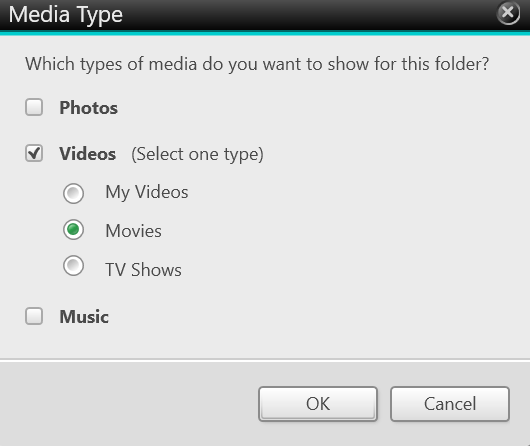
In Nero MediaHome library options, PC folders that include Movies / TV Shows have to be flagged as ‘Movies’ or ‘TV Shows‘ manually, and will be indexed accordingly, afterwards. This is a standard procedure for such a feature set.
Once the indexing is finished, ‘Movies’ and ‘TV Shows’ will be automatically displayed with their clear name and an associated movie posters. If existing, ‘TV Shows’ will be shown with their given season and episode.
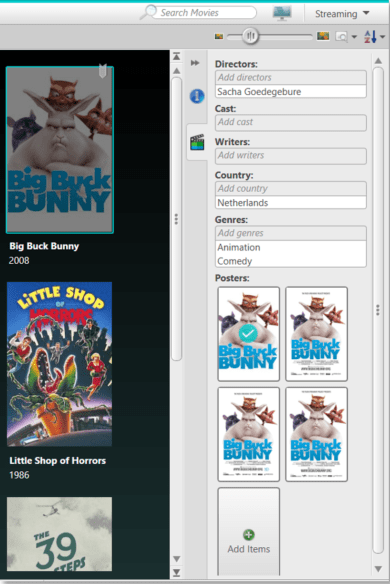
On the right hand side, within the browsing view of ‘Movies‘ or ’TV Shows‘ users will find dedicated meta-data windows allowing them to individually edit each title’s name, the director, actors and the like, select a range of movie poster, or add their own ones.
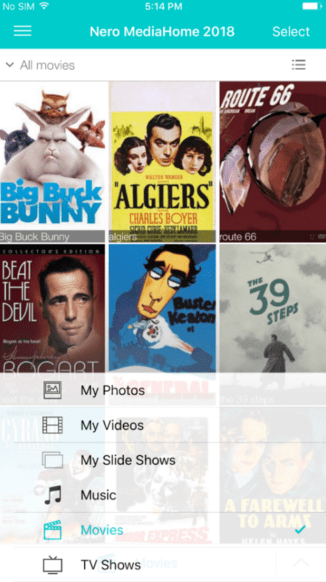
Using the free App for iOS and Android ‘Nero Streaming Player’ on their smartphone or tablet, users also have access to all media categories used in Nero MediaHome library, including ‘Movies’ & ‘TV Shows’. Now, they can comfortably play them to their Smart TV connected to the same network as their PC, and smartphone. They just need to select ’Play from PC‘ in Nero Streaming Player home page and within the playback window need to select their TV set. Now, they can enjoy full browsing and playback control of their PC right at their fingertips.
With such new functions included, users will realize that NeroMediaHome and Nero Streaming Player come with strong new features and quite a range of additional use cases. We believe they will like these a lot.
Our users are frequently asking this question. From version 2018, Nero Platinum has an answer to such questions. The brand new application ’Nero DuplicateManger Photo‘ addresses and solves issues with duplicated images fast and easily.
How does a big amount of duplicated photos heap up on your PC?
Anyone using his PC to archive his photo collection from smartphones, digital cameras, USB sticks, online storage, and the like, will have experienced the problem, probably more than once.
Let us take an example. Imagine you are enjoying a trip with family and friends. For sure, anyone of the group will take the chance of shooting photos and you will see quite a range of different devices. The trip is ending and everybody has shot nice images that he wants to exchange with everyone in the group.
Back home you might transfer your own images to your PC right away, and in order to initiate the photo sharing, you use an online storage for sending a link to your travel mates. And indeed, step by step the other images are being shared. But not everybody likes sharing online. One guy is sending the images on a DVD, another one makes use of a USB stick sent via post mail, and you also receive some images as email attachments.
By the nature of this sharing situation, nobody can take a central control over the images shared via the different media and channels. So, most probably, it will happen that you are going to copy anything, and end up with many duplicates. Initially, you may not even realize this, but over time, you will be irritated to see that your media library contains so many duplicates and the storage space on your PC is shrinking dramatically.
Even if the circumstances might be different in your situation, the problem of duplicates heaping up will be the same. And, there is a second problem. Which images should I keep? Which should I delete?
Due to the fear of deleting unrecoverable memories, there is a strong tendency not to answer this question at all and just leave the status quo. This of course will let you circle around the problem in endless loops.
’Nero DuplicateManager Photo‘ deals with your typical problem cases:
Folder(s) with identical content copied to several drives or folder paths
Folder(s) with identical content but different folder name copied to several drives or folder paths
Photos with identical content copied several times by accident
Photos with identical content but different name copied several times by accident
How does Nero DuplicateManager work?
In three simple steps:
Select drive or folder > next > automatic duplicate detection
Overview with proposal what is save to delete and what you should have removed > next > removal
Status page with options for deletion and recovery
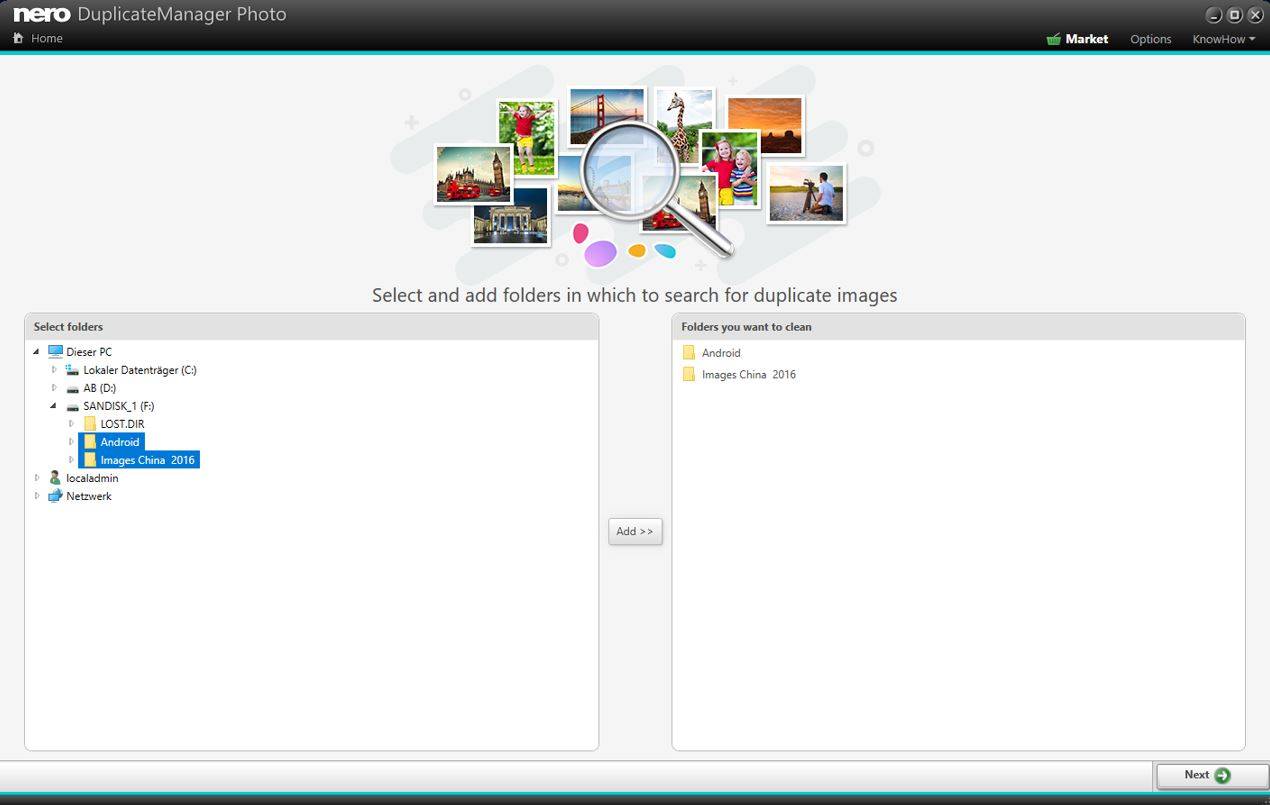
Step 1
On Nero DuplicateManager start page select your drives and folders like you do it in Windows Explorer. For multi-selection of several folders/drives use the control key.
Clicking ‘add’ enables you to add single or several folders, single drives, and also the whole system (‘This PC’) for detection and cleaning.
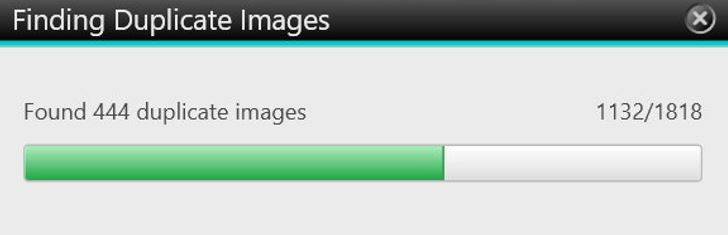
Click next and the detection will be performed. This works quite fast but of course is depending on the amount of data on your selected storage location.
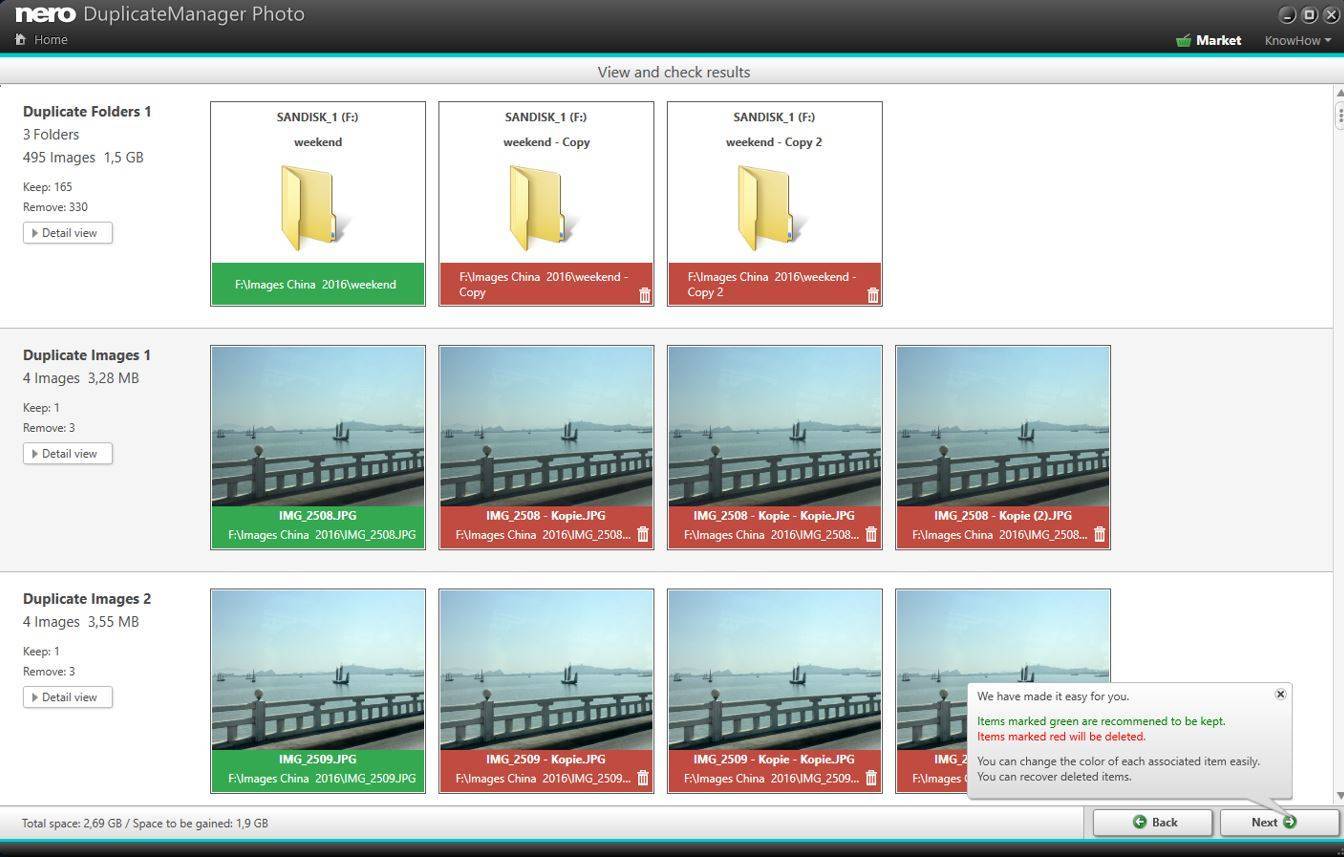
Step 2
The next screen already shows results for duplicated folders in the upper part. Single duplicated photos are shown below per line.
You will find green marked folders and images indicating that these are good to keep while the red indicated folders and images are set to be removed. For each proposal Nero DuplicateManager makes use of diverse criteria consisting of meta data and content detection data. The detection is very solid and you should have no problem taking over Nero DuplicateManager’s default proposal for removing your duplicated photos.
If you like to check the detection of duplicates, double click on a folder thumbnail or just click on ‘Detail view’ on the left hand side.
If you move the mouse over folders or images, a green or red icon will appear. If you click on the respective icon a green indication will turn red, and a red indication will become green. If you select the latter, e.g. you will mark this folder or image as not to be removed. This way you have full control on what you want to have removed or want to keep.
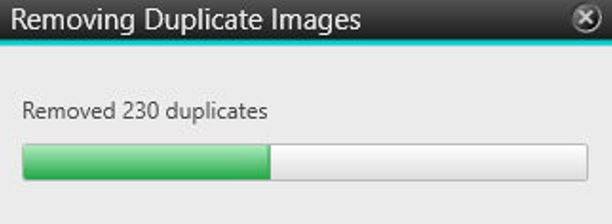
Clicking next will remove the red marked folders and images, and put them to the recycle bin.
Step 3
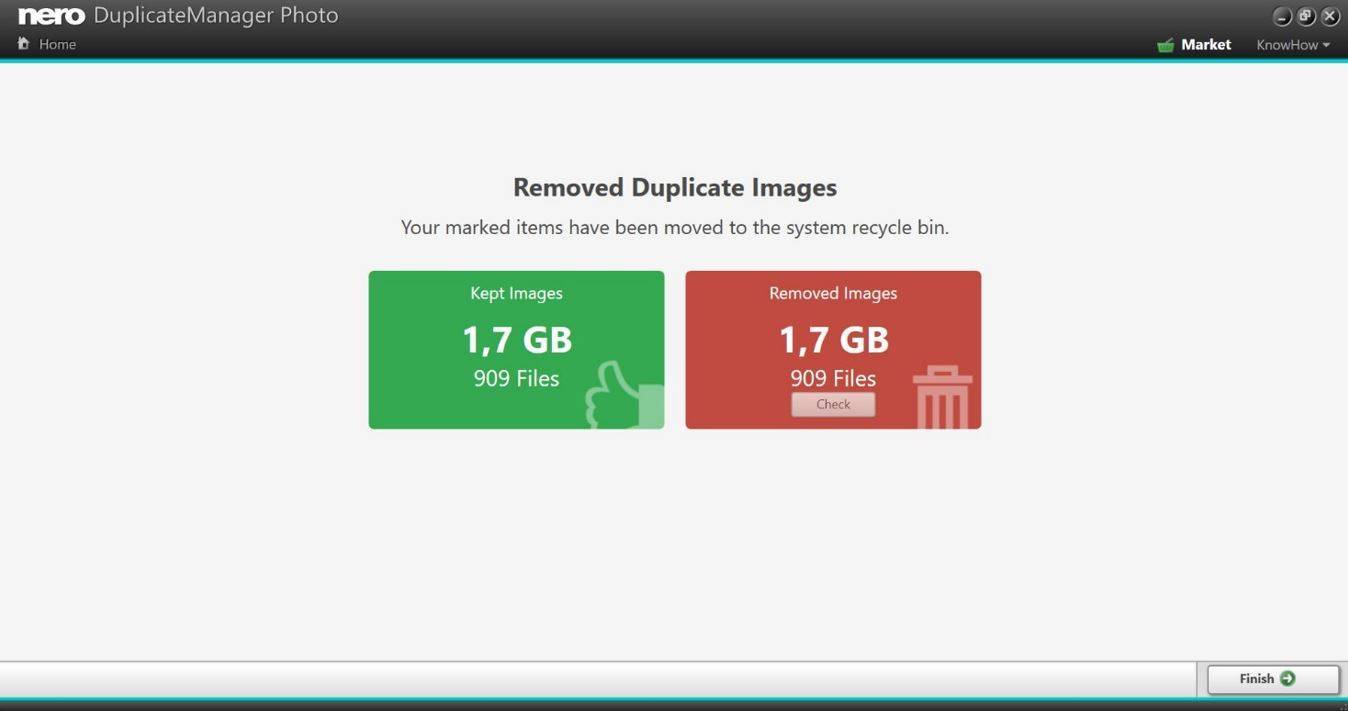
After the removal is done you will see the status page showing you the amount of removed data in the red box on the right hand side. If you want to check what was deleted click on ’Check‘. Via selection and right mouse click, you have the choice of finally deleting the images from the recycle bin or for restoring them.
If you decide not to permanently delete the images, you will have clean folders in Windows Explorer and in your media library, but the files will remain in your recycle bin eating up storage space.
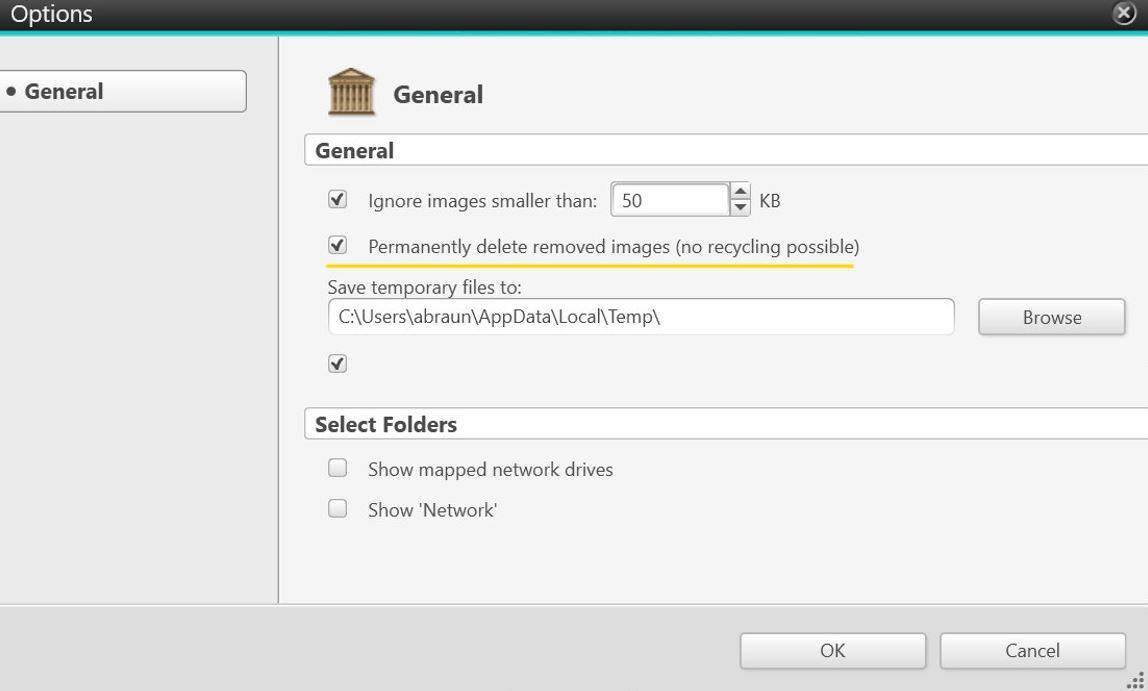
Once you have used Nero DuplicateManager a number of times you will probably be convinced of the solidity of its cleaning results. This would be the point when you should go to ‘Options’ and select ’Permanently remove deleted images’. Next time you do a cleaning, this will automatically also clean the recycle bin, resulting in gaining more storage space right away.
This works fast and easily via ‘Nero MediaHome WiFi Sync App’.
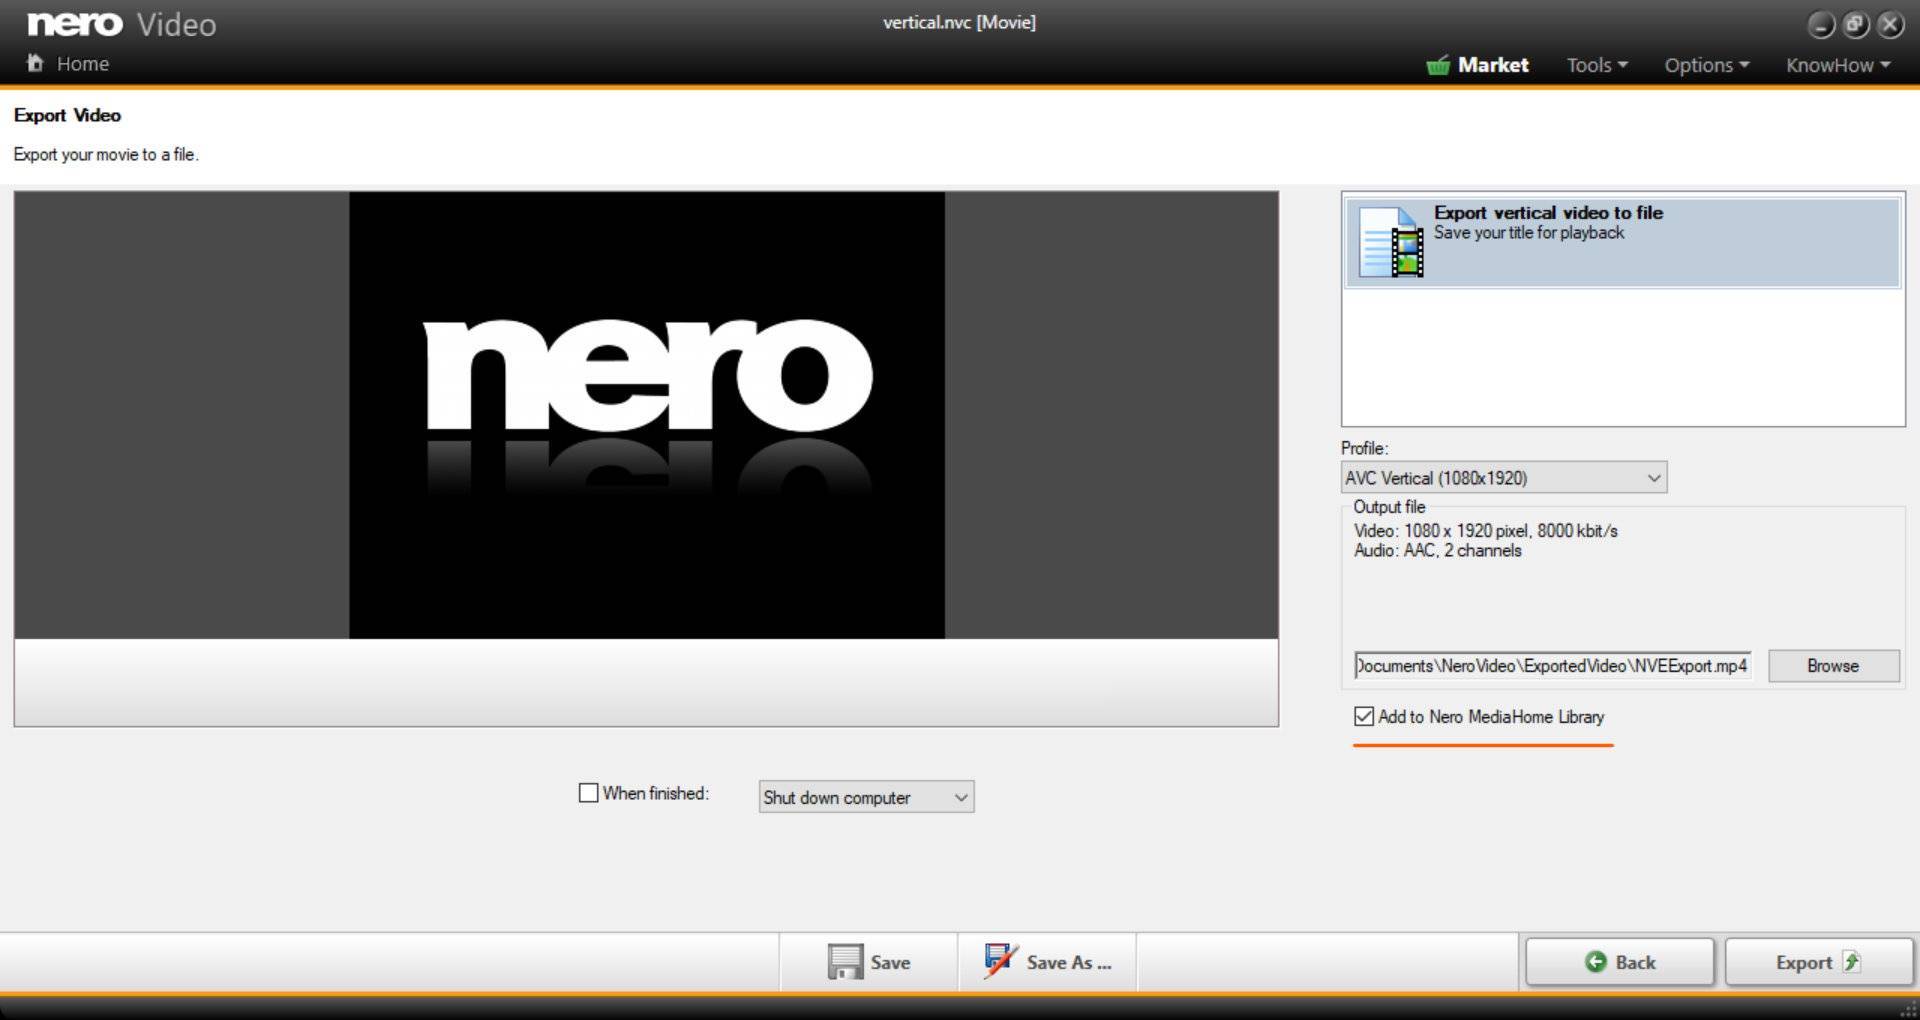
Within your vertical project in Nero Video select the export function. Select the option ‘Add to Nero MediaHome Library’ in the export screen for your vertical video. When the export is finished open Nero MediaHome and you will see your vertical video listed (more on that further down).
Install the free App ‘Nero MediaHome WiFi Sync’ via Google Play (Android) or App Store (iOS) on your smartphone or tablet.
Make sure Nero MediaHome and Nero MediaHome WiFi Sync are logged in to the same network.
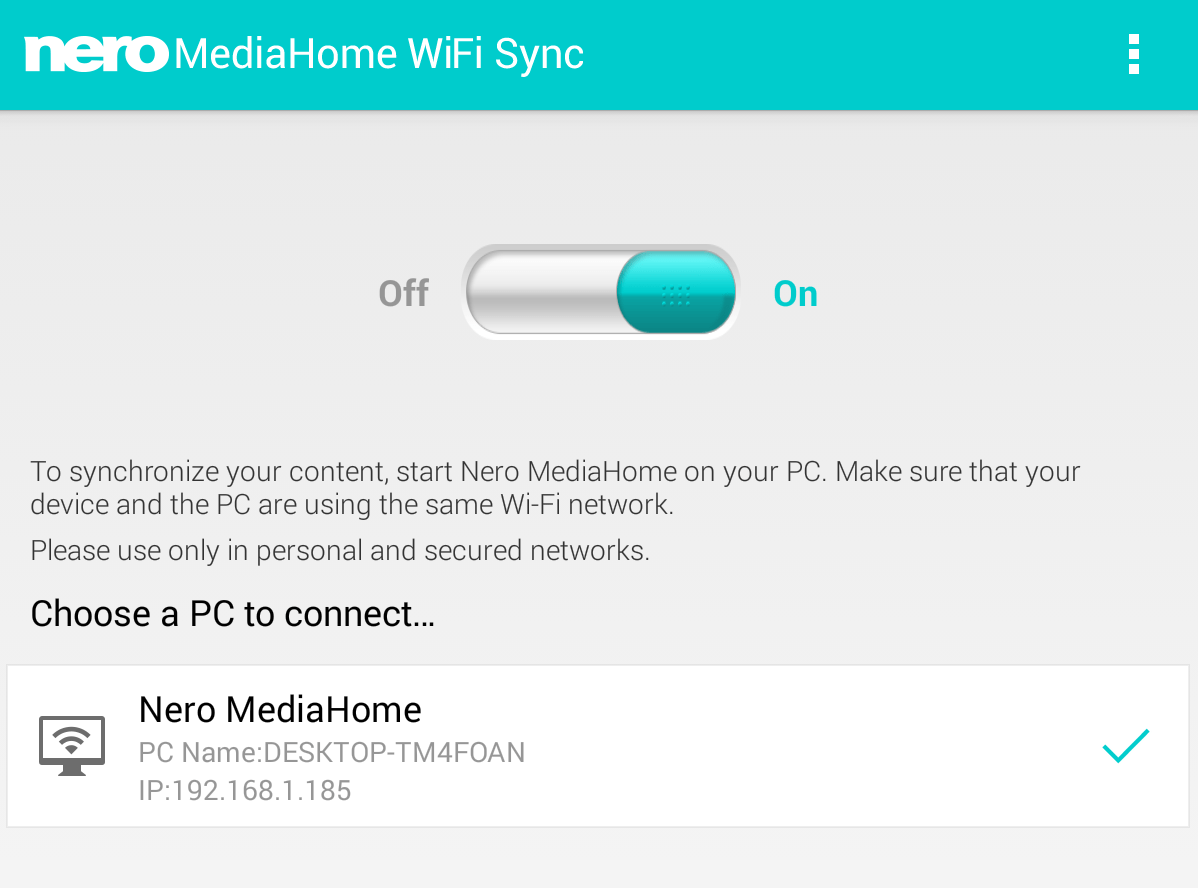
Make suere Nero MediaHome on your PC is running. While connected to the same network open Nero MediaHome WiFi Sync on your mobile device and switch it on. Nero MediaHome WiFi Sync will show your instance of Nero MediaHome. Click on it to activate the connection.
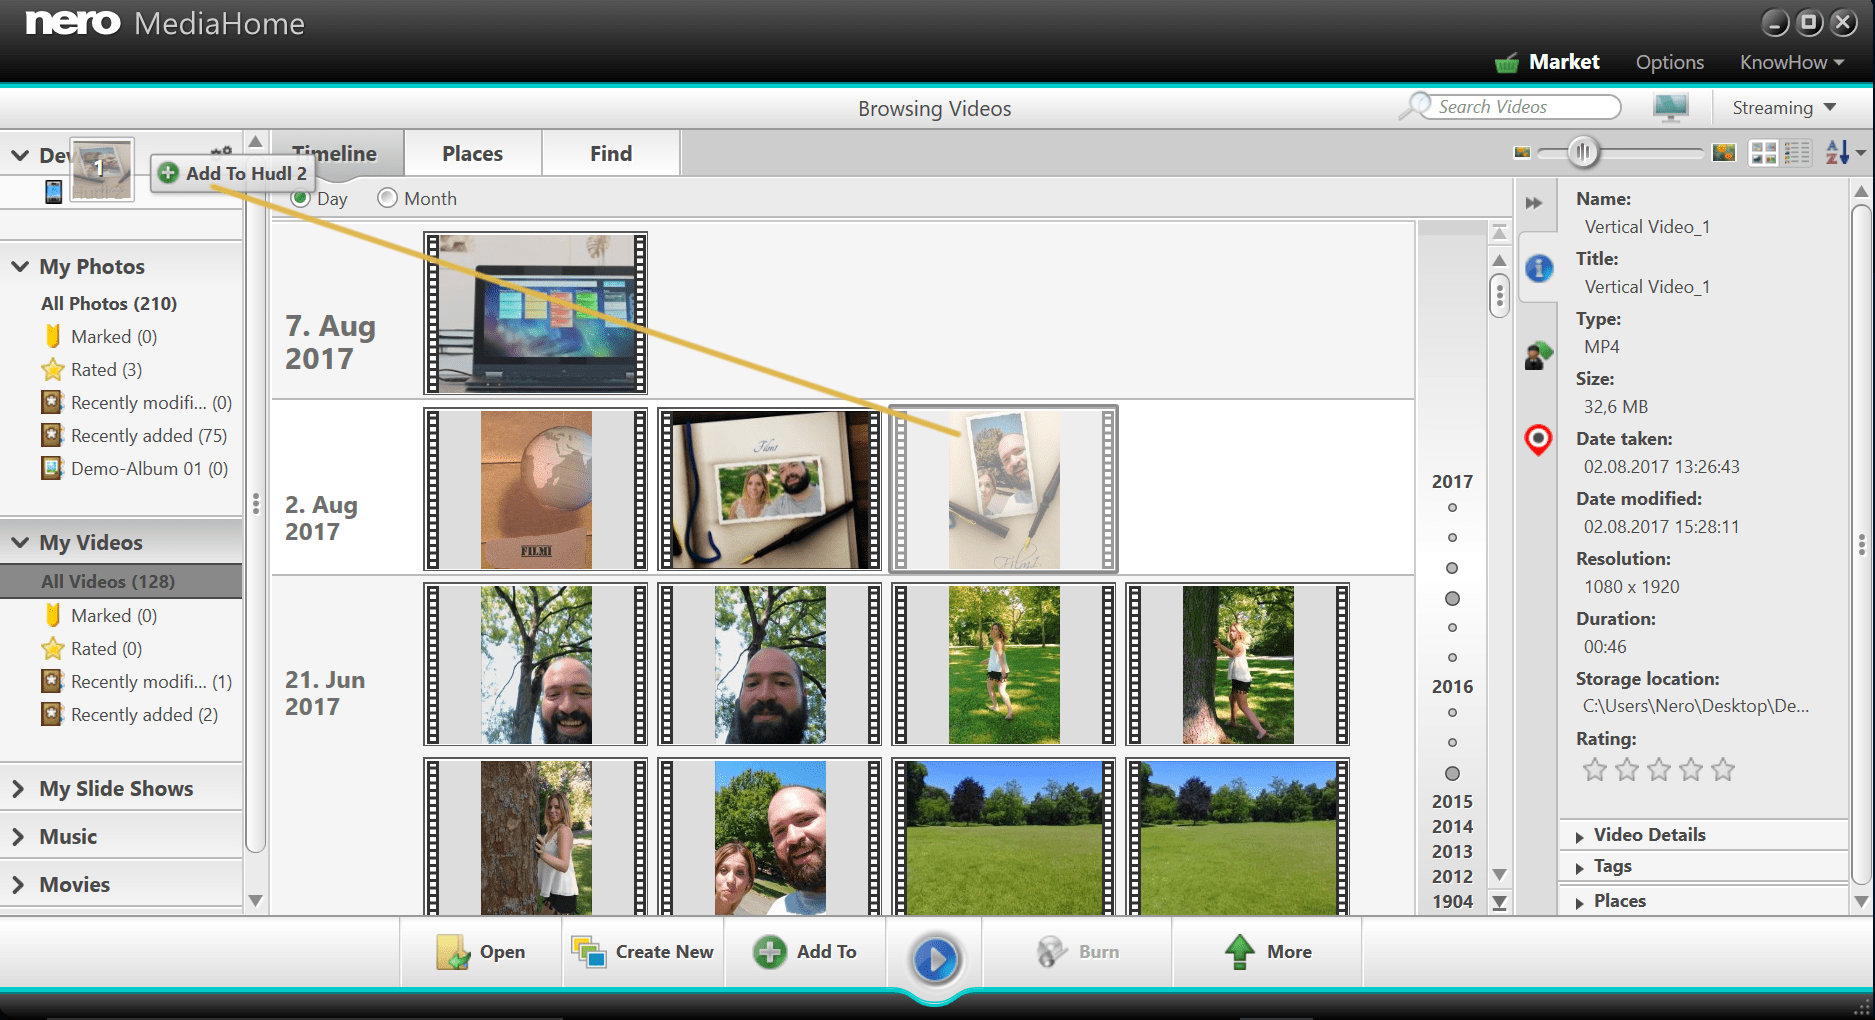
Nero MediaHome on your PC will now show your mobile device in the device view top left.
Select your prior exported vertical video in Nero MediaHome and drag it to your mobile device top left, as shown here. The transmission will start right away. The status can be checked bottom left.
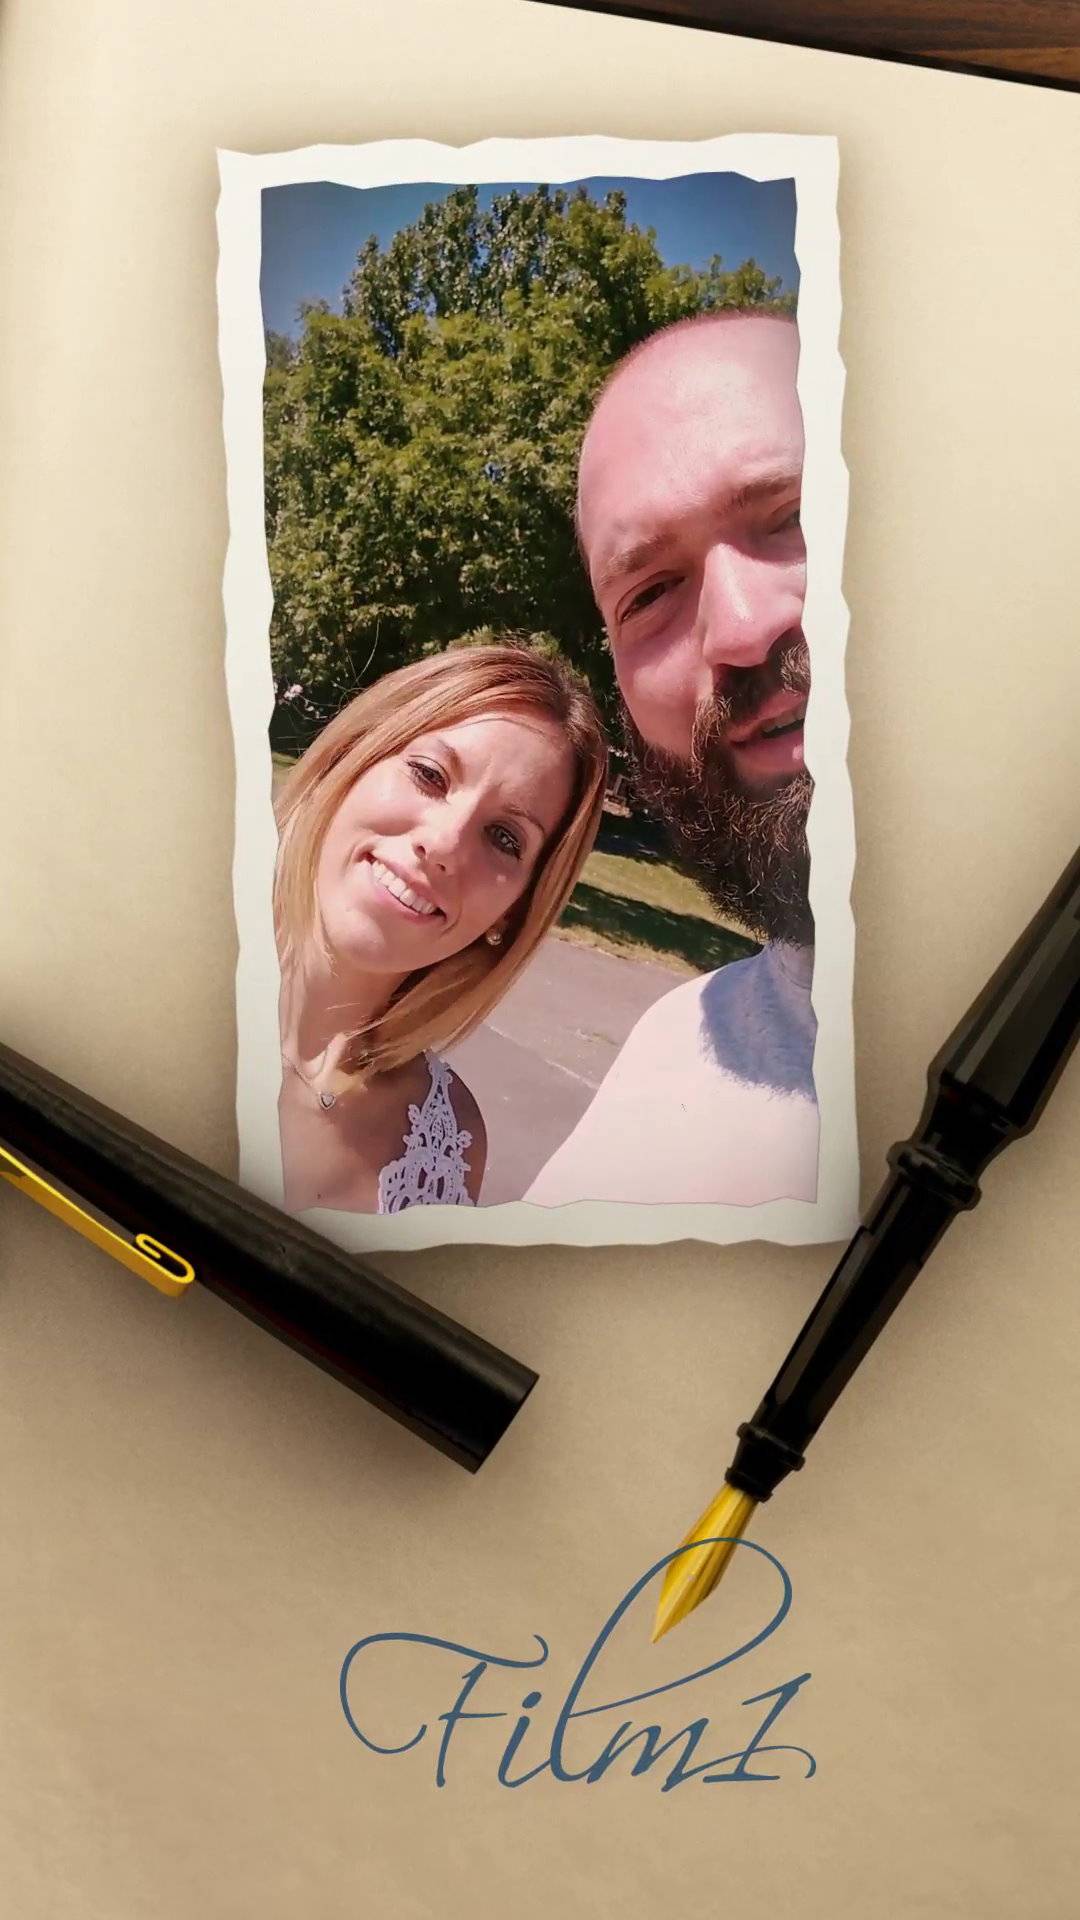
Now, on your mobile device open your preferred video player and play your vertical video.
If you are utilizing the free App ‘Nero Streaming Player’ (Android/iOS) you will be able to watch your vertical video on your device or directly play it on Smart TV in the living room.
The description and procedures as laid out here adequately work for sending wide screen video to your smartphone and for streaming it to your TV.
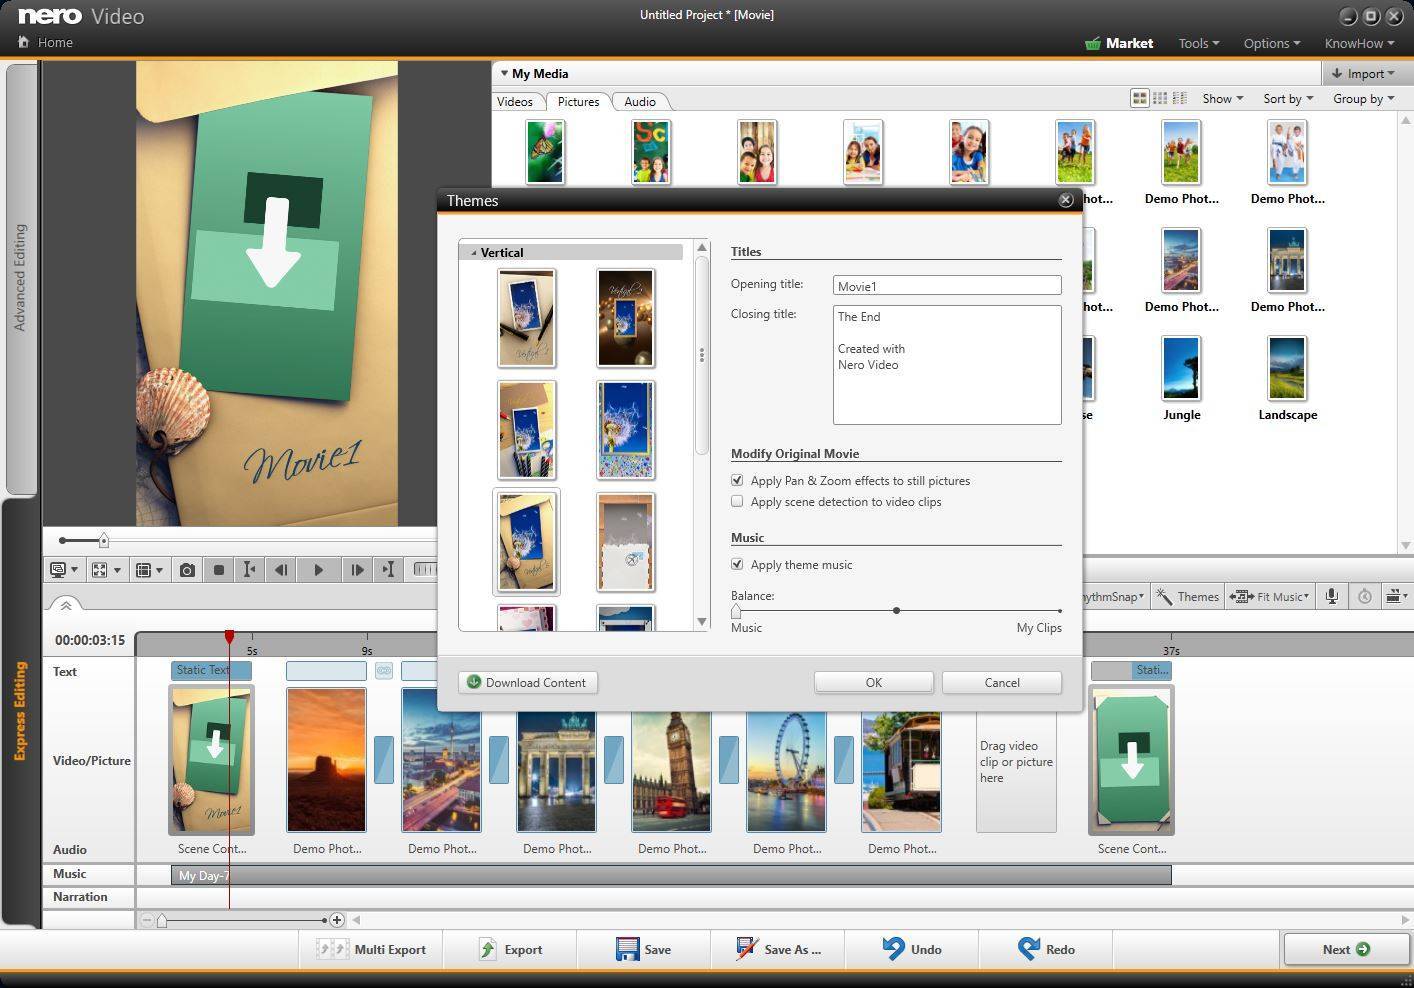
In Nero Video Vertical Editing Mode available in Nero Platinum 2018 (and later) as well as Nero Video 2018 (and later) you will find a variety of Nero MovieThemes that you can easily utilize for quick and shiny vertical movies to share or watch on your smartphone. The themes cover typical topics like family, travel, events, pets, and outdoor action.
The ‘effect drop zone’ in intro and outro allows you to personalize your movie by simply dragging photos or videos into the preview window or timeline. The dropped asset will automatically be integrated into the animation pattern of the template.
The main movie part has integrated dedicated video effects per template like focus/out of focus (tilt shift), nostalgic effects, slow-motion, etc., and each template comes with an individually composed music track that automatically adapts to the duration of your project.
There is no need to know a lot about video editing, except that you need to decide which source videos or photos you want to use for your movie and where you might want to trim them. The rest is all done automatically via the pre-designed movie themes.
This way you can create vertical masterpieces in no time for sharing and watching on your mobile device.
Today, most videos and photos are captured via smartphones in portrait orientation, and are also shared and watched vertically. Following this trend, major social media platforms like YouTube and Facebook have introduced vertical video as a newly supported standard format.
Nero Video has comfortable functions to utilize this format out of the box, now.
Via the vertical video editing mode, Nero Video allows you to import, edit, and export portrait videos and photos in native vertical video format.
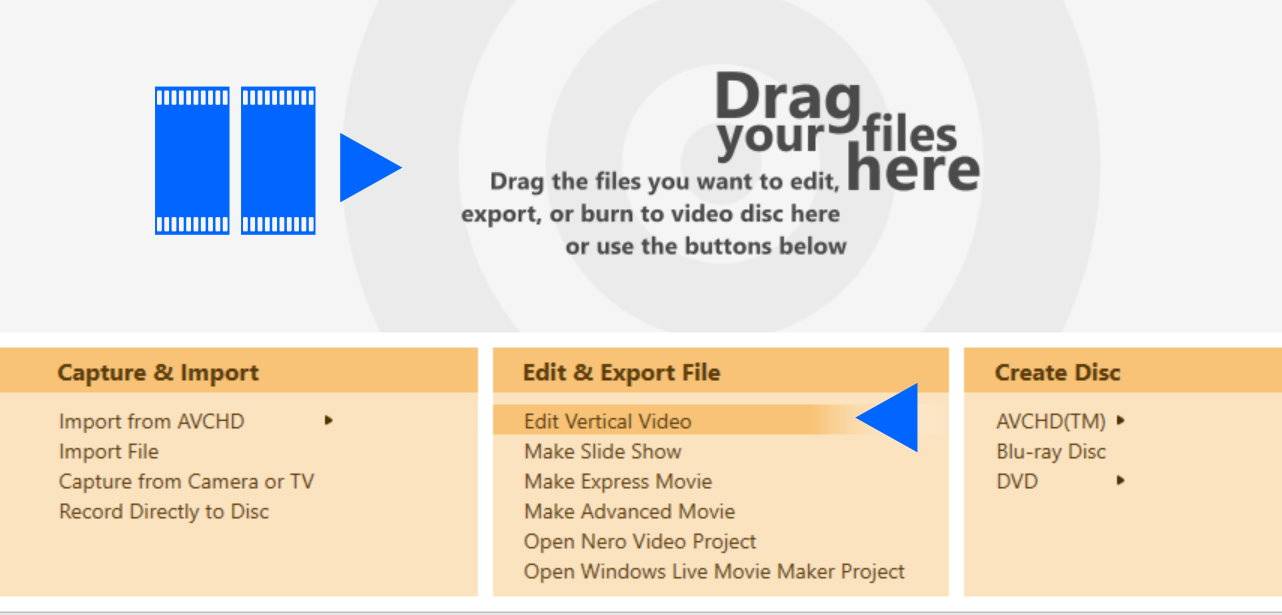
You can access the vertical video editing mode via Nero Video home screen either by dropping your files into the drop zone (dragging a 16:9 vertical video will automatically open a vertical editing project), or by clicking on the button ‘Edit Vertical Video’.
‘Express Editing’ and ‘Advanced Editing’ in almost all functions work exactly like the regular widescreen editing mode of Nero Video.
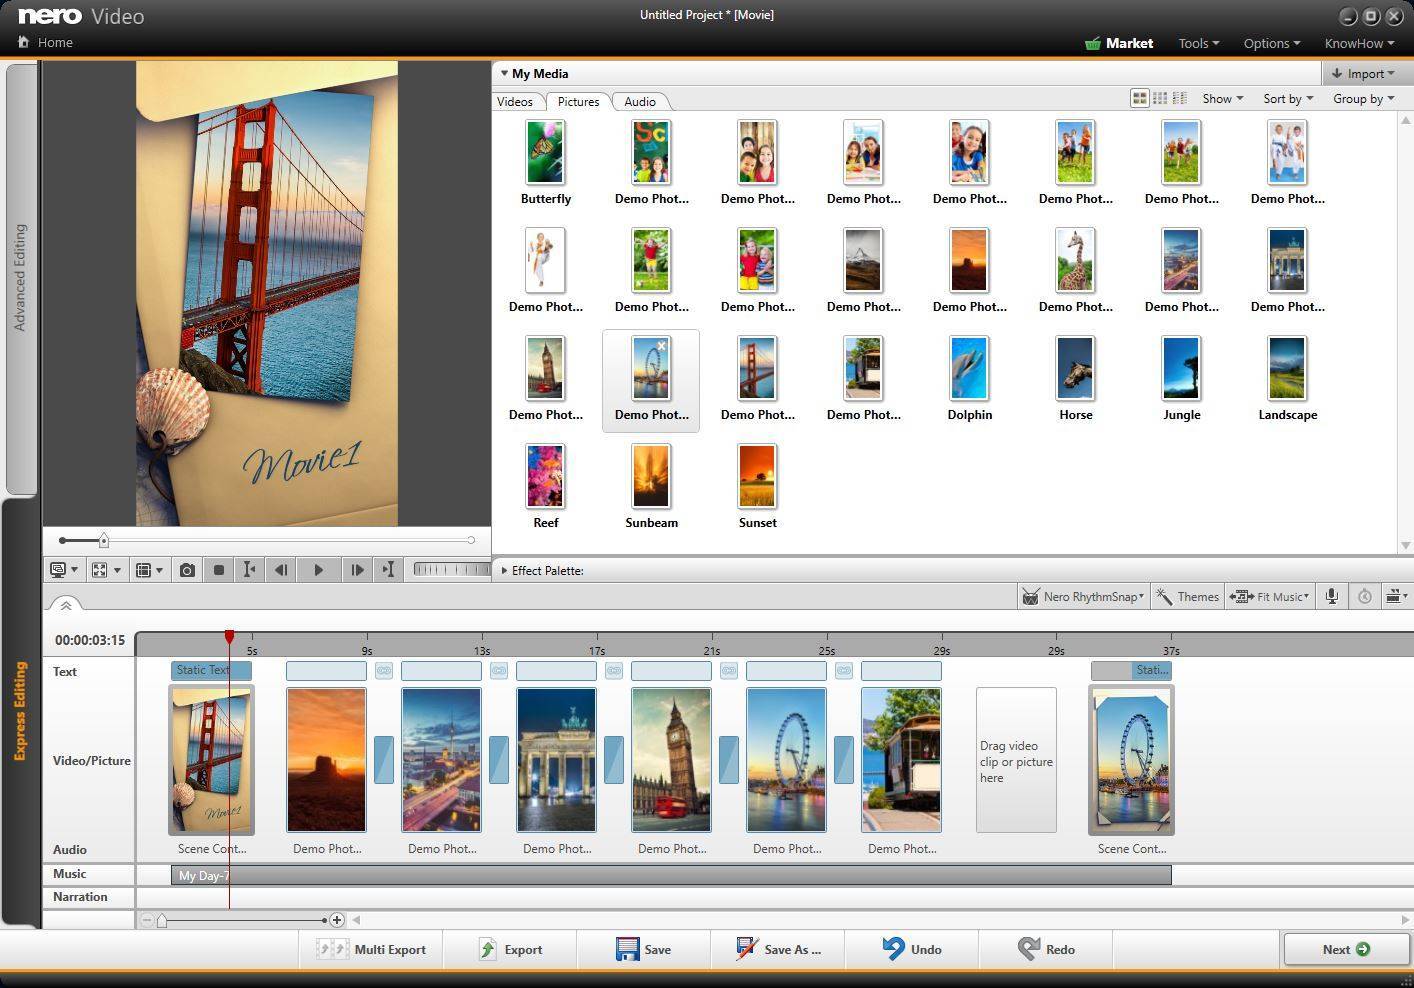
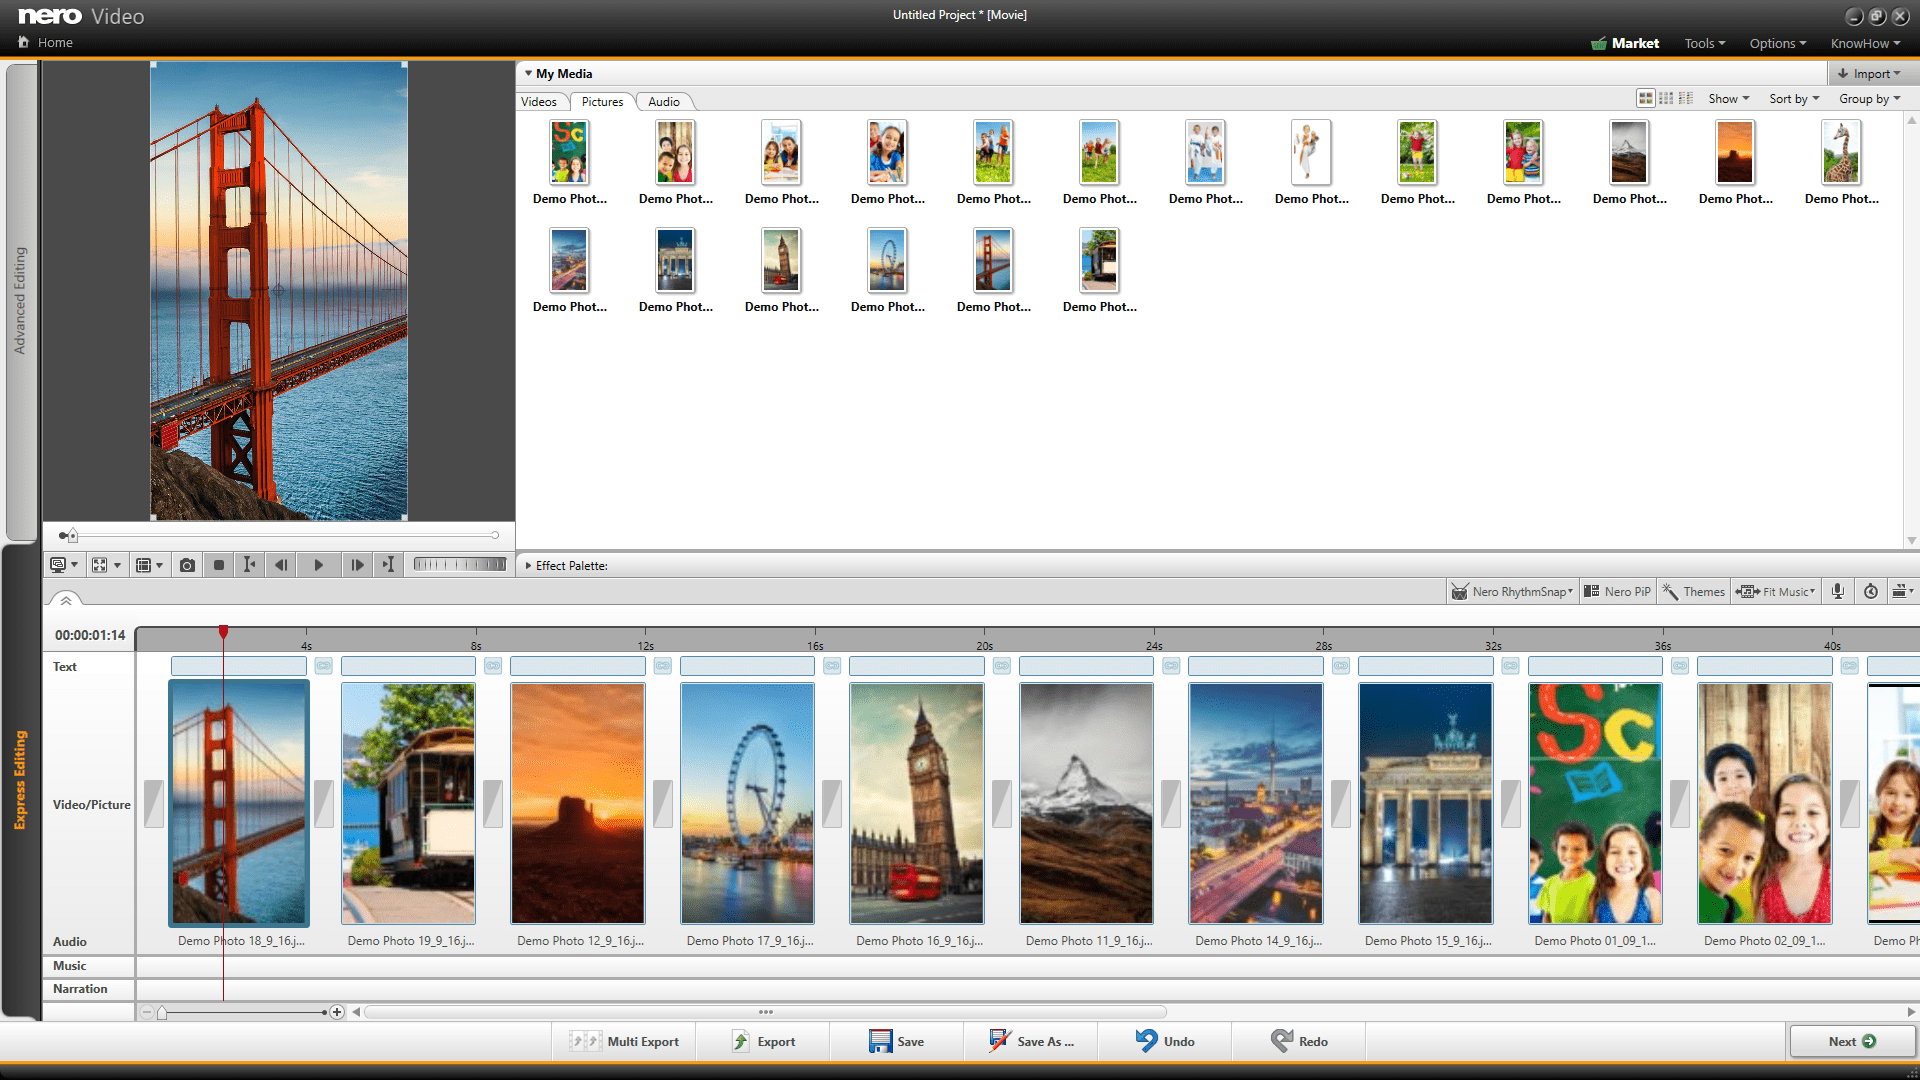
Vertical Video – Express Editing
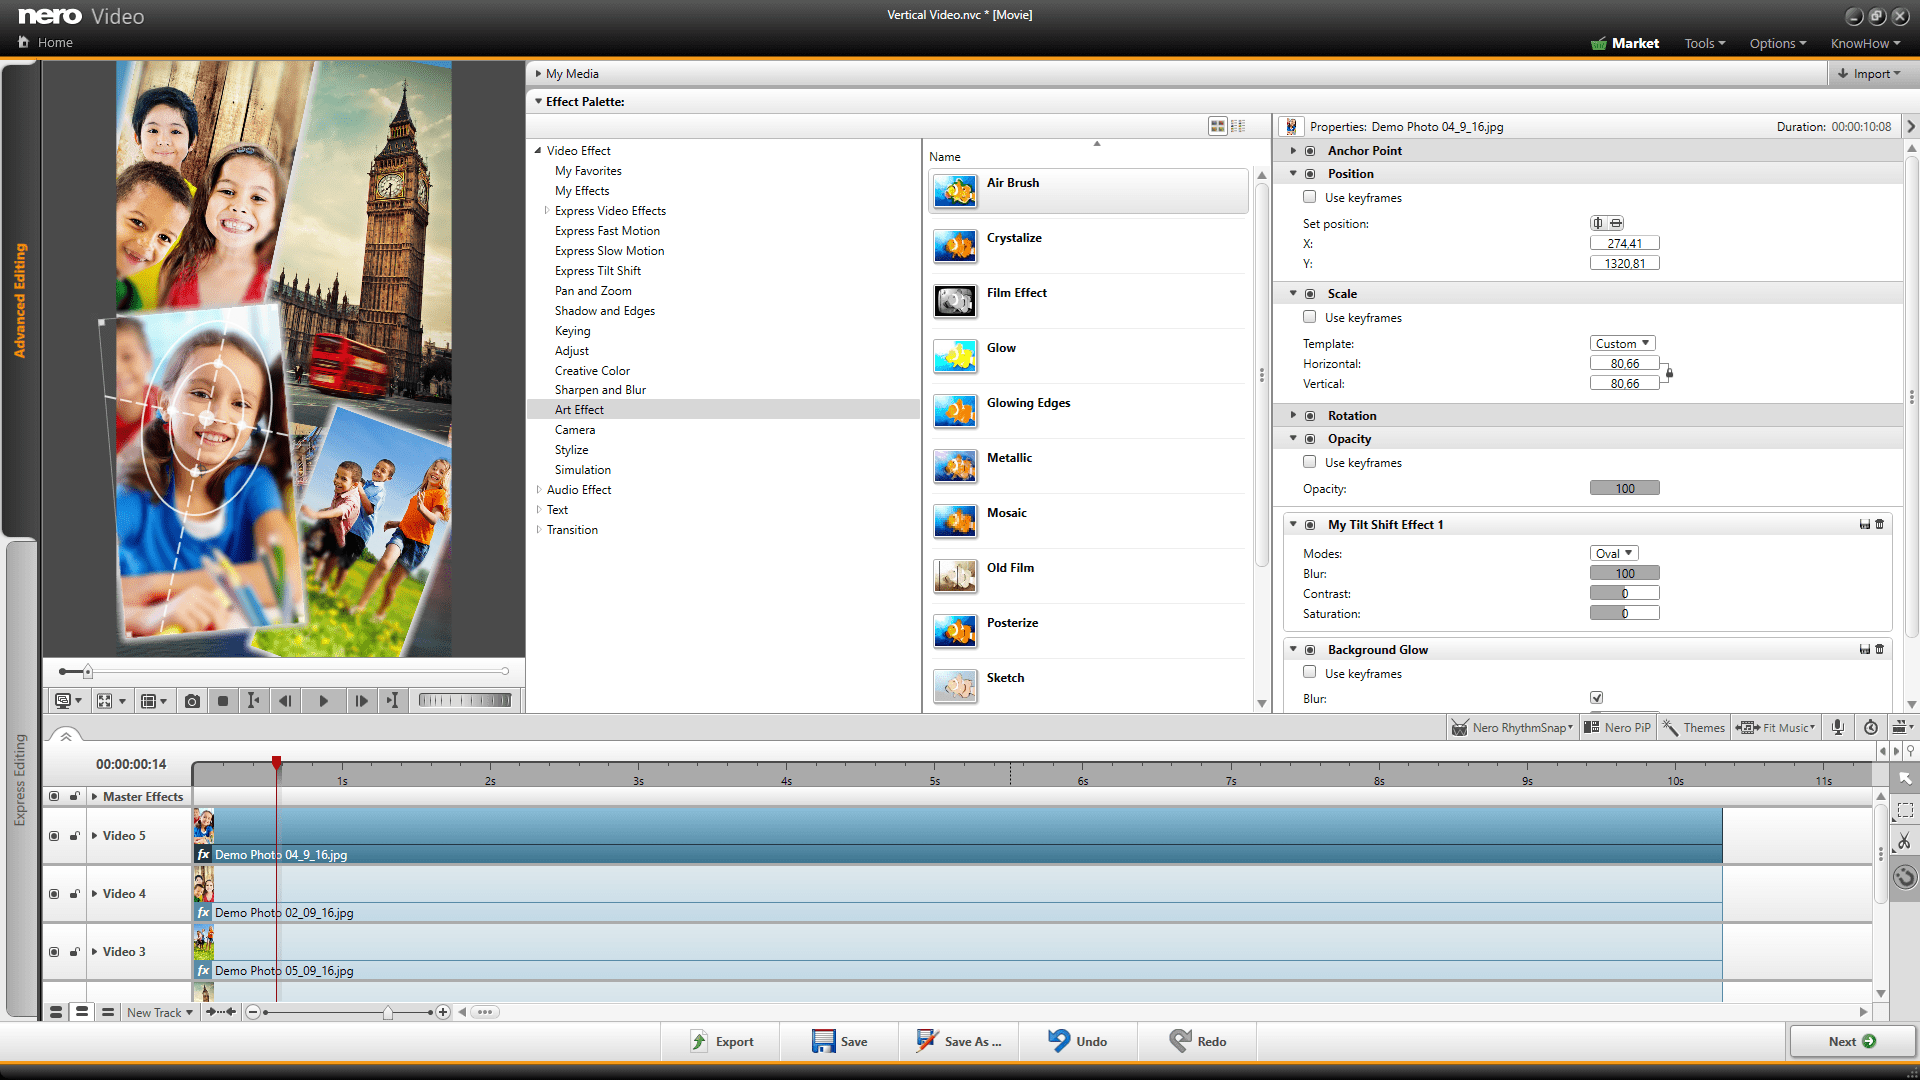
Vertical Video – Advanced Editing
When selecting one of the new ‘Vertical Video MovieThemes’ intro, outro, visual effects and matching music will be added to your vertical movie automatically. This way you can create your vertical masterpieces in no time for sharing and watching on your mobile device.