NEW: ‘DriveSpan App’
Nero 2019 lets users easily merge and consolidate all of their media and data located on mobile devices, on external hard discs and storage drives, on a PC or within the cloud to one central storage location, e.g. a PC, an external hard disc or the cloud. Via DriveSpan App for iOS and Android users can now comfortably control and trigger the consolidation of all devices connected via the same WiFi network. When the consolidation is finished all data are clean, i.e. duplicate media and data are being identified within the consolidation process and will not be copied. Nero Suite 2019 users (Platinum/Standard) have access to the complete App version with all features enabled. The free version available in the App Stores is restricted for consolidation from mobile/cloud to cloud only. Users that want to include their PC and even their Mac into the consolidation can buy this feature via In-App-Purchase.
NEW: ‘Nero Start’
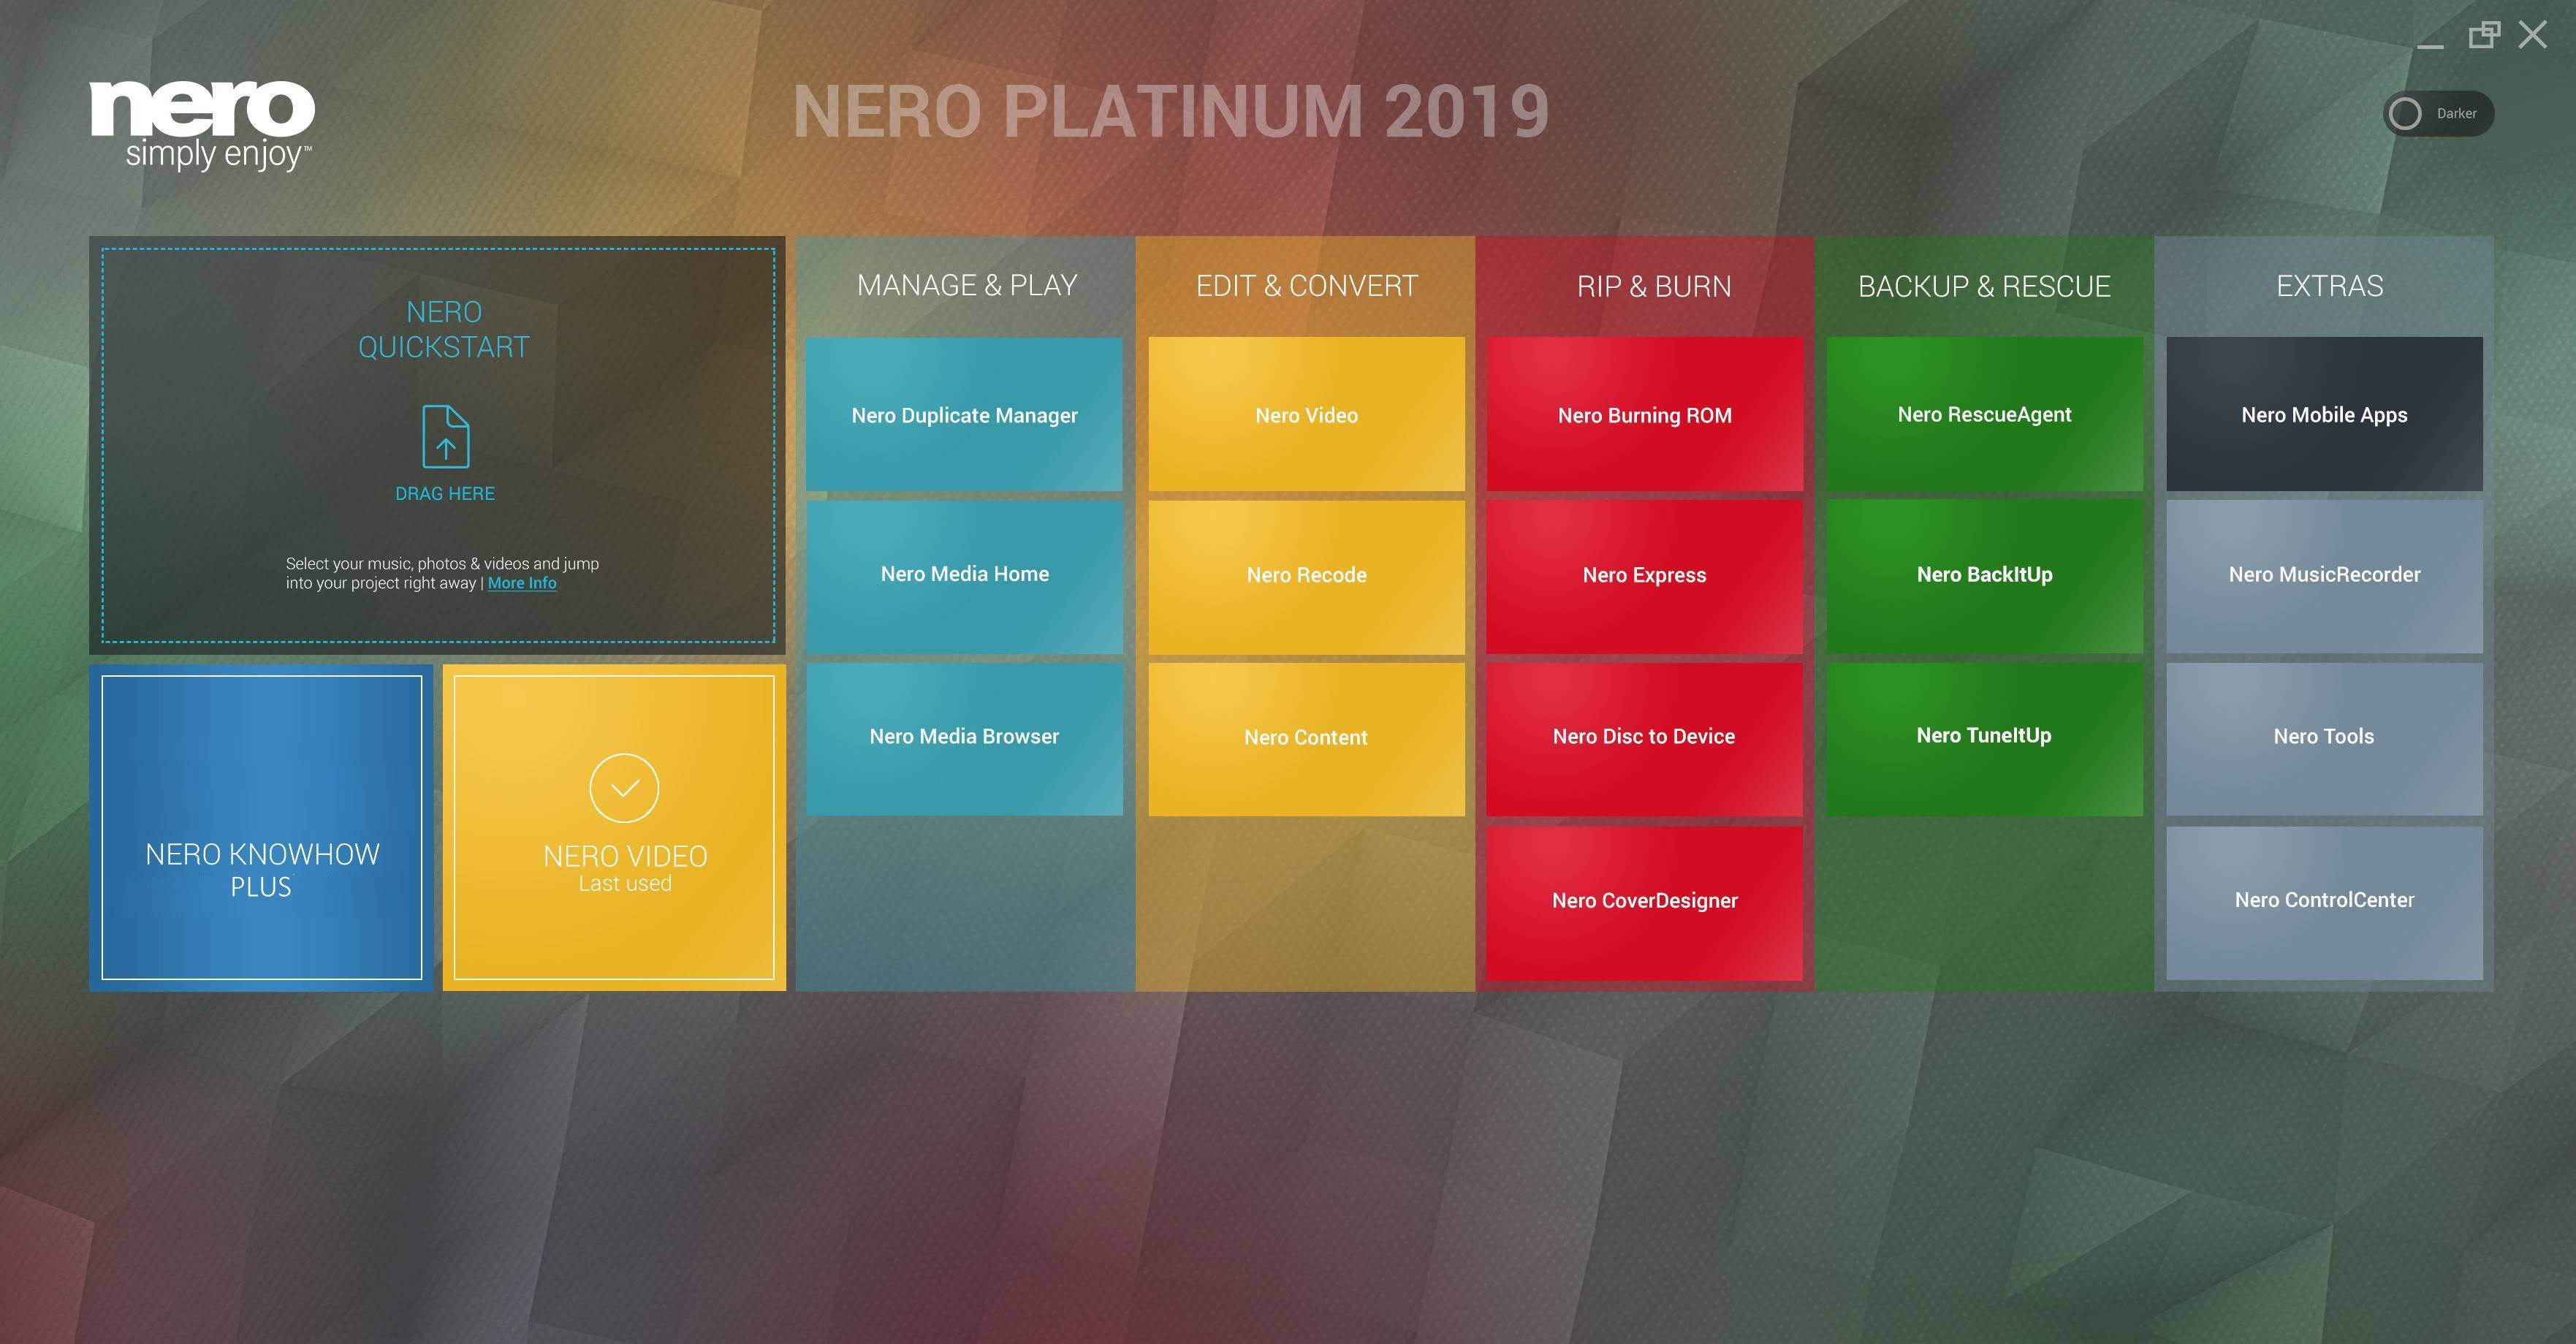
Via the brand new Nero Start application users of Nero 2019 will get going with their new product much more easily and achieve result even faster than before. The new user interface with completely updated design and workflows now includes animated buttons, which make the former next/previous page behavior superfluous, and also integrates a last used application function. Another highlight is ‘1-Click Video Story‘, that integrates into Nero QuickStart. Users simply drag & drop photos or videos into the drop zone and their files will load automatically with a pre-designed movie theme inside of Nero Video. Nero Start is available for all Nero Suite and standalone products and also includes access to Nero KnowHow PLUS.
NEW: ‘Nero KnowHow PLUS’ and ‘Live Guide’
Many Nero customers already know and utilize the Nero learning center ‘Nero KnowHow’. So far, the app was limited to Windows 10 and mobile users (iOS/Android). Starting with Nero 2019 any user can now benefit from the brand new ’Nero KnowHow PLUS‘ under Windows 7, 8, and 10 as a new PC application. A unique and very comfortably integrated feature is the new ‘Live Guide‘ which simply gives context sensitive help for the application in use and for the given use case via FAQ, manual page and video tutorial. This way, utilizing the Nero Suite becomes even more easy and intuitive. Customers can also send direct feedback to Nero within the given context.
NEW in Nero DuplicateManager Photo: Find & Remove ‘Similar Images’
Many users have a whole bunch of similar images sitting on their PC, be it due to photo editing, HDR series shots, resizing, format conversion, and more. It is so easy to get lost in one’s photo archive that has heaped up on the PC over years. This is where the brand new feature ‘find & remove similar images’ in Nero DuplicateManager Photo comes into place. The new function finds similar images and automatically sorts it into categories of similarity types: “Places, Series, Motive, Resized, Format, Other “. This way, users get a fast and comfortable overview of their similar images and can easily decide which ones to delete and which ones to keep. Getting their duplicate images and similar images cleaned up, users will gain more storage space on their PCs and at the same will have Nero MediaHome as their central media archive cleaned automatically, too.
NEW in Nero MediaHome: Access ‘OneDrive Files on Demand’
With Nero 2019 Nero MediaHome users can now access their ‘OneDrive online files on demand’ and have the option to individually download these, only when needed. This way, they can save storage capacity on their PC while having photos, videos, movies, TV shows, and music available anytime via download in Nero MediaHome, and thanks to Nero MediaBrowser even in any other Nero application.
NEW in Nero Video: ‘Nero LifeThemes PRO’
The Platinum version of Nero 2019 comes with a complete new package of high-quality movie themes and videodisc menus, and additionally includes a brand new set of vertical video themes for editing, exporting, and sharing a 9:16 vertical video on the smartphone. The pack also includes high-quality royalty-free music, which can be used independently in any video project. The ‘Nero LifeThemes PRO’ templates consist of motives suiting the best moments of everybody’s life: Cities, Landscapes, Pets, Wild Animals, and Nostalgia themes.
NEW in Nero Video: ‘1-Click Video Story’
Nero Video in Nero 2019 now comes with a very comfortable new feature that helps creating polished movies and slideshows in a snap. Simply drag & drop photos and videos to the drop zone in Nero Video and select ‘1-Click Video Story’. All files will automatically be loaded into a pre-designed video project complete with intro and outro sequence, effects, captions and matching music. Simply preview the video project, export, and share it.
NEW in Nero Recode: Convert to ‘Disc-compatible Formats’
Now, Nero users can transcode non-compliant source video files to fully compatible videodisc file formats prior to importing them into videodisc projects (DVD-Video™, AVCHD, Blu-ray Disc™). After conversion, the files can be handed over to video editing or authoring projects in Nero Video. Thanks to this new pre-conversion function in Nero Recode the time needed for rendering and burning a videodisc in Nero Video can be drastically reduced by utilizing Nero SmartEncoding. The new Disc-compatible profiles are also beneficial for users that want to utilize 4K source video for editing and exporting to Full HD or Blu-ray Discs™ but lack a more powerful editing system. When transcoding from 4K to Full HD before sending the video files to Nero Video, also lower performing systems will work more effectively.
NEW in Nero BackItUp: BackUp and Restore via the Cloud
Now, Nero users can do their online backups with ‘OneDrive’ and ‘Google Drive’ cloud storage. Actually, data can also be restored online, making backing up and restoring with Nero BackItUp independent of a special location.
Nero KnowHow 00151
