Since Nero 11 Suite, Nero Video has an integrated very easy yet powerful ‘Express Editing‘ mode. Since then, ‘Advanced Editing‘ with a multi-track timeline has been co-existing side by side with ‘Express Editing’ in Nero Video. Both are switchable within one project.
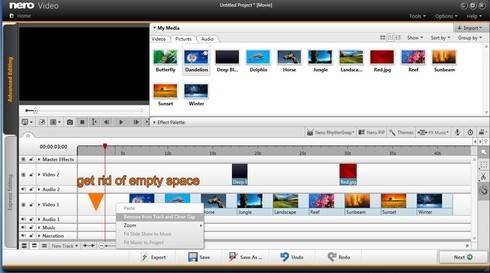
In the case asked for here, advanced editing was used. The advanced editing mode with a multi-track timeline is the versatile manual editing mode in Nero Video and gives you the full range of editing options. When shortening the duration of a clip that exists in the first position of a sequence of clips in your timeline – say trim it down from 7 to 4 seconds – a gap will show on the right side, i.e. between the new end of your trimmed clip and the next clip in sequence you will have a gap of 3 seconds.
A simple way of getting rid of that gap is to just move the standard arrow tool over the white space and right click on it, then select ‘Remove from Track and close Gap’. When executed this tool will align all associated clips located right of the gap to the end of your trimmed clip (your new mark-out), or if there is no other clip left of the gap, it will put the project to the timeline start position. I recommend using this tool with care as this action will delete anything on all associated tracks within the existing timeline gap.
There are also standard ways of closing a gap via multi-selection and dragging your project content to the wanted position.
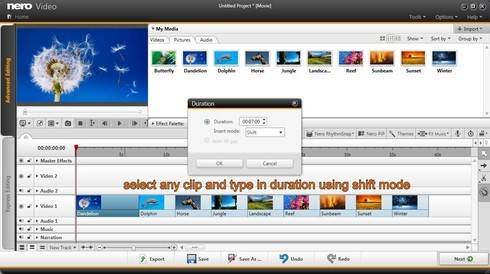
In advanced editing you can also modify the duration of an image clip within an existing arrangement of clips in your timeline via the context menu. Select a clip and right click on it. In the context menu select ‘Set Duration’. A window will open. If you want to change the duration – e.g. extend it from 7 to 9 seconds – just type in the new value or use the up and down arrows. When ‘Shift’ is selected (default selection) it assures that none of your clips are touched but just the duration of this one clip is going to be extended and the other clips will all line up in sequence in your track as before. The project will just be the amount of seconds longer that you added (in this case 2 seconds). If you select ‘Overwrite’ instead, the beginning of the clip right next to your prolonged clip will be overwritten (in this case by 2 seconds) while your project will not change its duration.
Express Editing
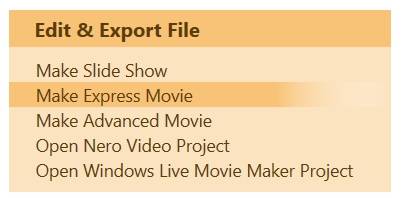
In ‘Express Editing‘ mode – in favor of ease of use – the editing handling is mostly automated. Although you have less editing options and only one video track at hand you can do all the regular editing, and can even utilize some advanced automated options.
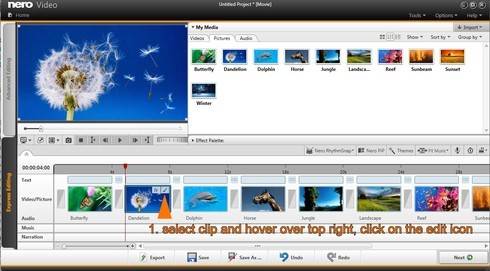
In express editing you do not have to bother about empty spaces as Nero Video takes care of that, deletes gaps when you delete clips automatically, automatically aligns your clips when trimming, and automatically shifts your project when you extend or shorten the duration of clips within your project.
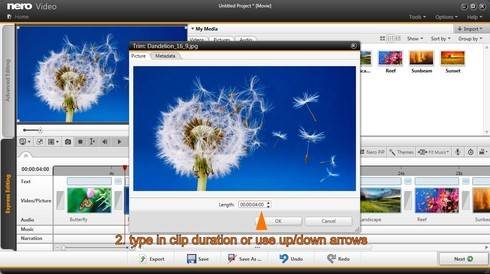
Just select the clip in the storyboard that you want to extend or shorten. Put the mouse over the clip and two icons will appear. Select the trim icon most right.
A window will open that lets you easily modify the clip duration by typing it into the fields or by using up and down arrows.
You can even type in a duration for single frame editing and this way create a stop frame animation project.
If you have several image photo clips in your project and plan to do a stop frame animation project, just select any single clip in your project and set the duration to 1 frame or 2 frames using the above method.
Then simply change the duration for all photos by using the context menu as below.
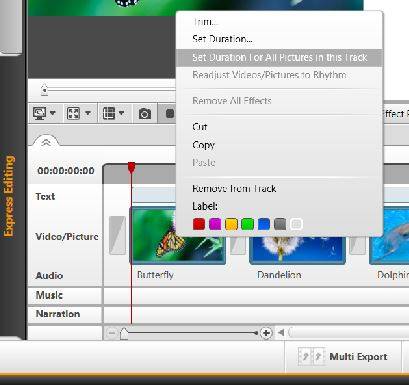
Your project will then show single frames in sequence. Below we have 5 photos with a total project duration of of 5 frames.
Note that switching from advanced editing to express editing is no option if you already have done a project in advanced editing. By design advanced editing has much more editing options that do not match to express editing.
The regular and conceptually implemented way of using express and advanced editing is starting in Express (1) and switching to (2) Advanced Editing. When switching from express to advanced editing your complete arrangement including all trim marks and effects will automatically be taken over to advanced editing mode. If you switch from advanced editing to express editing or vice versa, your given project is auto-saved and this way ready for continuing work on that any time later.
Tip: ‘Nero KnowHow 00027’ – more details on Nero Video Express Editing and Advanced Editing
Nero KnowHow 00073