AI frame interpolation
Nero AI frame interpolation is a technique that uses artificial intelligence to create additional frames between existing frames in a video. This process enhances the smoothness of motion by filling in the gaps between frames, making the video appear more fluid and visually appealing.
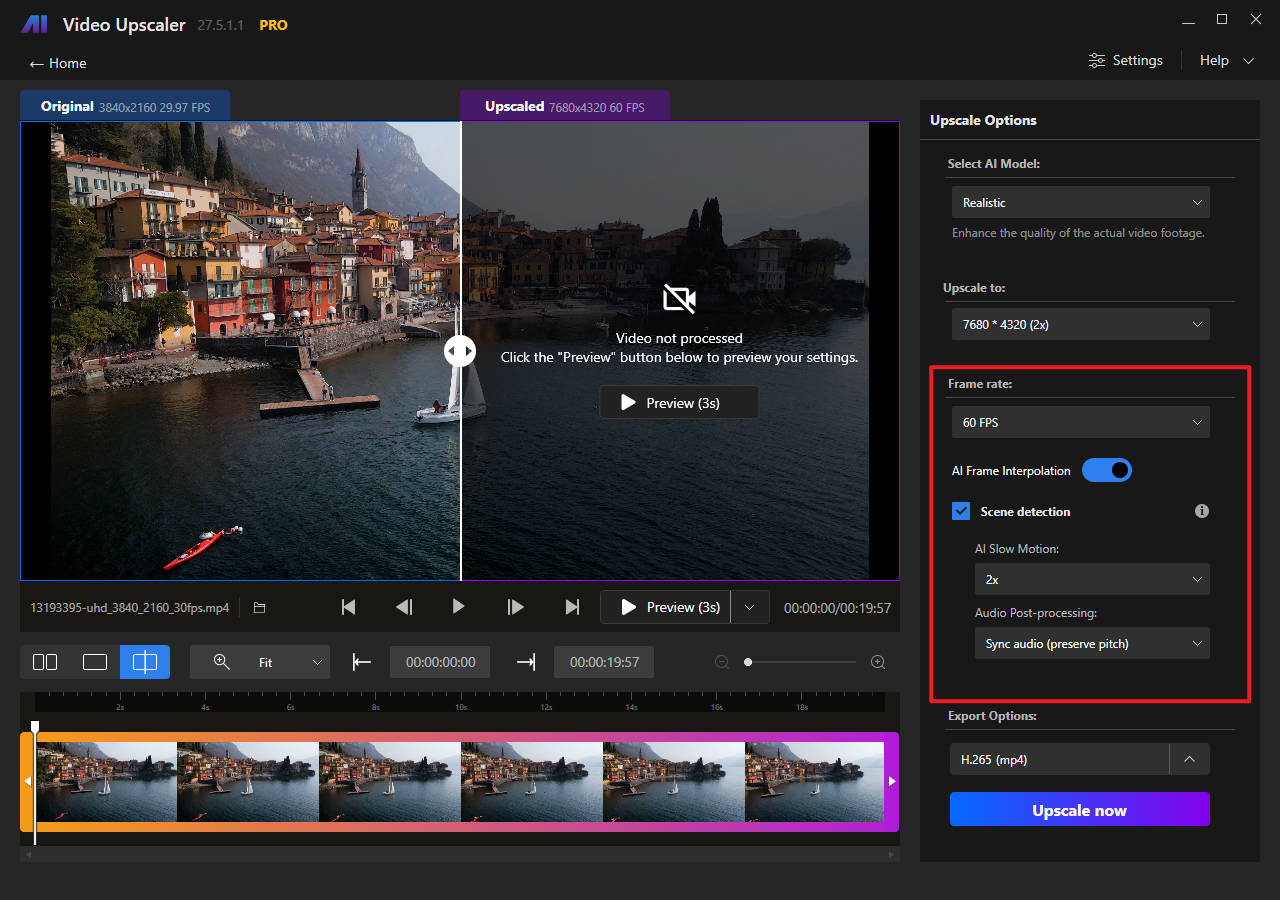
AI frame interpolation will be enabled automatically if you select a frame rate higher than the original.
The scene detection switch is used to avoid strange frames generated by interpolation when the scene changes. If there is no scene change in your video, you can turn off this option to speed up the frame generation.
AI slow motion
AI slow motion can only be enabled when the AI frame interpolation is enabled.
Select the time scale factor from 2x to 8x and choose the audio post-processing method to start processing.
Audio post-processing method:
- Keep original audio: do not process the audio and keep the original length, please note that the audio will lose synchronization with the video.
- Remove audio: remove audio track, suitable for the users who want to process audio separately.
- Sync audio (preserve pitch): slow down the audio pace and keep the audio pitch, please note that the audio may sounds strange when the speed is low.
- Sync audio (do not preserve pitch): slow down the audio pace and the audio pitch become lower than the original.
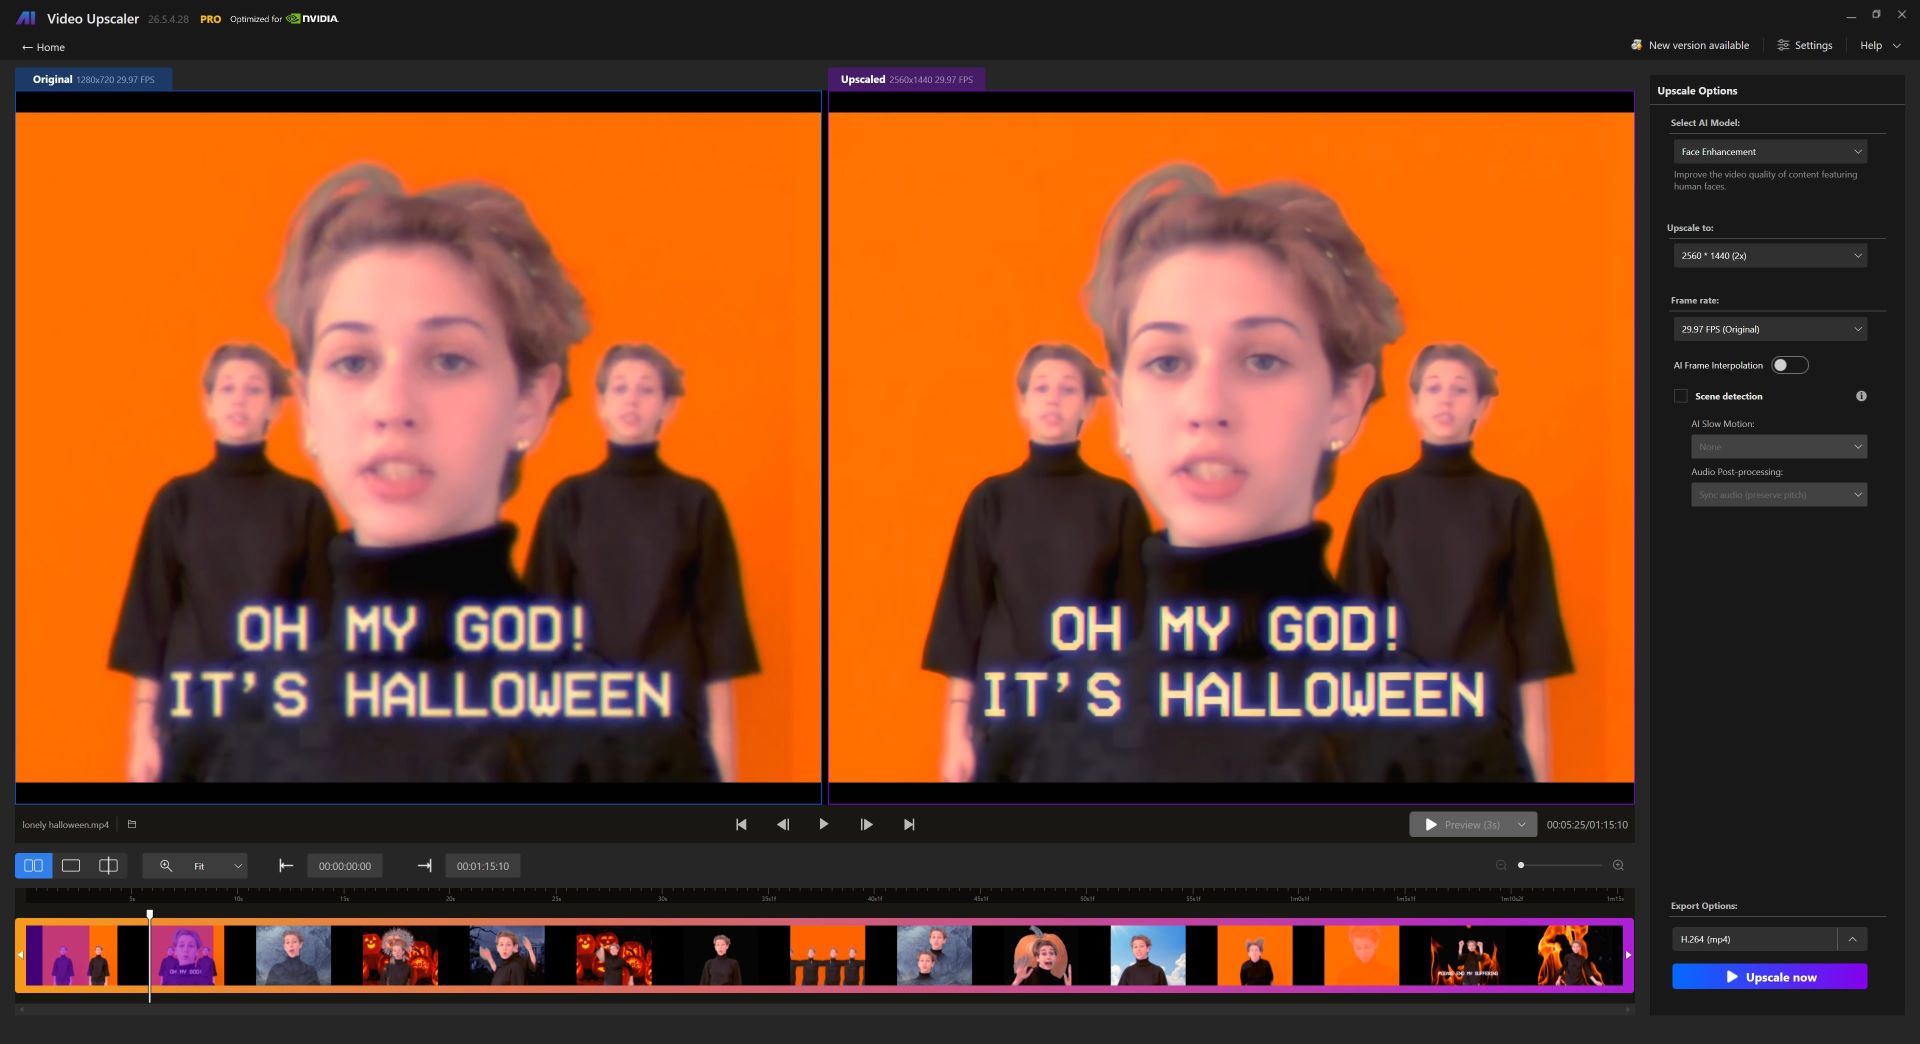
Face enhancement model
The face enhancement model will come as the first online update for both Nero AI Video Upscaler lifetime and subscription versions.
This model is focused on enhance the blurry details on the faces in the video.