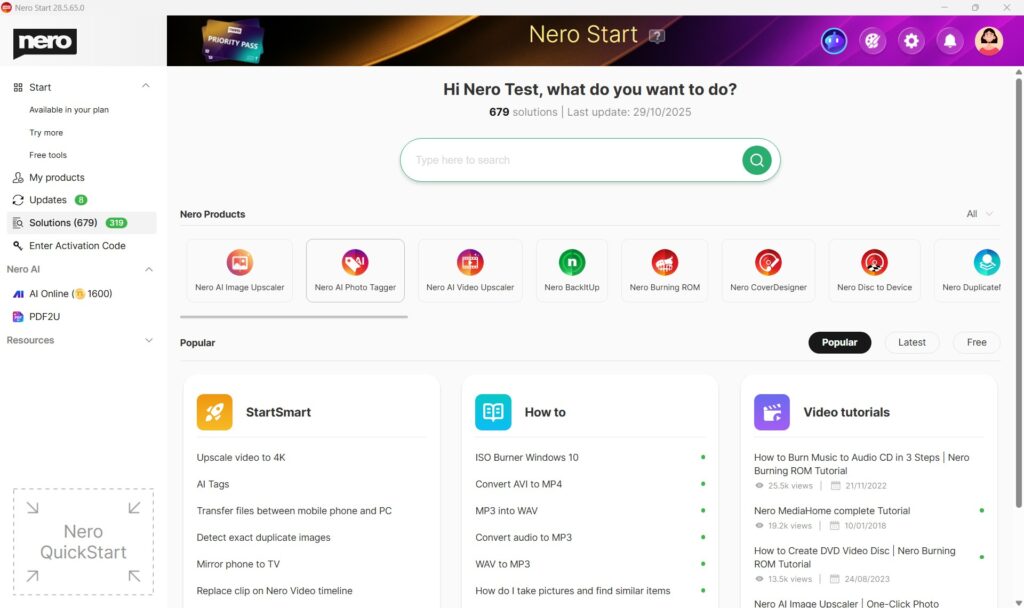
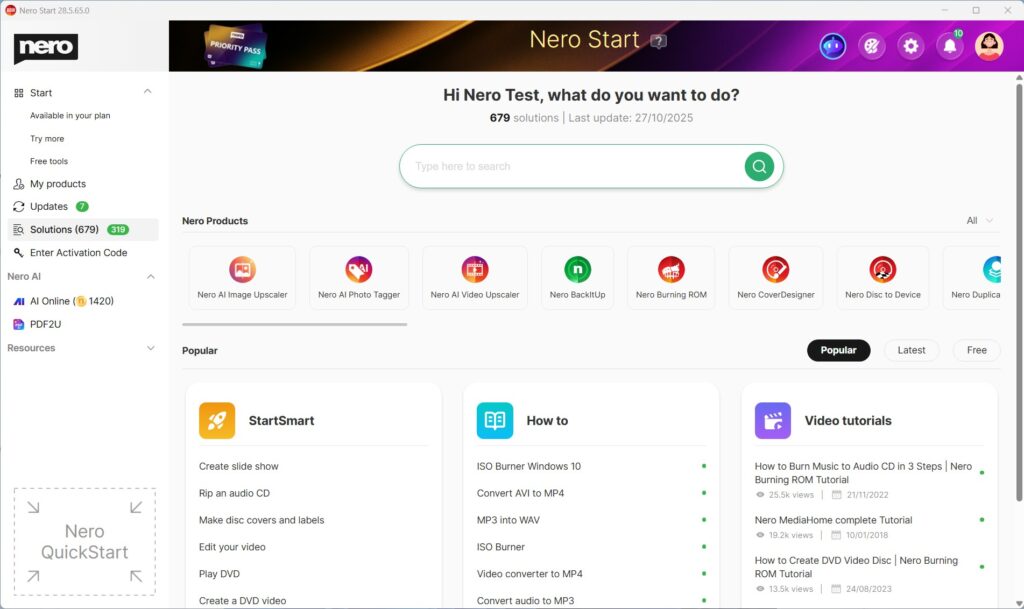
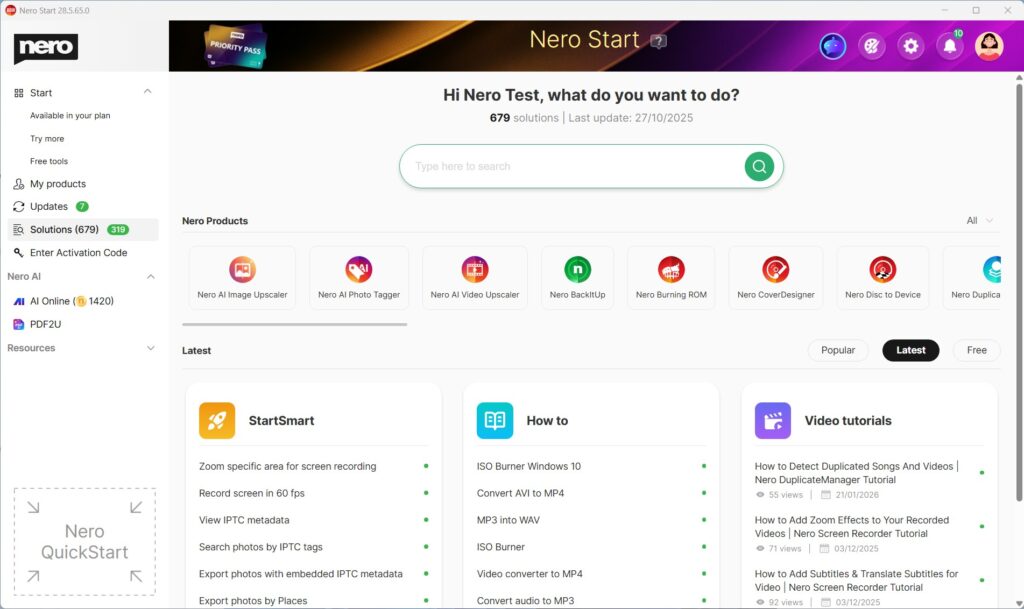
Solutions helps you complete common tasks by offering three types of help in one place:
StartSmart – Guided use cases that take you directly into the right Nero app to start your job.
How to – Step-by-step help articles for detailed instructions.
Video tutorials – Short videos that show the workflow.
When you search for a use case, Solutions can show all three (StartSmart + How to + Video tutorials) so you can choose what works best for you.
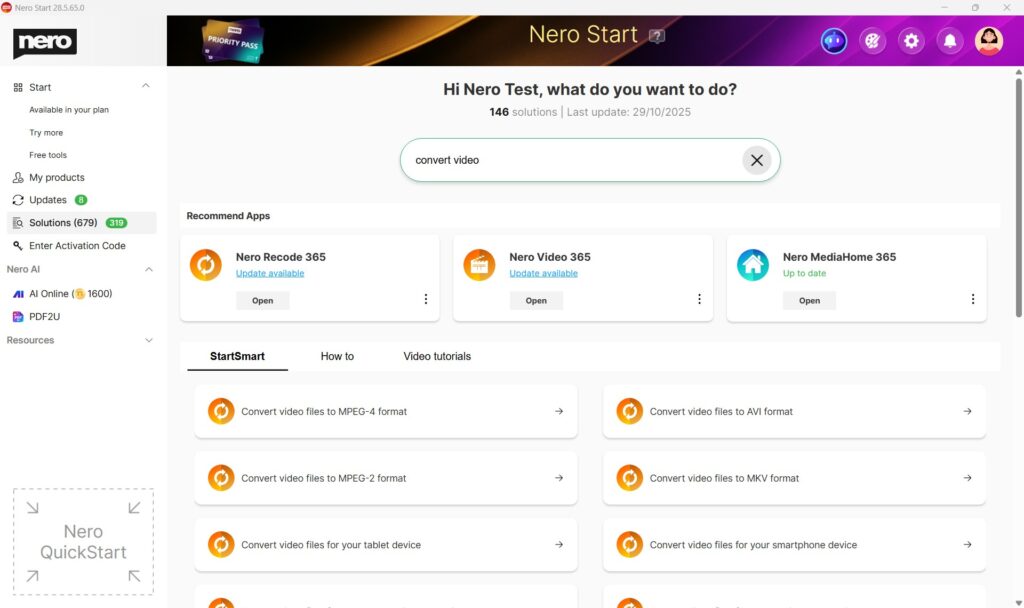
Find what you need with Search
Open Nero Start.
Go to Solutions.
Use the Search field.
Type what you want to do (e.g. convert video, rip CD, backup, edit)
Review results across:
StartSmart (start immediately),
How to (read steps),
Video tutorials (watch a demo).
Select the result you want.
Tip: The most relevant results are always listed at the front.
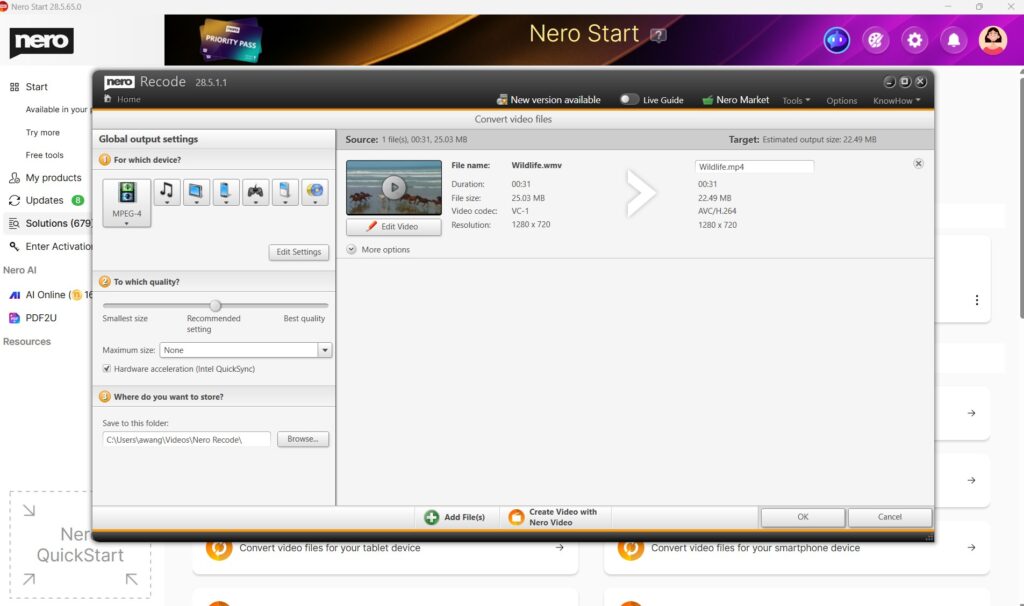
Use StartSmart to start a task right away
Open Nero Start > Solutions.
Choose a use case from StartSmart that matches your goal.
Select Open (or Install if the required app isn’t installed).
Follow the guided steps to begin.
Use “How to” for step-by-step instructions
Open Nero Start > Solutions.
From How to, choose an article for your use case.
Follow the instructions in the article.
Use Video tutorials to learn by watching
Open Nero Start > Solutions.
From Video tutorials, click a topic
You can start the watching of video demo.
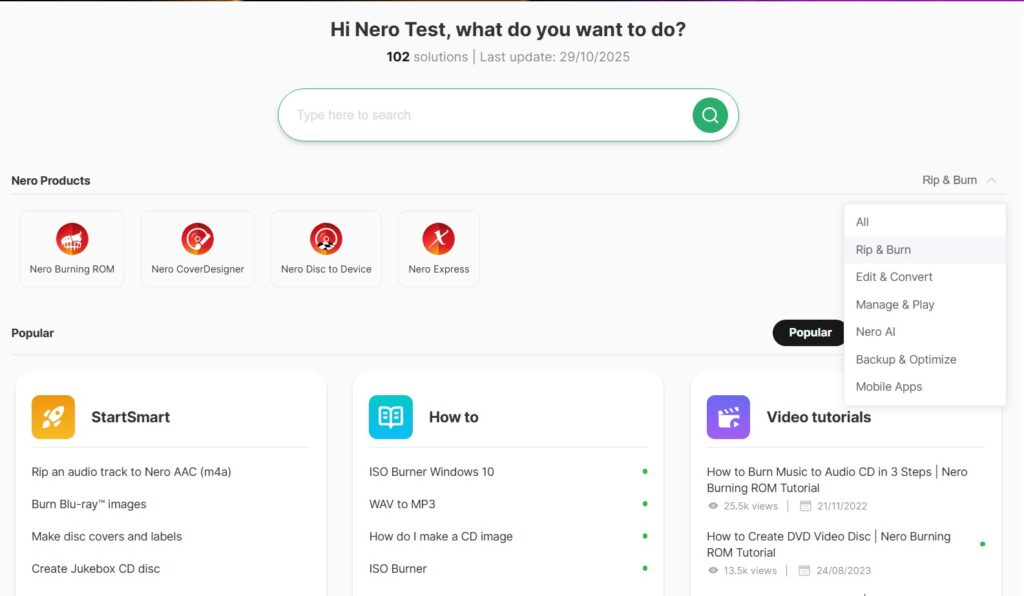
Refine results with Filters and Sorting
Apply filters
Open Solutions.
Select Nero Product Category
Or select a dedicated product
Change sorting
Open Solutions.
Select Popular, Latest or Free.
Solutions will list all info based on your requirement.
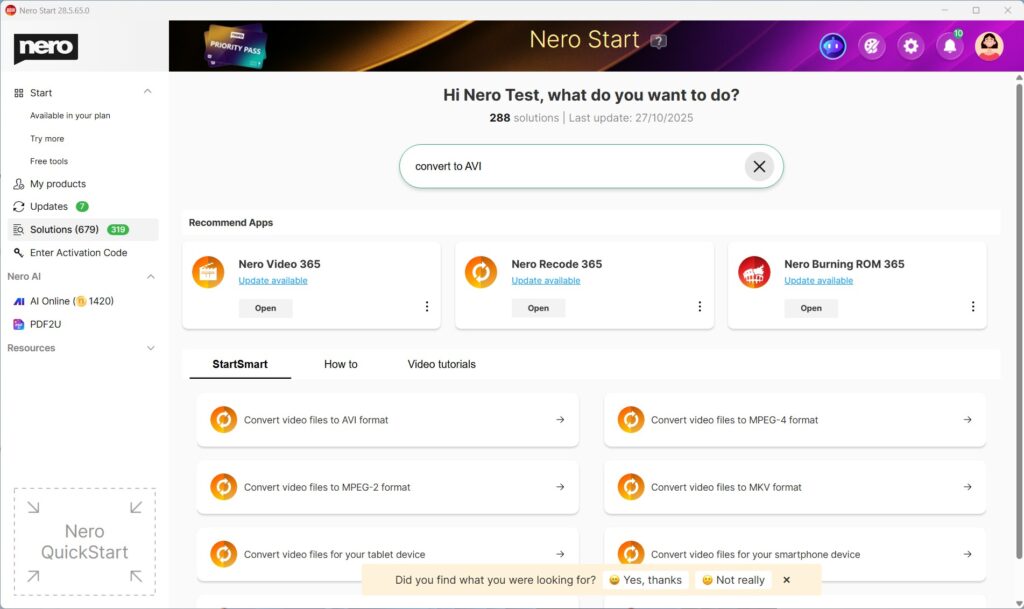
Troubleshooting
I can’t find what I need in Solutions
Try a simpler keyword (e.g., “convert” instead of “convert MP4 to AVI”).
Clear filters and search again.
In the feedback area, just feel free to submit what case you were looking for to Nero – we will collect your feedback and make improvements in future updates.
StartSmart doesn’t open the app
Make sure the required Nero app is installed.
If prompted, select Install and try again after installation.
Applies to: Purchases made directly on www.nero.com where the payment was processed by 2Checkout.
No activation code is required for these purchases. Your product is automatically added to your Nero Account. Signing in unlocks the product.
1) Do I need an activation code?
No. If you purchased your Nero product directly from www.nero.com via 2Checkout, you will not receive an activation code. The purchase is linked to your Nero Account automatically.
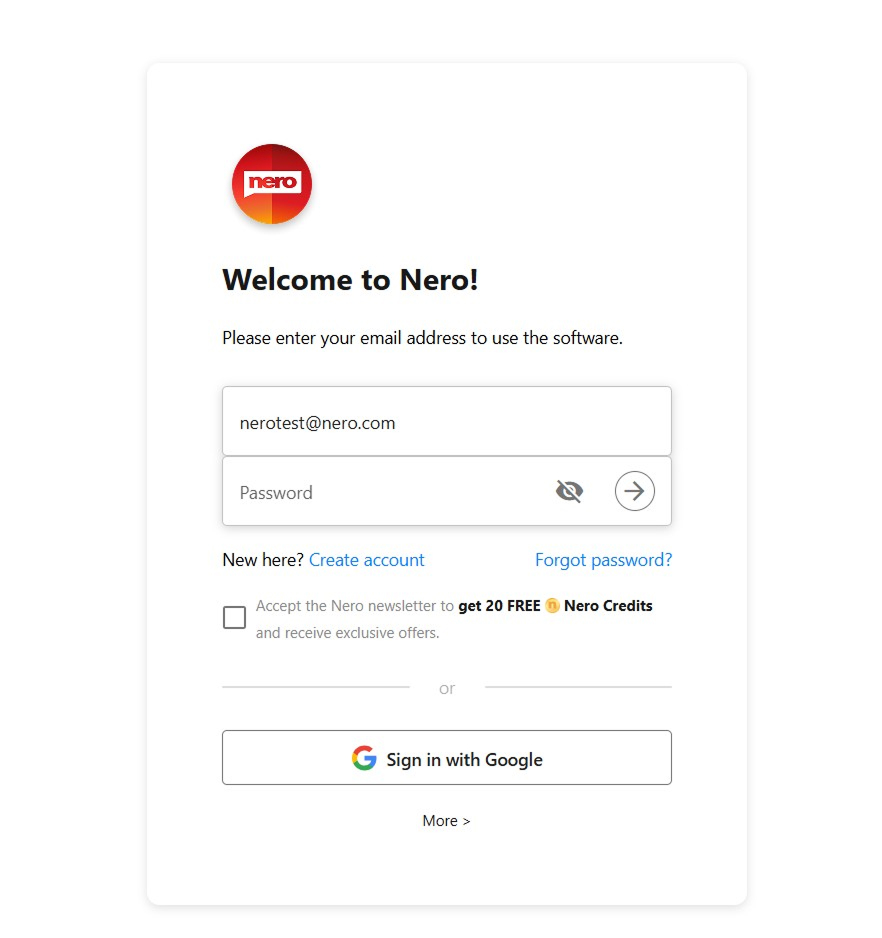
2) Which email address should I use to sign in?
Use the email address you entered during checkout on www.nero.com. A Nero Account is created automatically with that email address, and your product is added to it.
3) Where do I find my password?
Your initial password is sent to you by email after purchase. If you cannot find it, check your spam/junk folder and then use the “Forgot password?” / “Request password again” option on the sign-in screen.
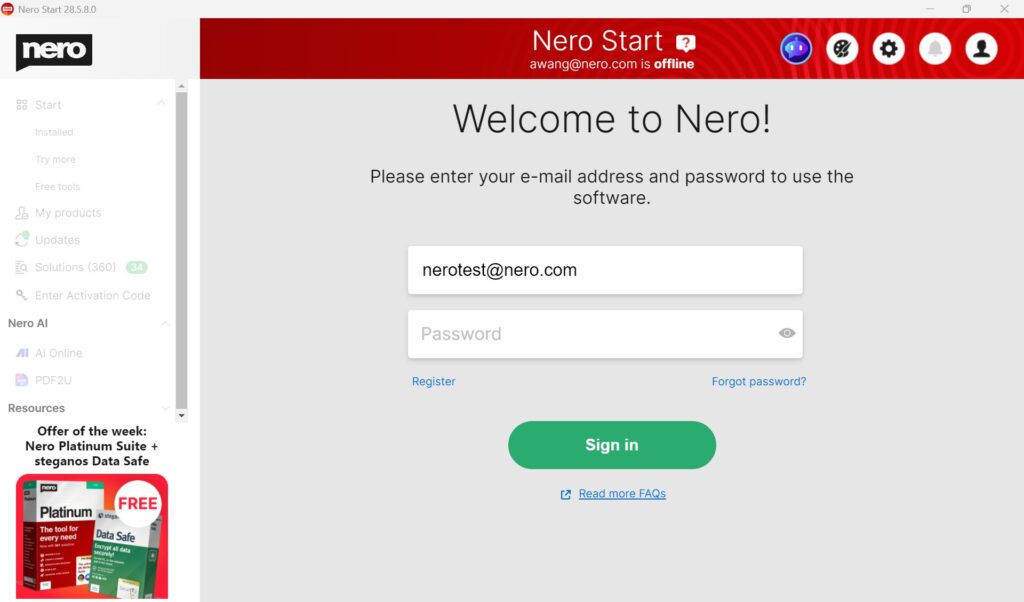
4) How do I unlock the product?
Follow these steps:
Install the product.
You can download the installer from your purchase email.
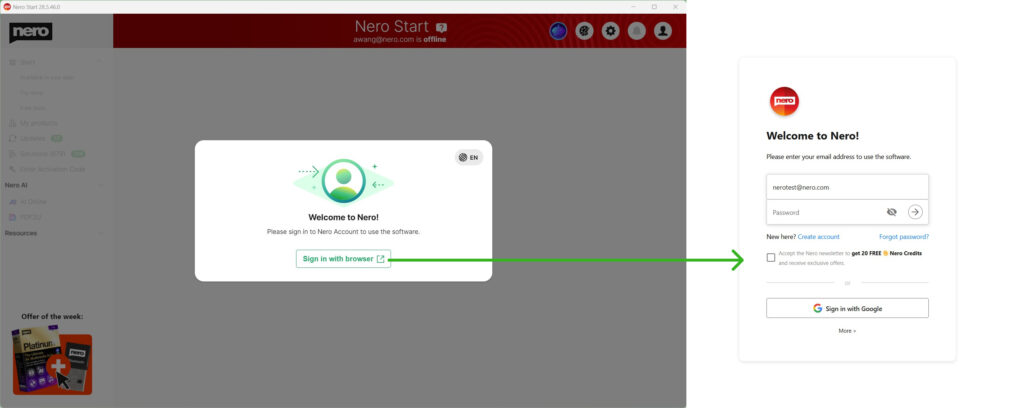
Open Nero Start.
Enter the email address you used during checkout.
Enter your password. If needed, select “Forgot password?” / “Request password again”.
After you sign in, the product unlocks automatically.
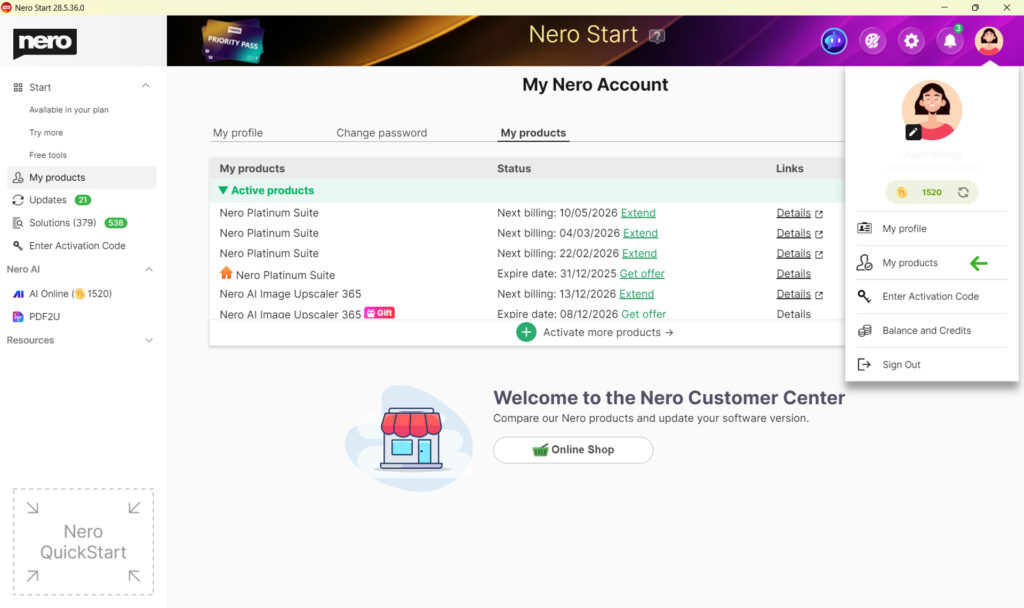
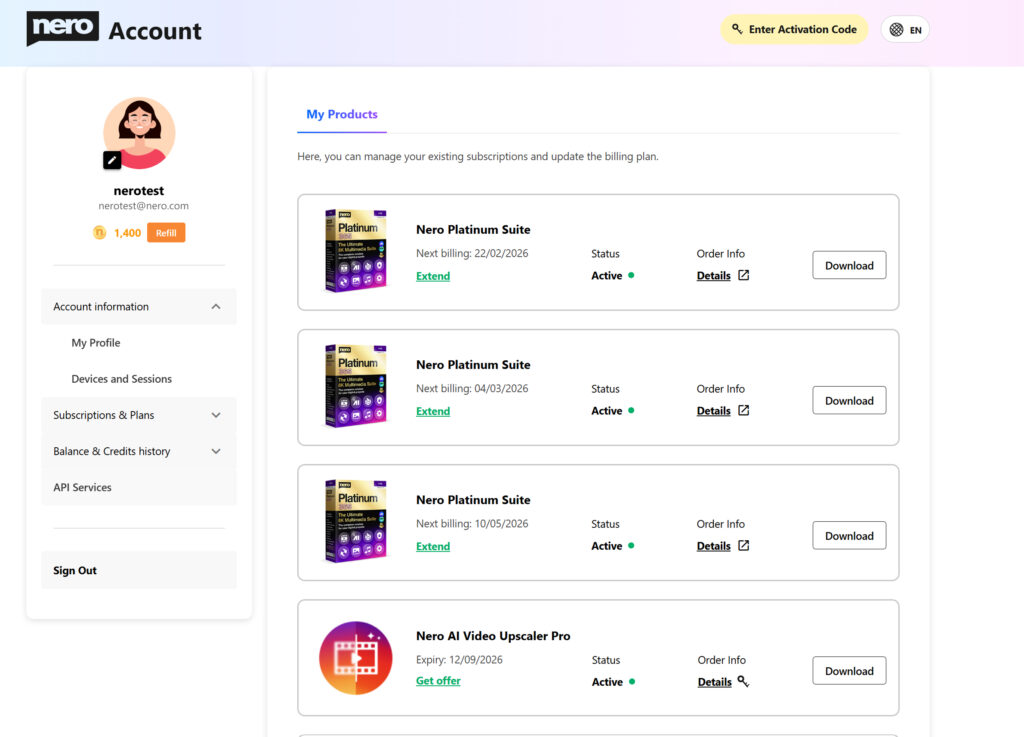
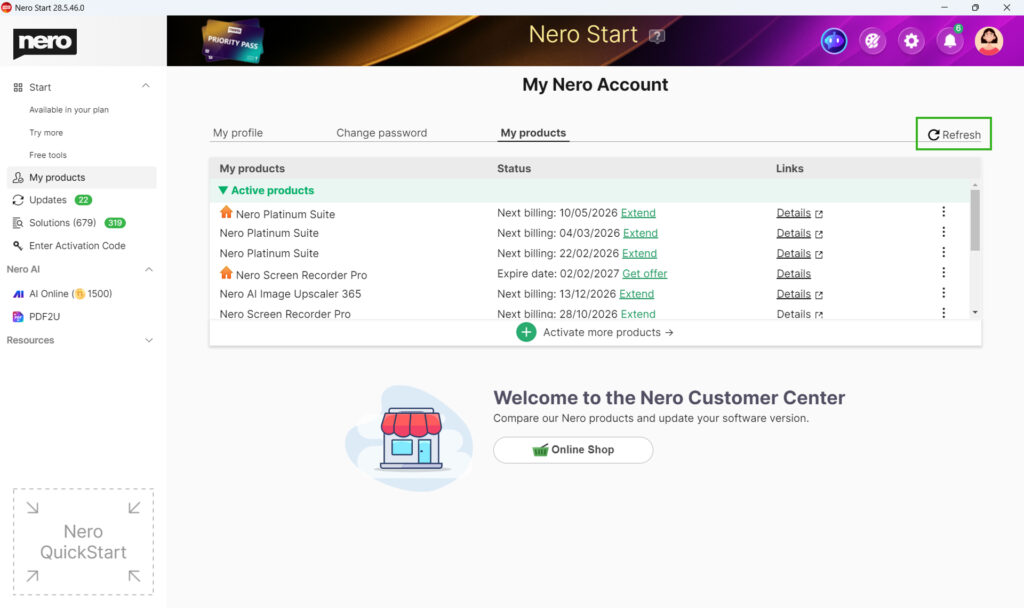
To confirm, go to Account > My products. Your purchased product should be listed there.
Example: Nero Start sign-in screenExample: Nero Start online sign-in screenExample: Account > My products (product listed after sign-in)
Troubleshooting
I did not receive the password email.
Check spam/junk folders and search your mailbox for “Nero” and your order confirmation. Then use “Forgot password?” / “Request password again” on the sign-in screen.
I’m not sure which email address I used at checkout.
Use the same email address that received the order confirmation from www.nero.com / 2Checkout. Try any alternative email addresses you may have used for the purchase.
The product is still locked after I sign in.
Confirm you signed in with the purchase email address, and check Account > My products. If the product is not listed, sign out and sign in again. If the issue continues, contact Nero Support and include your order information.
I see an “Enter Activation Code” item.
For nero.com purchases via 2Checkout, you do not need an activation code. Ignore this option and unlock the product by signing in to your Nero Account.
Note: If you purchased Nero from a retailer, reseller, or as a boxed product, activation may work differently and an activation code may be required. You will find more information at below article:
Applies to: Purchases from Amazon, eBay, software stores, or other retailers/resellers (not purchased directly on www.nero.com via 2Checkout).
Key point: You need an activation code. Sign in (or create) a Nero Account and redeem the activation code to unlock the product in that account.
FAQ
1) Do I need an activation code?
Yes. Retailer/reseller purchases are activated with an activation code. You will receive the code on a product card, on a receipt, or in an email from the retailer. Keep the code in a safe place.
2) Where do I find the activation code?
On the product card included with the product (printed or scratch-off).
In your retailer confirmation email (digital delivery).
On the receipt or invoice from the retailer (physical purchase).
3) How do I download the installer?
Follow the instructions on the product card or in the retailer email.
4) Do I need a Nero Account?
Yes. The activation code must be redeemed in a Nero Account. Use the account where you want the product to be listed under Account > My products.
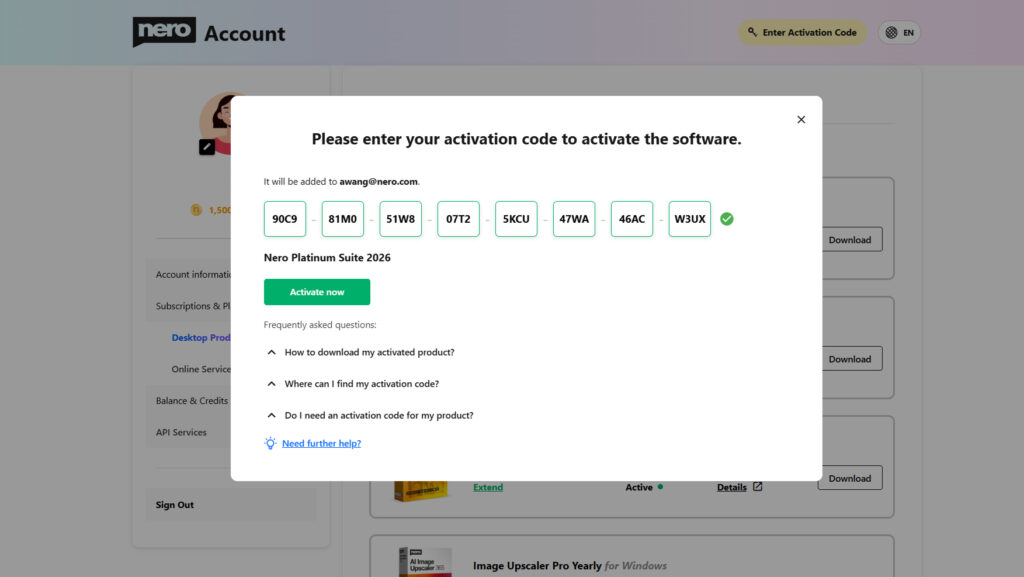
Sign in to your Nero Account. If you do not have an account, create one first.
Enter your activation code and follow the on-screen instructions.
Example: online product activation page
Example: online product activation
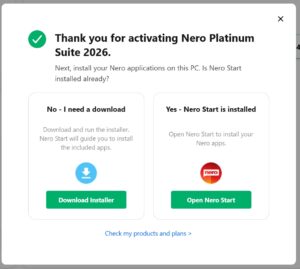
4. If Nero Start is already installed (recommended path):
Example:product activated
Open Nero Start from your desktop (or Start menu).
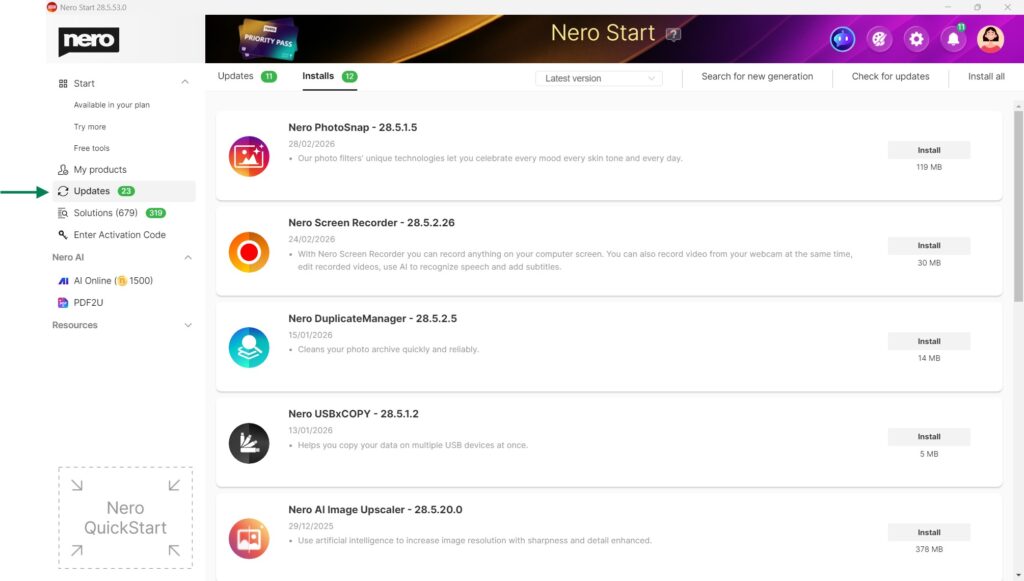
If sign in is required, sign in with the same Nero Account used in Step 2.
Follow the on-screen instructions in Nero Start to install or update the product applications.
If Nero Start is not installed
Download the installer offered after activation (or via the link on the product card/retailer email).
Run the installer to install Nero Start and the product applications.
Launch Nero Start and sign in with the same Nero Account used in Step 2.
For some products, follow the guide in Nero Start to install or update the product applications.
To confirm, go to Account > My products. Your activated product should be listed there.
Example: my products list
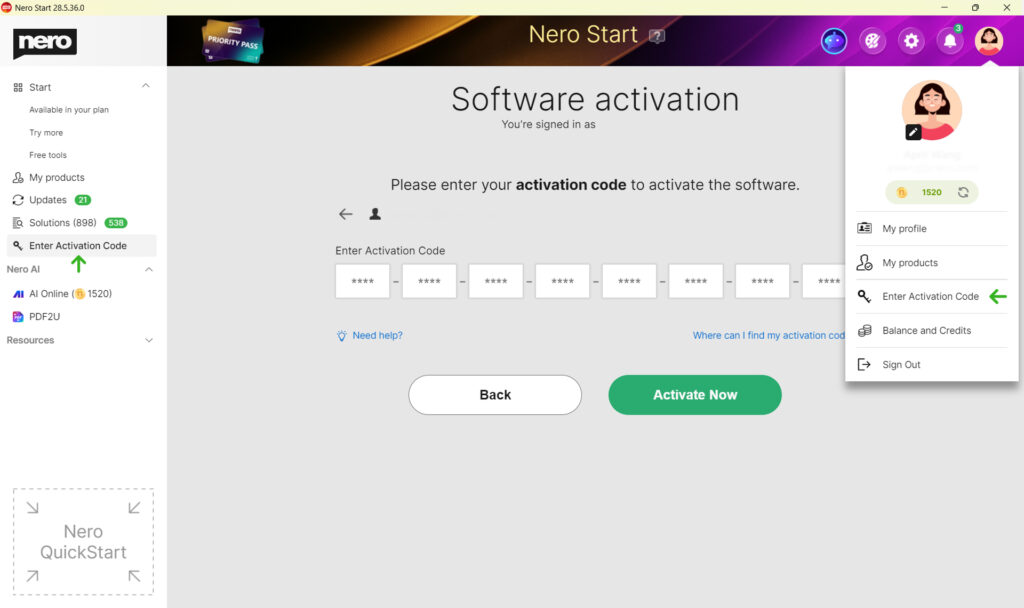
Option B: Activate in Nero Start
Install the product using the installer from the product card / retailer email.
Launch Nero Start.
Sign in the Nero Account where you want to add the product (or create an account).
Select Activate software or ‘Enter Activation Code’ from left pane / Nero Account.
Example: Enter Activation Code
Enter the activation code exactly as shown and confirm.
After activation, the product should unlock automatically.
How to confirm activation
To confirm, go to Account > My products. Your activated product should be listed there.
Example: Nero Start > My Nero Account > My products (product listed after sign-in)
Troubleshooting
My activation code is not accepted (invalid / already used).
Double-check the code for typing errors.
If the code has already been redeemed, it cannot be used again. Confirm you are signing in to the intended Nero Account.
If the problem continues, contact the retailer first (for code issues) or Nero Support and include your proof of purchase and the activation code.
I cannot find my activation code.
Check the product card packaging and any inserts that came with the product.
Search your email for the retailer confirmation and digital delivery details.
Check the receipt or invoice from the retailer.
If the code is missing, contact the retailer/reseller to request a replacement code.
I activated the code in the wrong Nero Account.
Activation codes are linked to the Nero Account used during redemption. If you redeemed the code in the wrong account, sign in to the account that was used and check Account > My products. You also can change your account email.
If you need help, contact Nero Support with your proof of purchase and the activation code.
The product is still locked after activation.
Confirm you are signed in to the same Nero Account that you used to redeem the activation code.
Go to Account > My products and verify the product is listed.
Sign out and sign in again in Nero Start, then restart the application.
Make sure your device is online during activation and sign-in.
I forgot my Nero Account password.
Use the Forgot password option on the sign-in screen to reset your password.
Note: I purchased directly from www.nero.com.
If you purchased directly from www.nero.com via 2Checkout, you do not need an activation code. Unlocking is done by signing in with the purchase email address. You will find more information at below article:
1) Do I need to download the installer?If your product is Nero 2021 or newer and Nero Start is already installed, you usually do not need a separate installer. Nero Start can download, install, and update the included applications for you.
You need to download an installer if:
Nero Start is not installed on your PC.
You are using an older Nero version that does not support installation via Nero Start.
If you only want to download the installer of Nero Start, please get it here.
Sign in with the correct Nero Account (the one used for purchase/activation). Then check Account > My products in Nero Start and refresh. If the product still does not appear, contact Nero Support and include your order/activation details.