What’s new in Nero Motion Tracker

The latest update of Nero Motion Tracker allows the application to be run outside Nero Video separately which gives you the best freedom to track objects without minding the timeline editing.

Auto face tracking

One of the exciting new features in Nero Motion Tracker is the Auto Face Tracking. With this feature, the motion tracker can automatically detect and track faces in a video. This is especially useful for video editing and surveillance purposes. The Auto Face Tracking feature uses advanced algorithms to accurately identify and follow faces, ensuring that the captured footage is focused on the right subjects. Whether you’re a content creator or a security professional, the Auto Face Tracking feature in Nero Motion Tracker will greatly enhance your workflow.

Add text and clip art

The latest update of Nero Motion Tracker includes the exciting new feature of adding text and clip art to your videos. Now you can easily enhance your videos with stylish text overlays and fun clip art elements. Whether you want to add a catchy title, include captions, or simply decorate your footage with creative graphics, Nero Motion Tracker has got you covered. With a wide range of fonts, colors, and clip art options to choose from, you can unleash your creativity and make your videos truly stand out.

Nero KnowHow 00321

What’s new in Nero Recode

Better Quality, Faster Speed

In the latest update of Nero Recode, we have made significant improvements to the video encoding process. Our engineers have developed advanced algorithms that ensure better video quality while maintaining faster encoding speeds. Now you can enjoy high-quality videos without sacrificing time. Whether you’re converting videos for playback on your mobile device or creating a digital archive of your favorite movies, Nero Recode has got you covered.

Support for Adding Subtitles to Videos

In addition to the improvements in video encoding, the latest update of Nero Recode now includes support for adding subtitles to your videos. Whether you want to add captions for better accessibility or include translations for international viewers, Nero Recode makes it easy. With a simple and intuitive interface, you can import subtitle files in various formats and customize their frame rate and delays. Now, you can enhance your videos with subtitles and make them more engaging and inclusive.

Difference between soft and burn-in subtitles

Subtitles are a great way to enhance your videos, but it’s important to understand the difference between soft and burn-in subtitles. Soft subtitles are separate files or embedded text streams that can be turned on or off by the viewer. They are typically used for adding captions or translations to videos. On the other hand, burn-in subtitles are permanently embedded into the video itself and cannot be turned off. They are commonly used for videos that need to be shared on platforms that don’t support separate subtitle files. Nero Recode supports both types of subtitles, giving you the flexibility to choose the best option for your videos.

Nero KnowHow 00320

What’s new in Nero PhotoSnap

Enhance your photos with powerful tools

Nero PhotoSnap is proud to present its latest update, packed with exciting new editing features. Now, you can take your photo editing skills to the next level with advanced tools like AI-powered auto-enhancement, professional-grade filters, and precise color adjustments. Whether you’re a beginner or a seasoned photographer, these tools will help you transform your photos into stunning works of art. Stay tuned for more details on how to make the most of these new features!

Add Text and Clip Art to Your Photos

In the latest update of Nero PhotoSnap, we are excited to introduce our new text and clip art features. Now you can easily add text and clip art to your photos, allowing you to personalize and enhance your images in creative ways. Whether you want to add captions, quotes, or decorative elements, our tools provide you with a wide range of fonts, styles, and clip art options to choose from. With just a few clicks, you can transform your photos into unique and visually appealing compositions. Stay tuned for more tips and tricks on how to make the most of these exciting features!

Applying LUT to your photo

With the latest update of Nero PhotoSnap, you can now take your photo editing skills to a whole new level by applying LUTs (Lookup Tables) to your photos. LUTs are powerful tools that allow you to quickly and easily change the look and feel of your images. Whether you want to give your photos a vintage film look, a cinematic color grade, or a trendy Instagram filter, the LUT feature in Nero PhotoSnap has got you covered. Stay tuned for more tips and tricks on how to make the most of this exciting new feature!

Nero KnowHow 00319

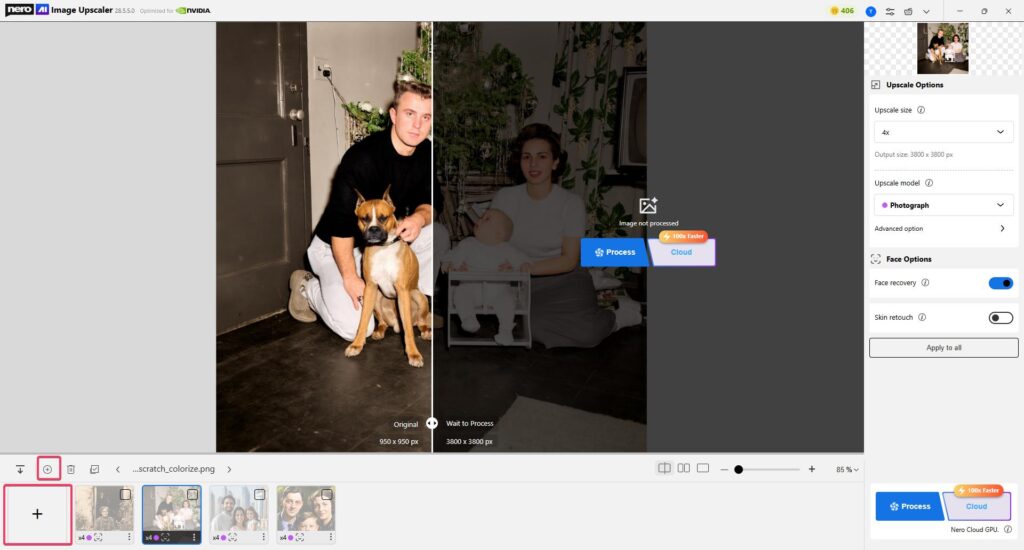
Upscale images with cloud GPU acceleration⚡

We are pleased to announce that the latest version includes an online engine mode. Users can now upscale images faster than ever before, thanks to the acceleration provided by the cloud server GPU.

What is the online engine mode?

This mode refers to the integration of a web service engine within the AI Image Upscaler Windows Desktop App to handle the process of image upscaling.

Therefore, images will be uploaded to the server for processing. Rest assured that your precious pictures will not be stored after processing. Our server will promptly and securely delete your uploaded data, ensuring that there is no risk of your valuable information being exposed. We prioritize your data privacy and are fully committed to protecting it.

Why do we need the online engine mode?

The speed of AI image upscaling greatly depends on the performance and power consumption of the GPU.

Expensive GPU

In recent years, due to the influence of Bitcoin and AI-Generated Content (known as AIGC), the prices of graphics cards have skyrocketed. Not all users can afford to equip their desktop computers with high-performance graphics cards.

Even if your desktop computer at home has a good graphics card, you may still have to endure long waits caused by the lack of a dedicated graphics card while traveling on business trips.

travel and work with laptop

No more errors, hardware issues, quality compromises, or long loading times! That’s why the online engine mode is introduced.

Can I use the online engine mode for free?

First of all, the online mode is not a free service. It requires consuming credits from your account to enable its usage. Generally, it takes 1 credit to upscale one image.

Secondly, you need to have Pro version privileges. You can upgrade your entitlement through In-App purchases or online purchases.

If you have subscribed to our Platinum Suite 1-Year License (known as the Nero Platinum Suite 365), congratulations, you can log in to your Nero Account to obtain your entitlement.

How to use the online engine mode?

  1. Run the app.

    Run the app
    Run the app
  2. Import the image.

    Import image
    Import image
  3. In the AI model selection section on the right side of the settings panel, you can click on the mode options and select Online mode.

    select online mode
    Select online mode
  4. Click on Start to begin.
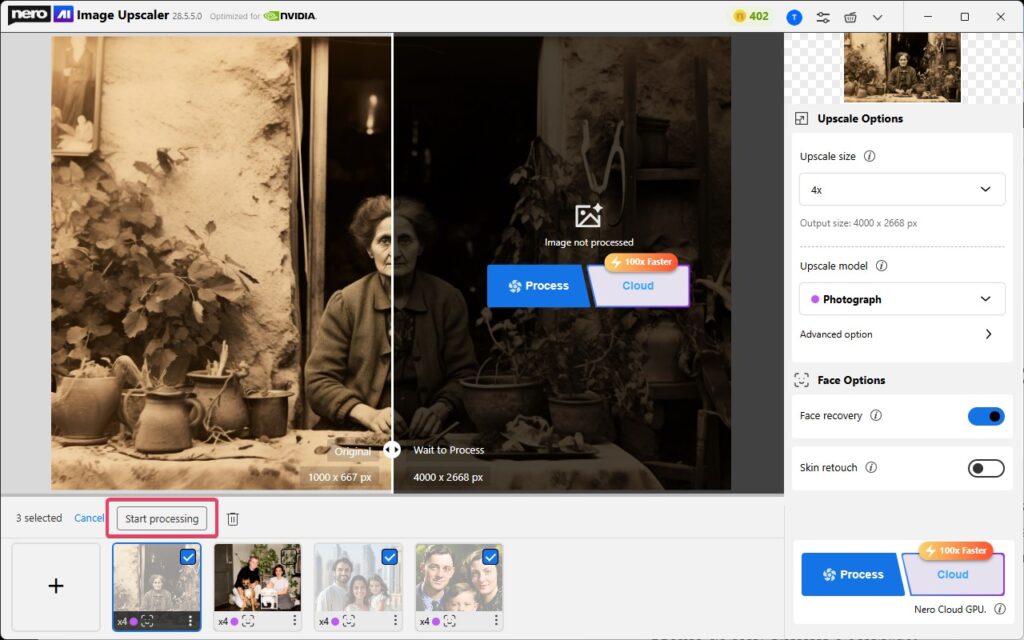
    Select AI model and click [Start processing]
    Select the AI model and click [Start processing]
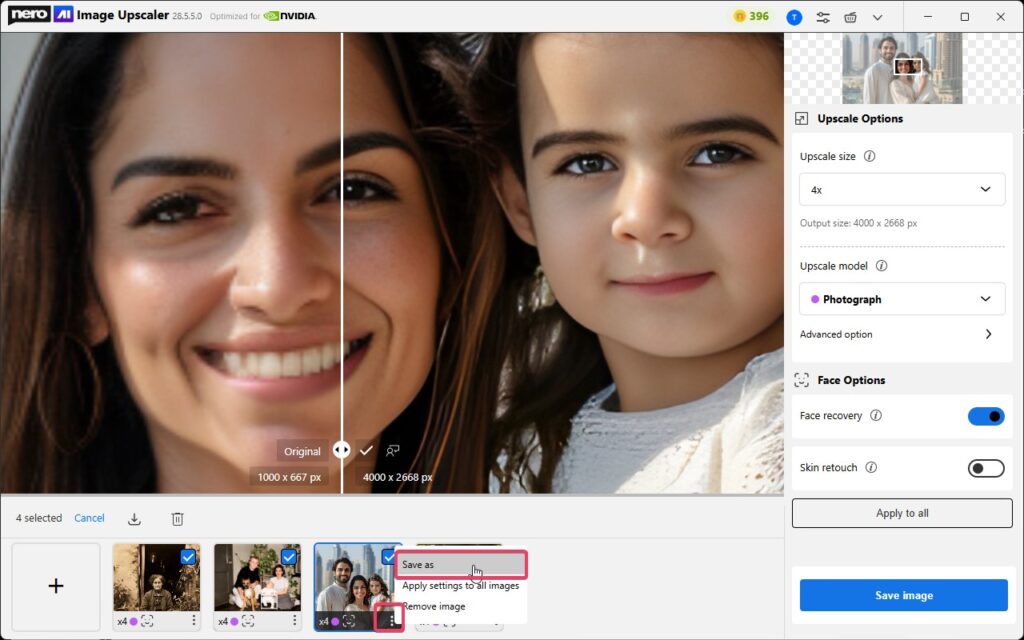
  5. Don’t forget to save the result.

    Save the result
    Save the result

Additionally, you can also set the preferred engine mode as Online mode and specify the default model within the preferences settings. Turn on the switch for automatic start.

Preferred engine, model and auto-start
Preferred engine, model and auto-start settings

Simply import the image without clicking the Start button, and the app will automatically perform the image upscaling task.

What should be considered?

First, you need to have an internet connection.

Second, you need to have the Pro version privileges.

Third, you need to have enough credits.

Fourth, you need to agree on the Privacy Policy and EULA.

Finally, once the task is processed successfully, please save the images to your local storage promptly.


Nero KnowHow 00318

Nero Start release notes – 25.5.81.0

This release includes some user experience improvements and bug fixes.

Improvement

Jump into your use case just in 2 steps!

Back from vacation, are you still struggling about how to make a video with so many pictures and videos?

Follow the introdution below to create a vacation video just in 2 steps!
Jump into your use case just in 2 steps

Not only creating video automatically, but also other use cases, now, from Nero Start > Solutions, you can jump into your use cases just in 2 steps


Nero KnowHow 00317

Nero の体験版にはどのような制限がありますか?

Nero の体験版はインストールした日から 15 日間お試しいただけます。

Nero の体験版では AVCHD オーサリングと再生、MPEG-4 および BD-AV フォーマットはご利用いただけません。また、書き込み機能の一部も制限されています(最大100MBまたは30秒)。

体験版のスタート画面から、製品版をご購入いただくこともできます。購入後はシリアル番号を入力するだけで製品版としてお使いいただけます(追加コンテンツのダウンロードが必要な場合があります)。

体験版から製品版に移行する場合は、ご購入いただいた製品版のシリアル番号を Nero ControlCenter に入力してください。

Add serial EN 00001_2

チュートリアルビデオで、製品の使い方などをご紹介しています。

Nero KnowHow 00014

Nero の既存のコピーが残っていても Nero の体験版をテストできますか?

はい。

旧バージョンをお使いの場合も、体験版をインストールしてお試しいただけます。体験版をアンインストールしてもお使いの旧バージョンの設定などが変更されることはありません。

Nero の体験版は以下のウェブサイトからダウンロードできます。
http://www.nero.com/downloads.html

体験版から製品版に移行する場合は、ご購入いただいた製品版のシリアル番号を Nero ControlCenter に入力してください。

Add serial EN 00001_2

チュートリアルビデオで、製品の使い方などをご紹介しています。

Nero KnowHow 00015

Nero のソフトウェアを複数台の PC にインストールすることはできますか?

一つのシリアル番号で複数台の PC に Nero をインストールすることはできません。複数台の PC で Nero をお使いいただく場合は、台数分の製品をご購入ください。

詳しくは エンドユーザー使用許諾条項 をお読みください。

Nero KnowHow 00016

シリアル番号が入力できません。

シリアル番号の入力に問題がある場合は、以下をお試しください :

Nero ControlCenter を起動し、「シリアル番号」タブから、インストールされている製品を確認してください。Add serial EN 00001_1

お持ちのシリアル番号に対応した製品がインストールされていることを確認してください。

Nero ControlCenter の「アップデート」タブから、製品を最新バージョンにアップデートしてください。

Nero ControlCenter に再度シリアル番号を入力してください。

その場合入力間違いがないかどうか再度確認してください。

例えばお使いのシステムに旧製品のみがインストールされている場合、Nero 2017 のシリアル番号は入力できませんのでご注意ください。

Nero 2017 の体験版をお使いいただいている場合は、ご購入いただいた Nero 2017 のシリアル番号を Nero Control Center から入力することで、製品版の機能がお使いいただけるようになります。Add serial DE 00001_2

チュートリアルビデオで、製品の使い方などをご紹介しています。

Nero KnowHow 00017

How to Use 1001TVs to Enable the Android 13 Pixel Exclusive Features Already Today on Your Non-Pixel Phone

Tips: the latest posts has been migrated to new website: https://1001tvs.com

Have you been feeling bothered that your non-Pixel phone cannot follow the Google update closely to experience the latest Android 13 new features? Do you know that you actually can easily enjoy the new Android 13 Pixel exclusive features by using the 1001TVs? This blog will show how you can use 1001TVs as your reachable access to help you enjoy the Android 13 Pixel exclusive feature without waiting.

1.Android 13 Overview— things you need to know

Android 13 tiramisu

On June 9th, Google released Android 13 Beta 3 and announced that it has reached the “platform stability” status. This indicates that Google has locked down the main updates for Android 13.

According to Google’s schedule, Android 13’s final release will be unveiled sometime in Q3 2022.

Android 13 timeline

The release timeline for Android 13. Source: Google.

In the Beta 3 version, all application-oriented behavior and APIs are in their final version. For developers, this means that apps can be prepared for launch. For users, it means that there won’t be many changes after that from a feature or user interface change perspective.

Android 13 brings privacy features like new notification permissions and the photo picker, as well as productivity features like themed App icons, HDR video, Bluetooth LE Audio, and MIDI 2.0 support via USB, etc.

2.A new feature of Android 13— Tap to Transfer

In addition to the new features mentioned above, reportedly, there is also a possible new Android 13 feature called the “Tap to Transfer” system. It appears to be focused on transferring media controls between devices.

For example, users could theoretically start a playlist on their phone and then pass it to another phone, passing control from one’s phone to the smart speaker, tablet, TV, or any other smart device.

According to the media sources, this “Tap to Transfer” feature will display chip notifications with some contextually useful information when a user is playing media on a local media cast sender device (e.g., your Android phone), and it gets close enough to a media cast receiver device. As we can read in the now released pictures, the first part of this feature is to put a message telling users to “move closer” to the device they want to transfer media to, and then it shows a message while connecting to that other device. After connecting, the message changes to include an “undo” button to bring playback back to your device. The avatar icon seen on the message in the screenshots below will instead show the App being used when the functionality is adequately used.

9to5 Google screenshot

screenshots from 9to5google, Here’s what Android 13’s ‘Tap to Transfer’ feature looks like

Android police screenshot

screenshots from Android Police, Android 13: Everything we know about Google’s next big release

So far, we’ve only got our hands on some non-functional demo process created by Google, and the new feature right now can only be experienced in those devices that qualify for the Android 13 Beta program, and still appears to be in development. So, is there any chance for those who are not able to implement this feature? In other words, how can I get the Pixel exclusive feature on my phone?

The answer is yes! You definitely can! By using 1001TVs, all models of Android phones can easily transfer media between different devices.

3.Try the Streaming function of 1001 TVs

For the non-Pixel phones, enjoying the experience of media files traveling between different terminals is also possible. For instance, we can use 1001TVs to stream media files from your phone to smart TV.

Step 1: Open “1001 TVs” and enter the “Streaming” page.

streaming step 1

Then you can choose to mirror Photo, Video, or Music.

Mirror Photo – Tap the Play button to automatically play the next photo. Modify the picture play interval on the Settings page.

Mirror Video – Long press to select multiple videos, automatically play the next selected video, and support mirroring sound.

Mirror Music – Support for sound mirroring.

Step 2: Select the media file you want to play on your phone (e.g. a piece of music), then select the target smart TV you need to connect to from the list of devices.streaming step 2

Since most smart TV and TV boxes currently on the market support the DLNA protocol, once it connected to the same network with the phone, they can be reached automatically.

After successfully connecting, you can enjoy the streaming media files from your phone on the smart TV terminal, and you can synchronize the control on your phone for both devices!

streaming music success image-1


1001TVs is open to users of any operating system, you are highly welcome to download the 1001TVs on your no-Pixel phone or any other smart device.  Plus, if you have further interest, you can also visit Nero’s official website for a deeper and multi-dimensional software experience with our products!