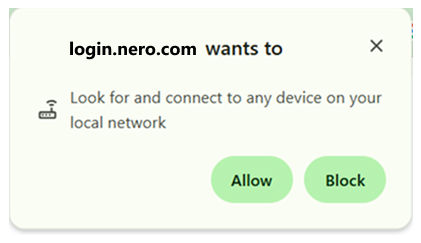
Why do I see a “Local network access” permission request?
When you sign in or sign out, the login page must send the “signed-in”/“signed-out” result back to Nero Start on the same PC (via a local connection such as localhost). Some browsers show this as ‘Look for and connect to any device on your local network‘ (or similar wording).
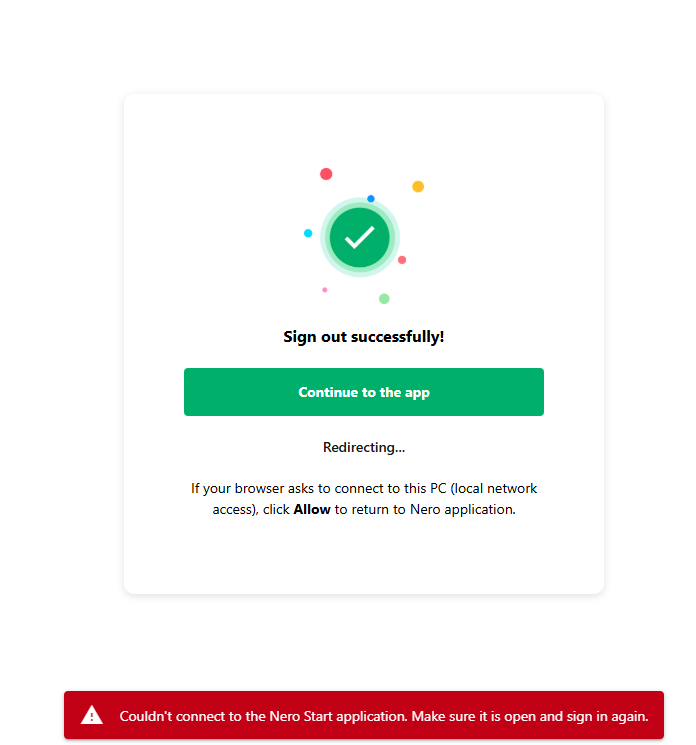
What happens if I block it?
If this permission is blocked, the browser cannot return the sign-in result to Nero Start, and the login may fail (for example: “Couldn’t connect to the Nero Start application…”).
Is it safe to allow?
Yes. This permission is used only to hand over the sign-in status to Nero Start on your device. It is not used to access your files.
How to allow it (Chrome, Edge, Firefox, and other browsers)
The setting name may vary by browser. Look for permissions related to Local network access, local connections, or connecting to this device/PC for https://login.nero.com/ .
Method A: Allow it when the browser asks
-
Start the online login from Nero Start.
-
When your browser asks for permission to connect to this PC / local network access, select Allow.

-
Return to Nero Start and complete sign-in.
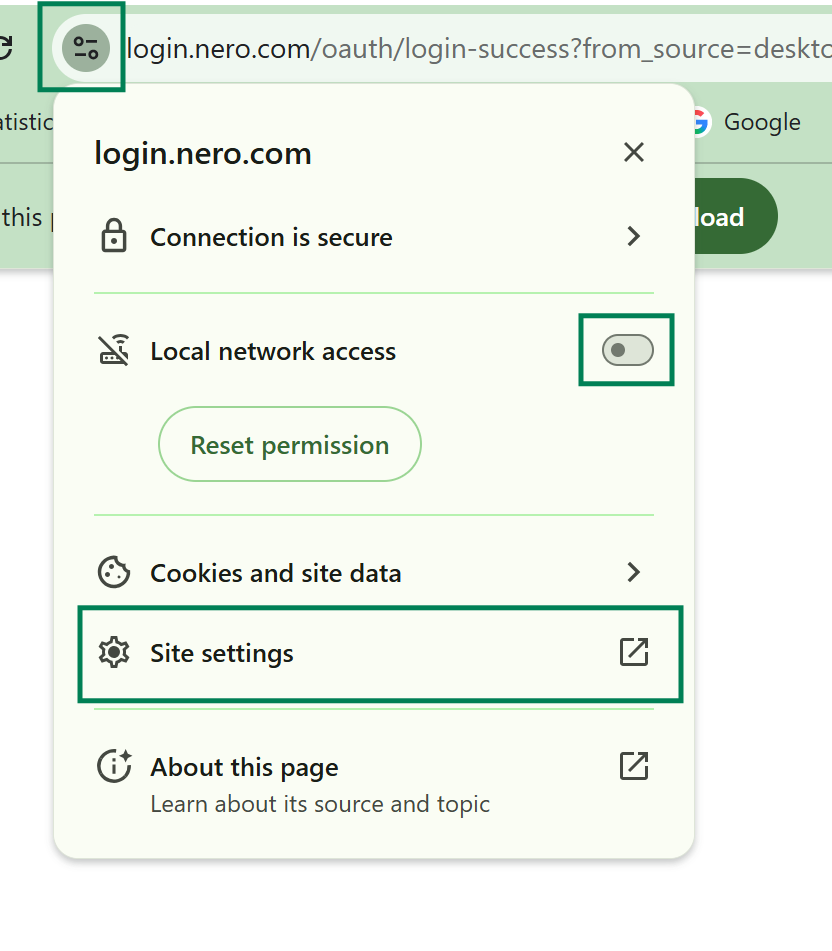
Method B: Change it in the settings of login.nero.com (if you previously blocked it)
-
In the Nero Account Login page which you got the error info, open your browser Settings.
-
Enable ‘Local network access‘ directly
-
Or clicking ‘Site Settings‘ and scrool to the bottom to find ‘Local network access‘(or equivalent), and set it to ‘Allow‘.

-
Close the settings tab, then return to Nero Start and sign in again (keep Nero Start open).
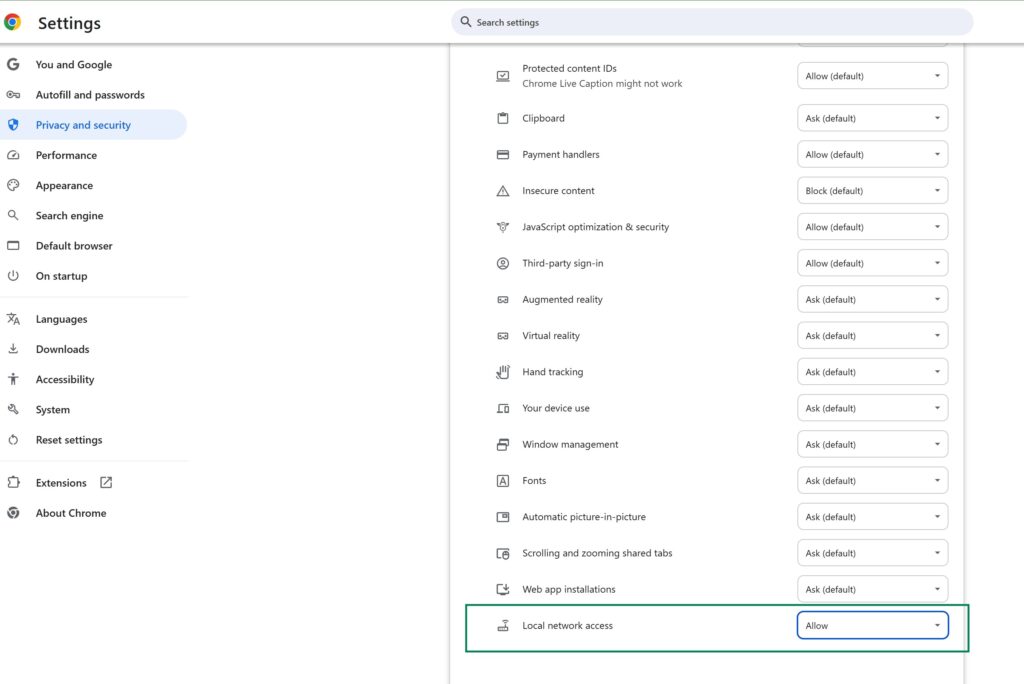
Method C: Change it in your browser site settings (if you closed login.nero.com)
-
Open your browser Settings.
-
Go to Privacy & Security (or Site permissions / Site settings).
-
Find site permissions for
https://login.nero.com/. -
Locate Local network access (or equivalent) and set it to Allow.
-
Close the settings tab, then return to Nero Start and sign in again (keep Nero Start open).
Quick checklist if it still fails
-
Keep Nero Start open while signing in.
-
After changing the permission, back to Nero Start and sign in again.
-
Contact Nero Support(feedback@nero.com) for further help.