Ja, dies ist mit einem Workaround möglich. Standardmäßig unterstützt Nero Video keine benutzerdefinierten Menüs, die mit Nero Vision in Nero 9 erstellt wurden. Führen Sie als Workaround die unten aufgeführten Schritte aus. Dies sollte auch mit selbst erstellten Menüs aus Nero Vision Xtra (Nero 10) funktionieren.
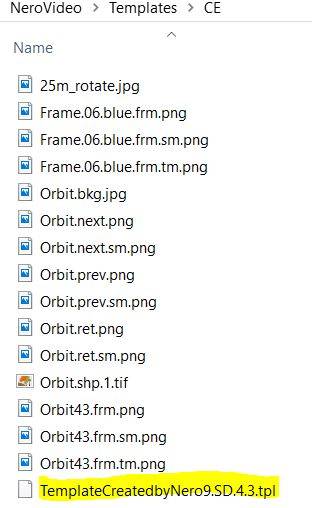
Kopieren Sie Ihr individuelles Disc-Menü von Nero 9 im Ordner „C:\Users\<User>\Documents\NeroVision\Templates\CE“ nach „C:\Users\<User>\Documents\NeroVideo\Templates\CE“, das für Nero Video 2019 verwendet wird.
1. Navigieren Sie zu den einzelnen Ordnern des Disc-Menüs und suchen Sie eine Datei mit der Erweiterung „*.tpl“. (im folgenden Beispiel im Ordner „This PC\Documents\NeroVideo\Templates\CE\1\TemplateCreatedbyNero9\SD.4.3“).
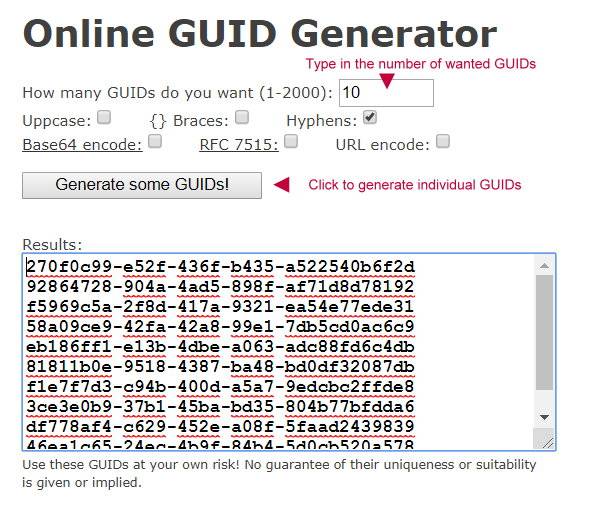
 2. Die tpl-Datei ist eine xml-Datei, in der Sie einen „Global Unique Identifier“(GUID) hinzufügen müssen, damit Sie sie in Nero Video öffnen können. Bitte besuchen Sie diese Website https://www.guidgenerator.com/online-guid-generator.aspx, folgen Sie den beiden Schritten im Screenshot unten und kopieren Sie eine der GUIDs in Ihre Zwischenablage (jede Zeile ist eine GUID).
 3. Klicken Sie mit der rechten Maustaste auf die Datei „*tpl“ des Menüs, das Sie zuvor nach Nero Video kopiert haben „… NeroVideo\Templates\CE“ und wählen Sie für die Bearbeitung den Windows-Text „Edior“ aus.
4. Klicken Sie auf ein leeres Feld nach dem Eintrag „<metadata>“. (Viertes Element in der Zeile)
5. Fügen Sie eine neuen Eintrag wie folgt ein „<GUID>{**********}</GUID>“
6. Fügen Sie Ihre GUID in die Klammern {************} ein. Dies lautet z.B. wie folgt:
 7. Speichern Sie die Datei und starten Sie Nero Video neu
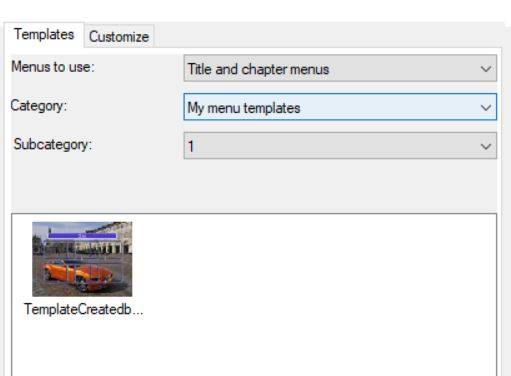
8. Öffnen Sie die Vorlage in der Menüauswahlseite von Nero Video unter „Meine Menüvorlagen“
9. Führen Sie dies für jedes Menü aus, das Sie von Nero Vision zu Nero Video überführen möchten.
Nero KnowHow 00162

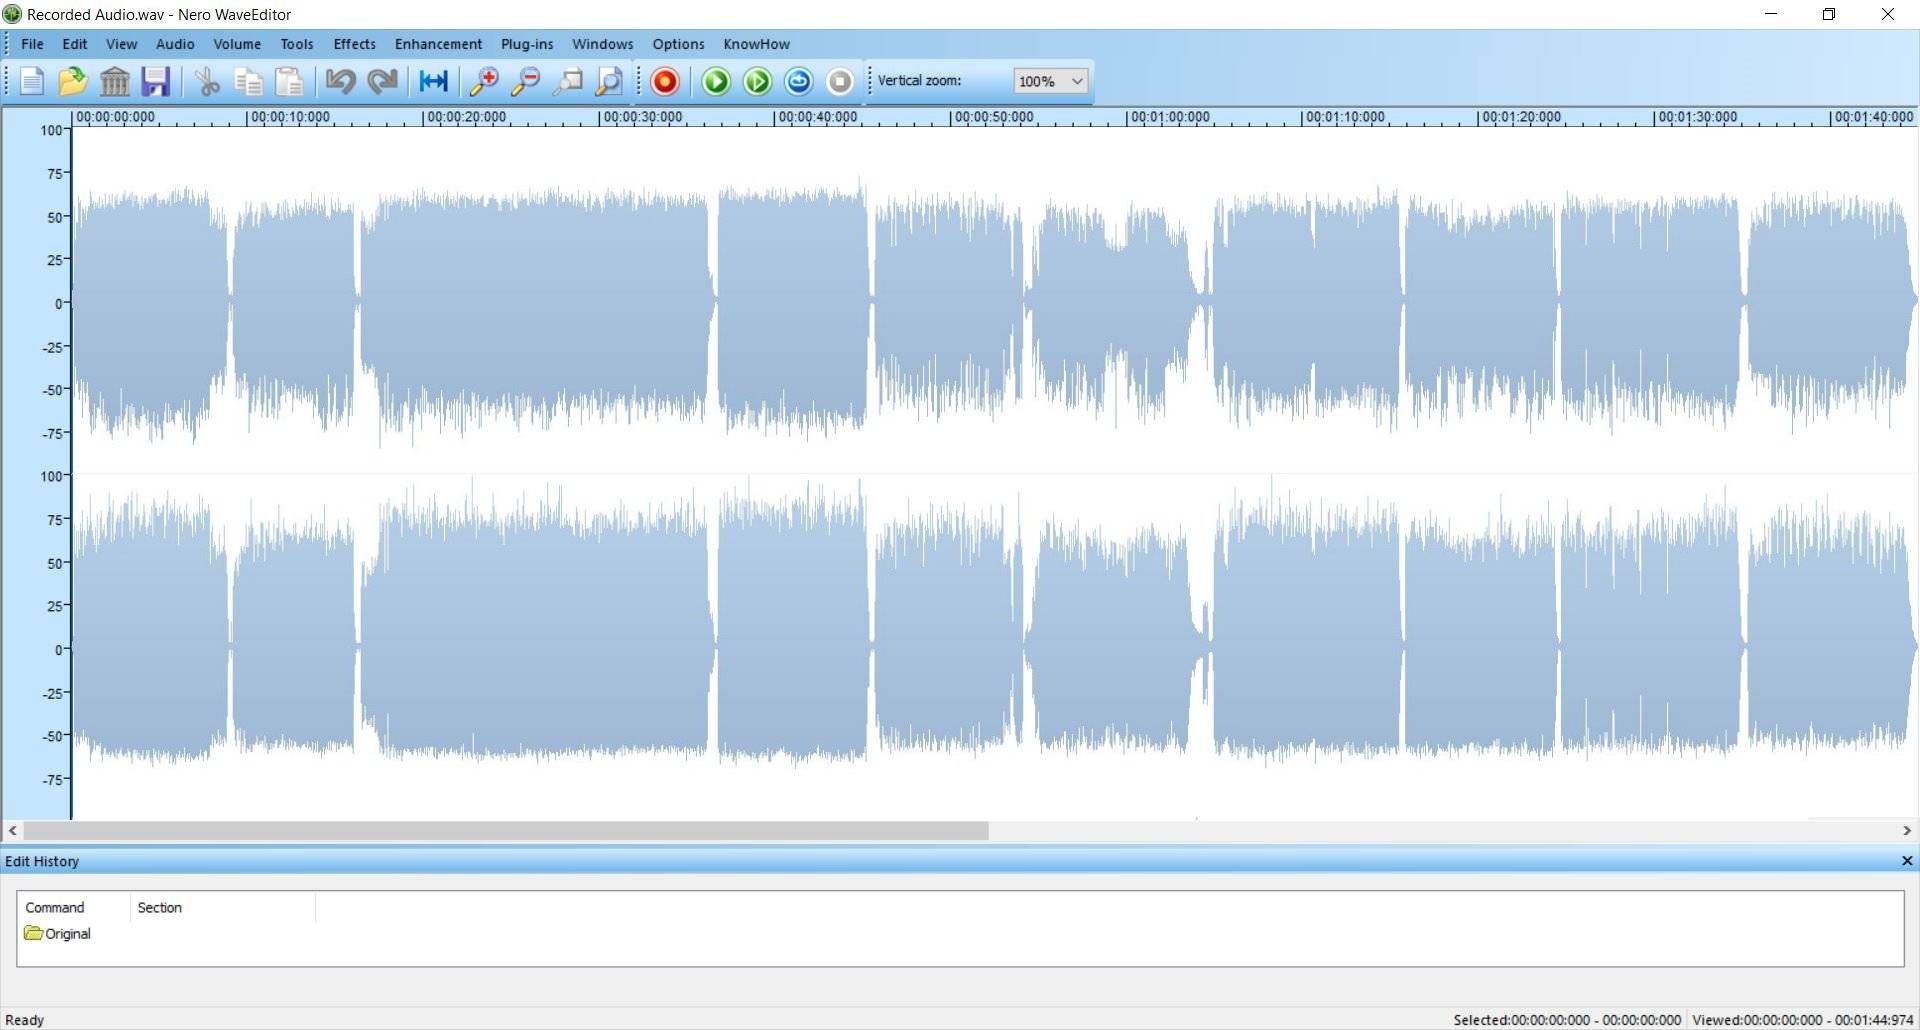
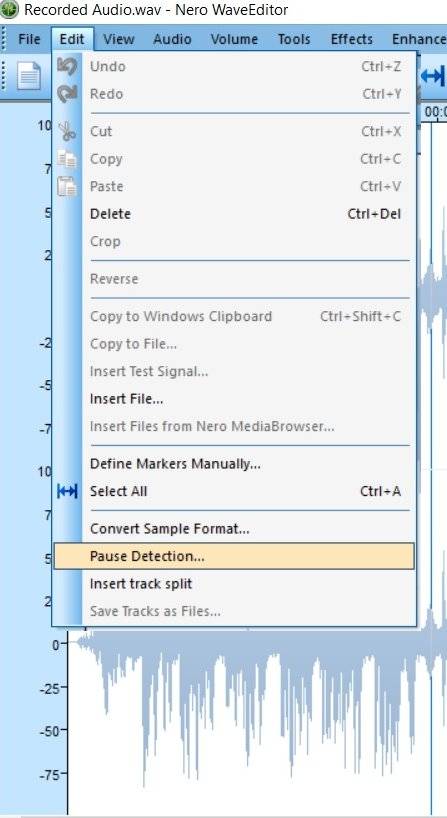
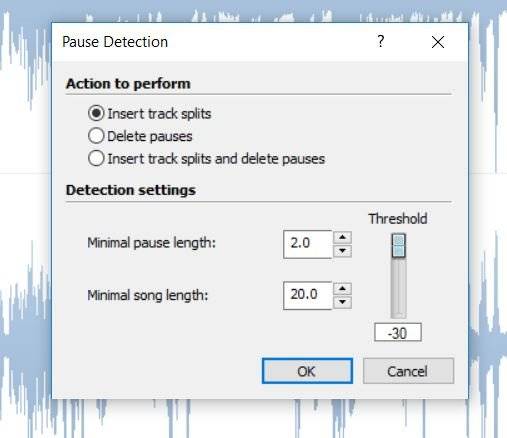
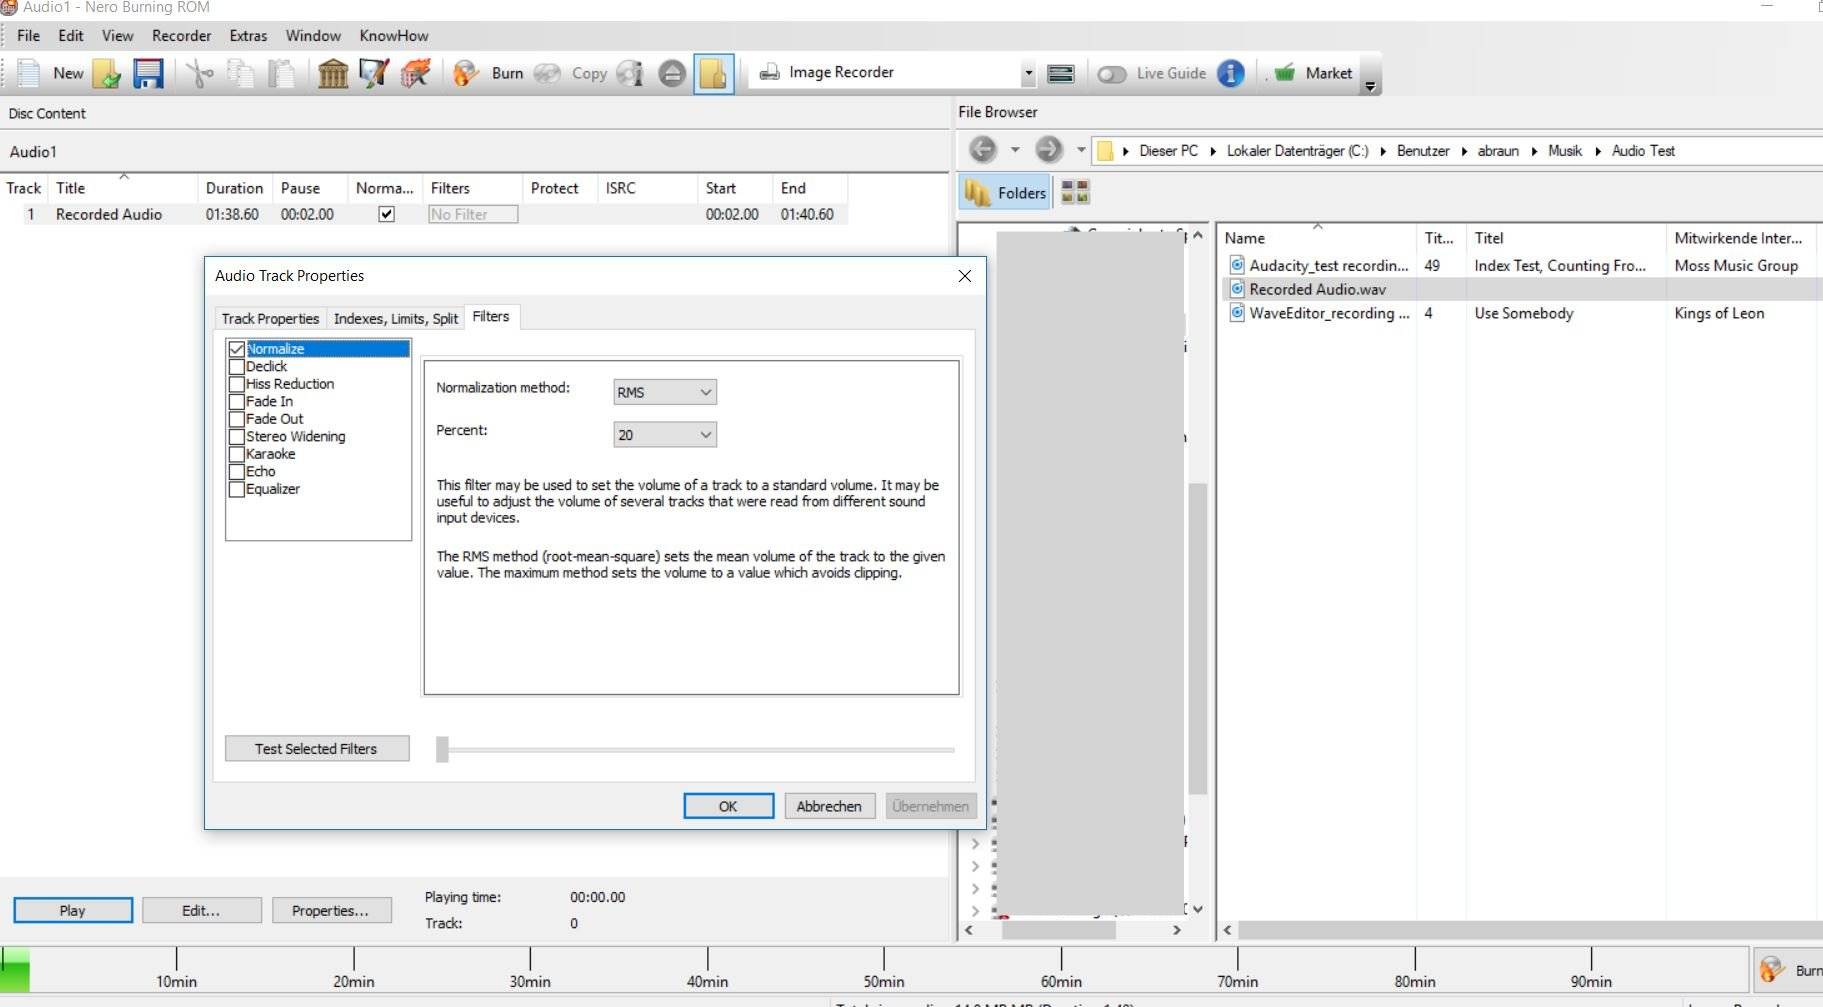
 Um jeden Split zu überprüfen, zoomen Sie heran, um die detaillierte Wellenformansicht zu sehen. Wenn Sie mit der Position nicht zufrieden sind, berühren Sie einfach den eingestellten Track-Split mit dem Cursor und bewegen ihn leicht nach links oder rechts. Sie können diese Funktion auch nutzen, nachdem Sie automatisch Tracksplits hinzugefügt haben.
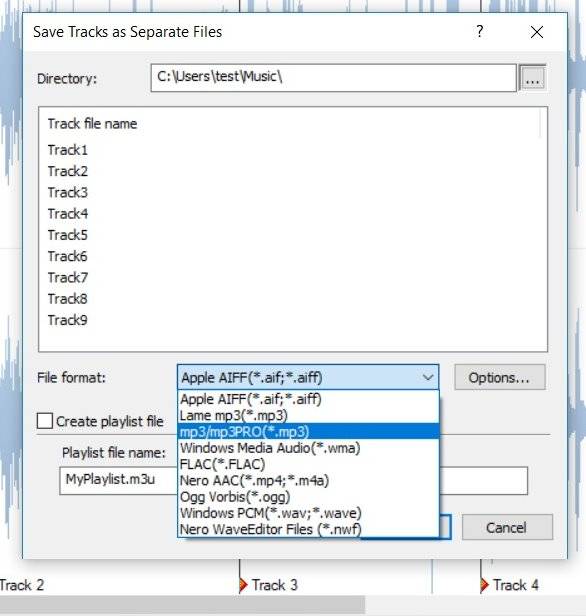
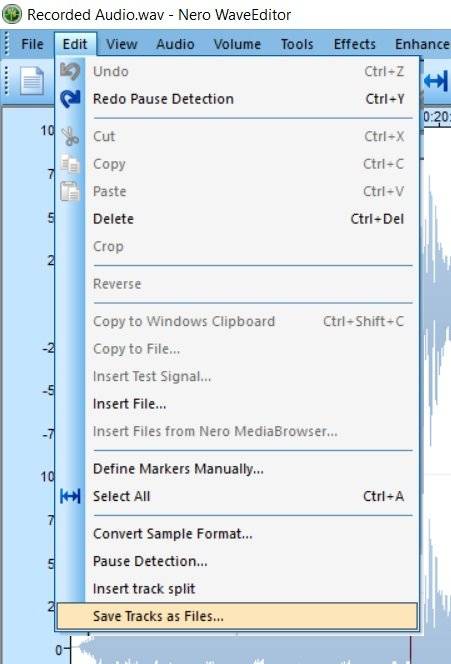 Im folgenden Fenster können Sie Ihre Tracks manuell umbenennen. Innerhalb der wählbaren Audiodateiformate für den Export haben Sie viele Möglichkeiten: Neben MP3 und AAC gibt es auch verlustfreie Formate. Wählen Sie den Ordner, in dem Sie Ihre Dateien speichern möchten, und klicken Sie auf OK.