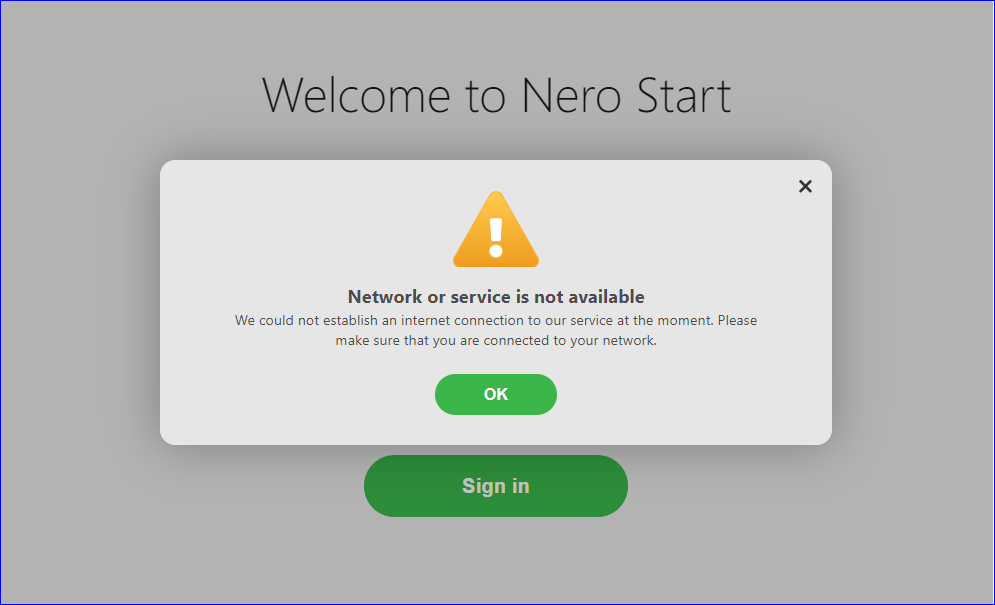
You can enjoy your benefits of your product or subscription after signing in to your Nero Account. If you are experiencing connectivity issues, however, the following screen will occur:
Please follow these steps in order to solve this issue.
Make sure your computer is connected to the Internet.
Take Windows 10 as an example. Click or tap the Start button and then the Settings shortcut on the left (it looks like a cogwheel). Then click “Network & Internet”, in the Status tab, it will show your Network Status. If it shows “Not connected” this means that the computer is not connected to the Internet. Then you need to first check your network connection and settings of the router, or even call your ISP.
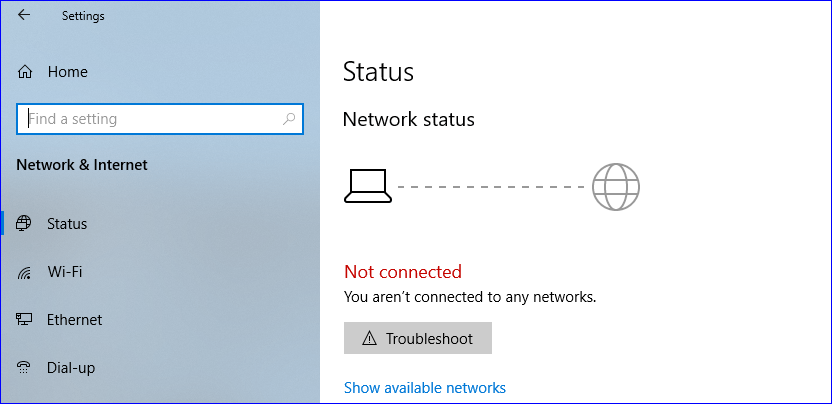
After your network is connected, you can access the website www.nero.com or other websites to make sure your computer is connected to the Internet.
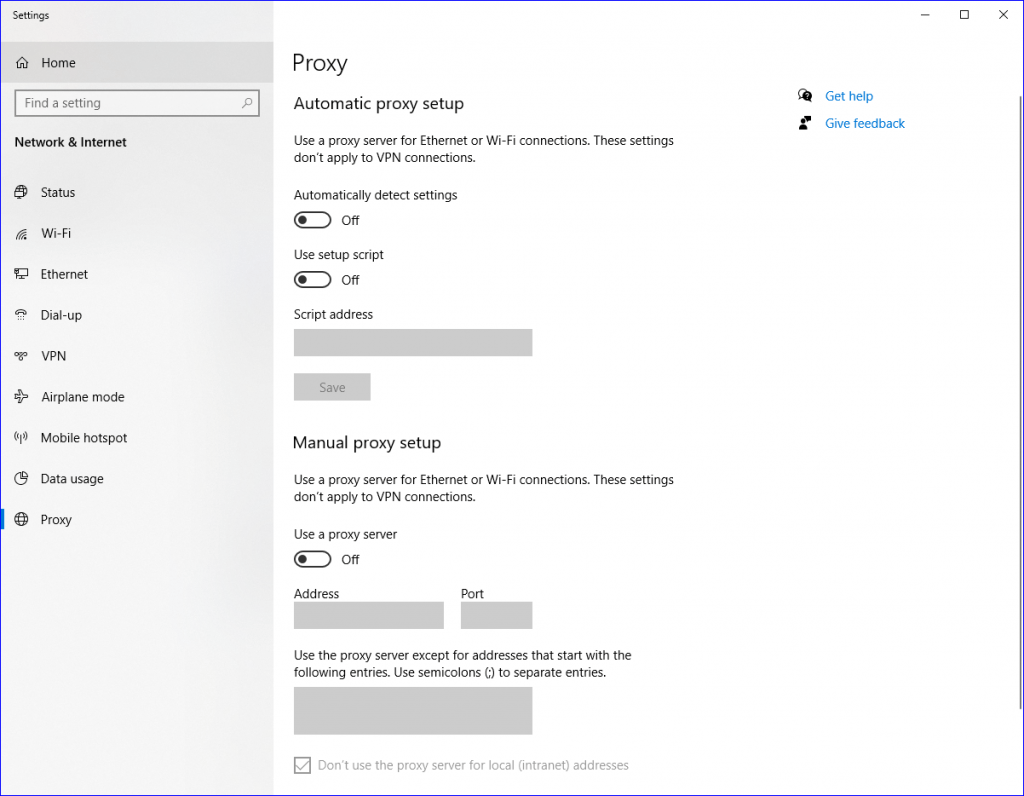
Make sure your Network Proxy Setting is correct
In computer networking, a proxy server is a server application or appliance that acts as an intermediary for requests from clients seeking resources from servers that provide those resources. You can check your Network Proxy Setting from Settings -> Network & Internet -> Proxy. For most cases, you do not need to adjust the network proxy settings.
By default, Nero Start will automatically apply the system network proxy setting if they exist. In most cases, if your web browser can access the Internet after you have set the network proxy, Nero Start can access the Nero Account service, too.
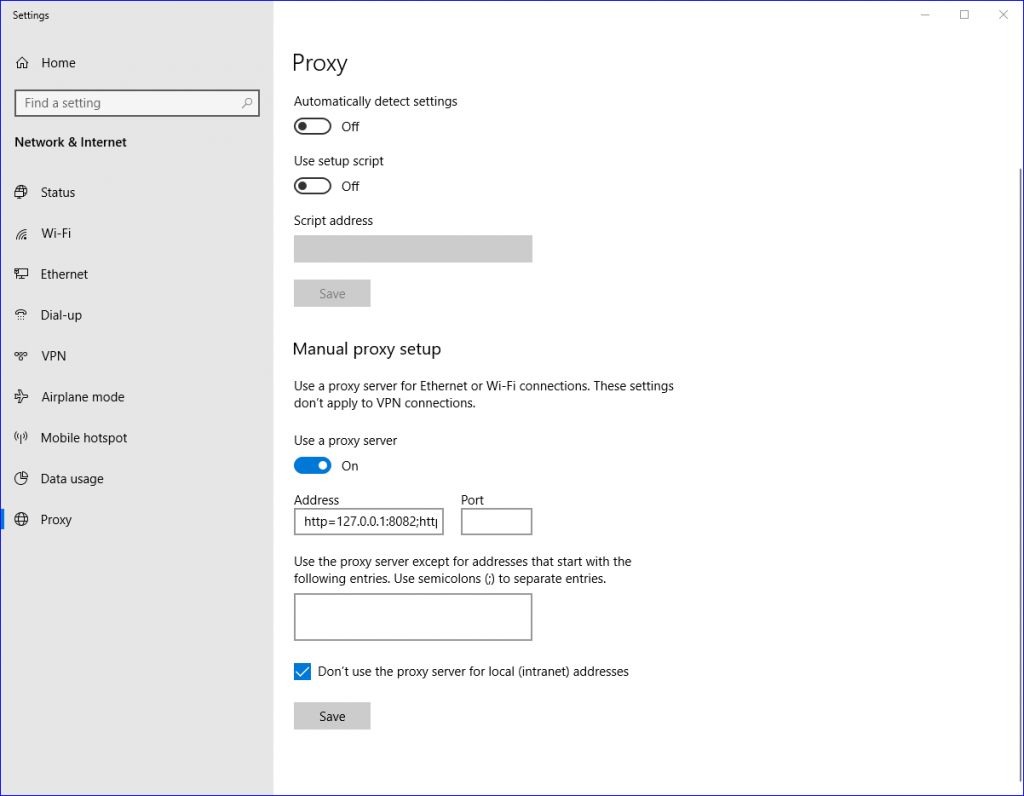
For some special purposes, some software will build a local network proxy server, and apply new or change the Windows network proxy settings after the software startup. Usually such local network proxy uses the local IP address “127.0.0.1”. Below is an example for network proxy settings that are modified with a local address. Such proxy may affect the network connection which causes Nero Start to have network connectivity errors.
To resolve this issue, you can follow the below instructions:
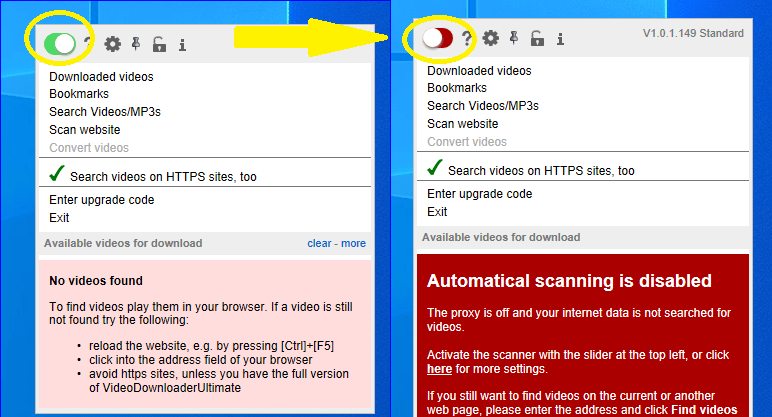
* If you are sure about which software will apply/modify the Windows Network Proxy settings, then close the function or exit the application and resume to previous network proxy setting. Take “Video Downloader Ultimate” for example: Click the app icon in the right-bottom task area. In the pop up dialog, click the switch to resume the network proxy settings. You can still enable the network proxy setting if you want to enable the functional.
* If you are sure about the network proxy setting, then just close the network proxy settings or update the network proxy settings as needed.
* In the latest Nero Start, you are also available to set and apply individual network proxy settings in the application.
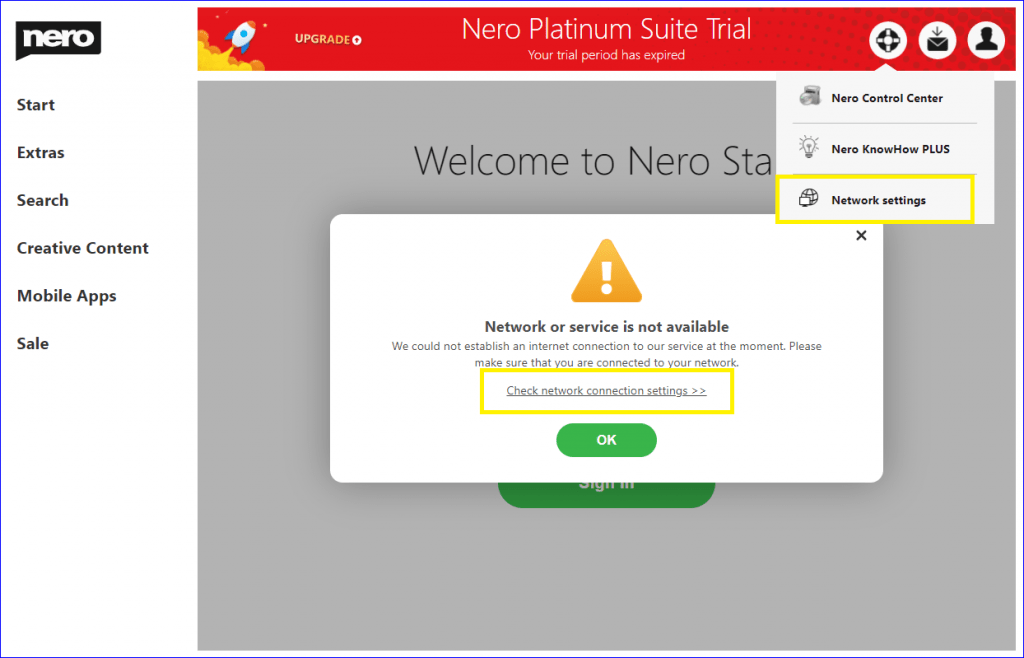
Click the menu Support -> Network settings or the hyperlink in the pop up warning dialog. The Nero Start network settings window will appear.

| Network proxy settings | Nero Start Behavior |
| No proxy | No proxy settings applied in Nero Start |
| Automatically detect settings (Recommended) | Apply the current Windows System network proxy settings to Nero Start.
Note: If you are not sure about the network proxy, please select this. |
| Use manual proxy | Apply specified network proxy setting to Nero Start
– Proxy IP: The IP address of the network proxy server – Port: The port of the network proxy server – User name: The user name used to authenticate and access the network proxy server. – Password: The password used to authenticate and access the network proxy server
Note: Leave user name and password empty if no authentication is needed. |
Before saving the Nero Start network proxy setting, you can also click the button “Test” to verify the connection in Nero Start.
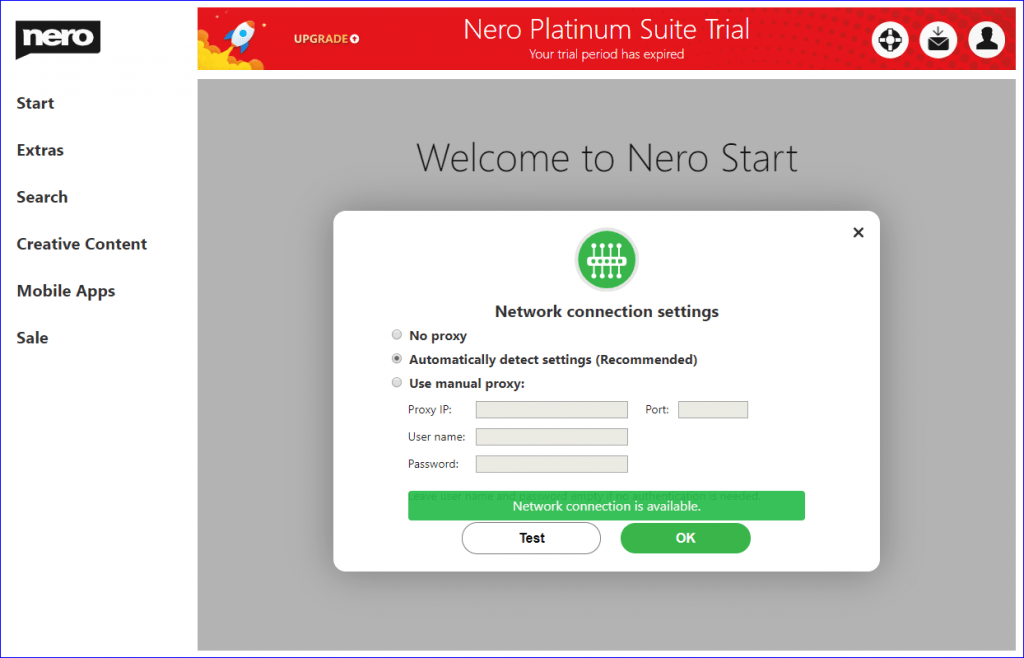
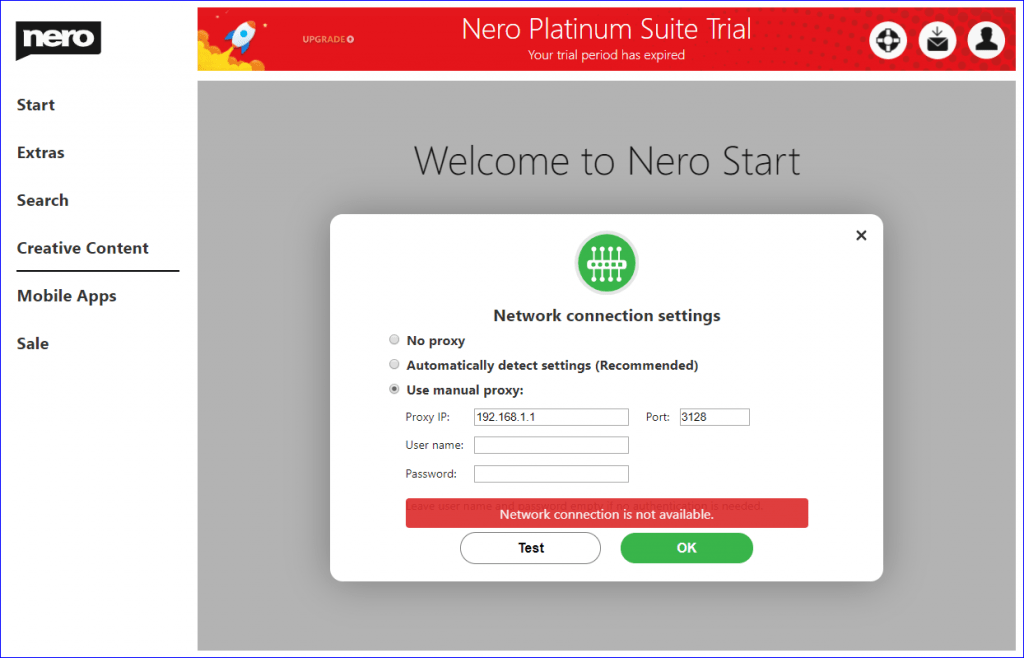
Note: in some conditions, you still need to restart Nero Start to apply the network proxy setting.
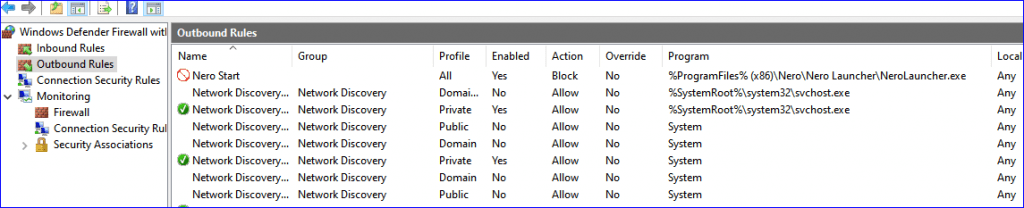
Make sure Nero Start is not blocked by Windows Defender Firewall or other anti-virus software
You may have installed some anti-virus software or network firewall software, some of which might block network connections in Nero Start.
Take the Windows Defender Firewall for example. Search for “Windows Defender Firewall” in the Windows 10 Search bar and open the Windows Defender Firewall configurations

In the Outbound Rules tab, check if there are any rules blocking Nero Start to connect to the Internet. Delete any such rules in order to restore network connectivity of your software.
Nero KnowHow 00205