Can I manage and playback media on ‘OneDrive’ with Nero MediaHome – even access ‘Files On-Demand’?

OneDrive is a very useful cloud service that many people use as a free version or within their Office 365 subscription. OneDrive embeds into the PC system and shows up like a regular drive in Windows Explorer. When you use Windows 10, OneDrive is auto installed, but you need to create an account and sign in to make use of it.

OneDrive Files On-Demand

With ‘Windows 10 Fall Creators Update’ in late 2017, Microsoft has embedded a very powerful feature into OneDrive that is called ‘OneDrive Files On-Demand’.

Now, you have the option to have your files only available in the cloud, as ‘online only’ – in such a case, the content will not be synced with your PC, but you can still see the folders and the content in your PC folder. With this great feature, you can save space on your PC, as you no longer need to store the content locally. Via ‘Files On-Demand’ you just make locally available, what you really need for the projects on your PC.

From Nero 2019 onwards you have this comfortable option embedded into Nero MediaHome, allowing you to access online only files in the browsing view, and download for playback or creative use cases on demand.

As Nero MediaHome library is also the basis for all of your related Nero applications via Nero MediaBrowser, you will have this feature readily available for accessing any online only content from OneDrive – be it video, photos, or music – in Nero applications. Due to the fact that Nero MediaBrowser also works with many non-Nero application you can even hand over ‘Files on Demand’ via drag & drop  into these applications, in case they can deal with photos, video, or music.

How do  ‘Files On-Demand’ work?

Initially you need to check if your OneDrive client is installed with your Windows OS. As mentioned, under Windows 10 this will be done automatically, when the new OS is installed. Make sure to have the Windows 10 Fall Creators Update or later installed on your PC to make use of ‘Files On-Demand’.

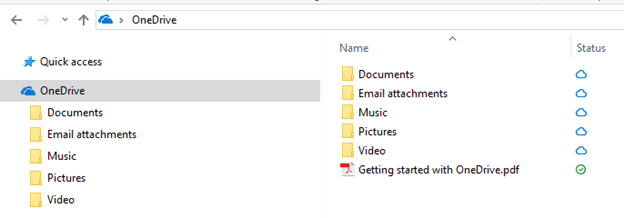
Once ready with your OneDrive client, you will see OneDrive as a drive with folders in your Windows Explorer.

OneDrive Windows Explorer

Just three easy steps

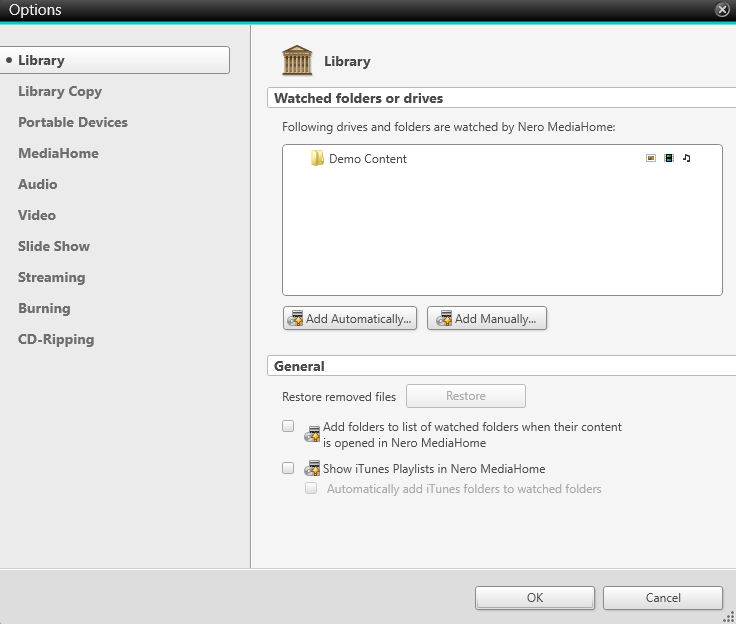
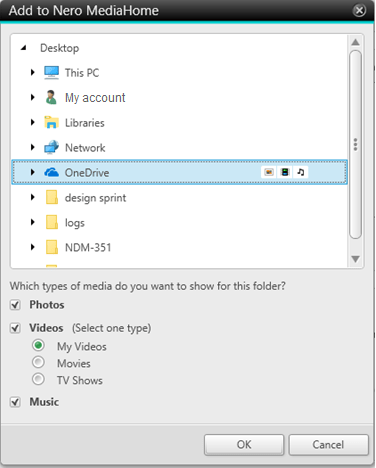
  1. Please start Nero MediaHome and add OneDrive as your watched folder. You can select either the whole drive or individual folders inside of OneDriveadd OneDrive as watch folder
  2. If you want to access your online-only media files in Nero MediaHome library directly, you need to sign in to your OneDrive account. The interface is provided via Nero MediaHome, so you do not need to leave Nero MediHome. In order to access ‘OneDrive Files on Demand’ in Nero MediaHome , please sign in with the same account that you have signed in to with your OneDrive client applicationsign in
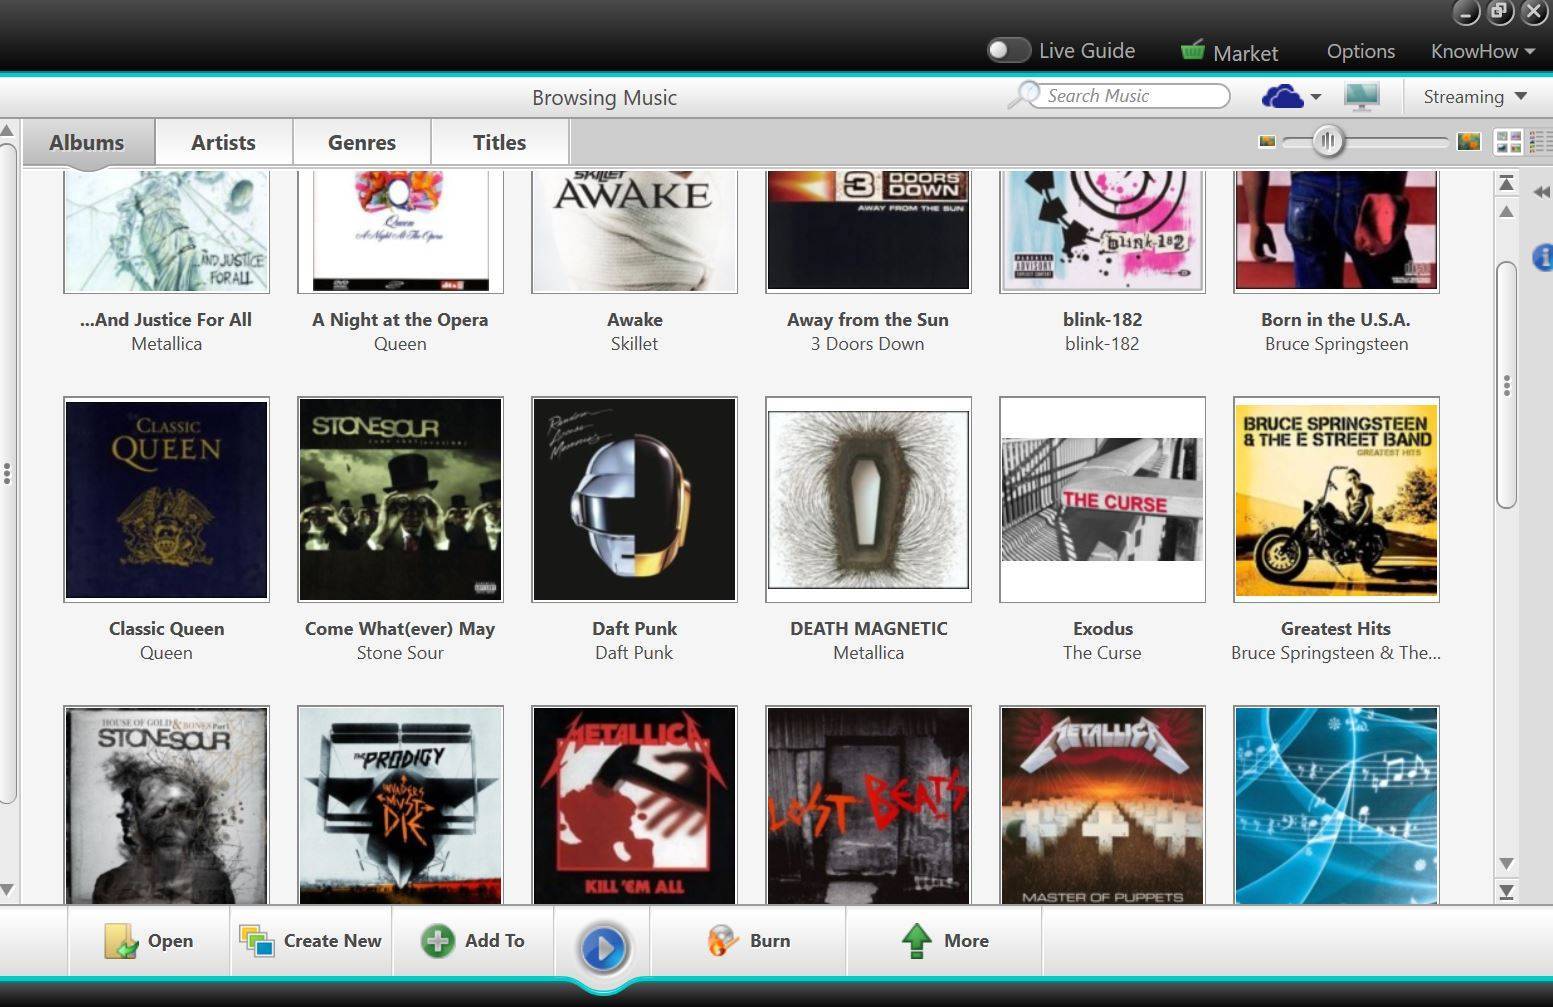
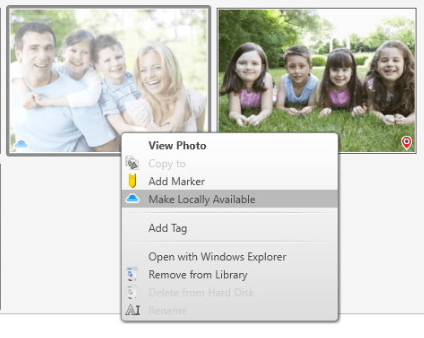
  3. Nero MediaHome will list the media files of your OneDrive account in the library. The clips with the blue-cloud icon are the ones that are online onlyNMH with OneDrive_01

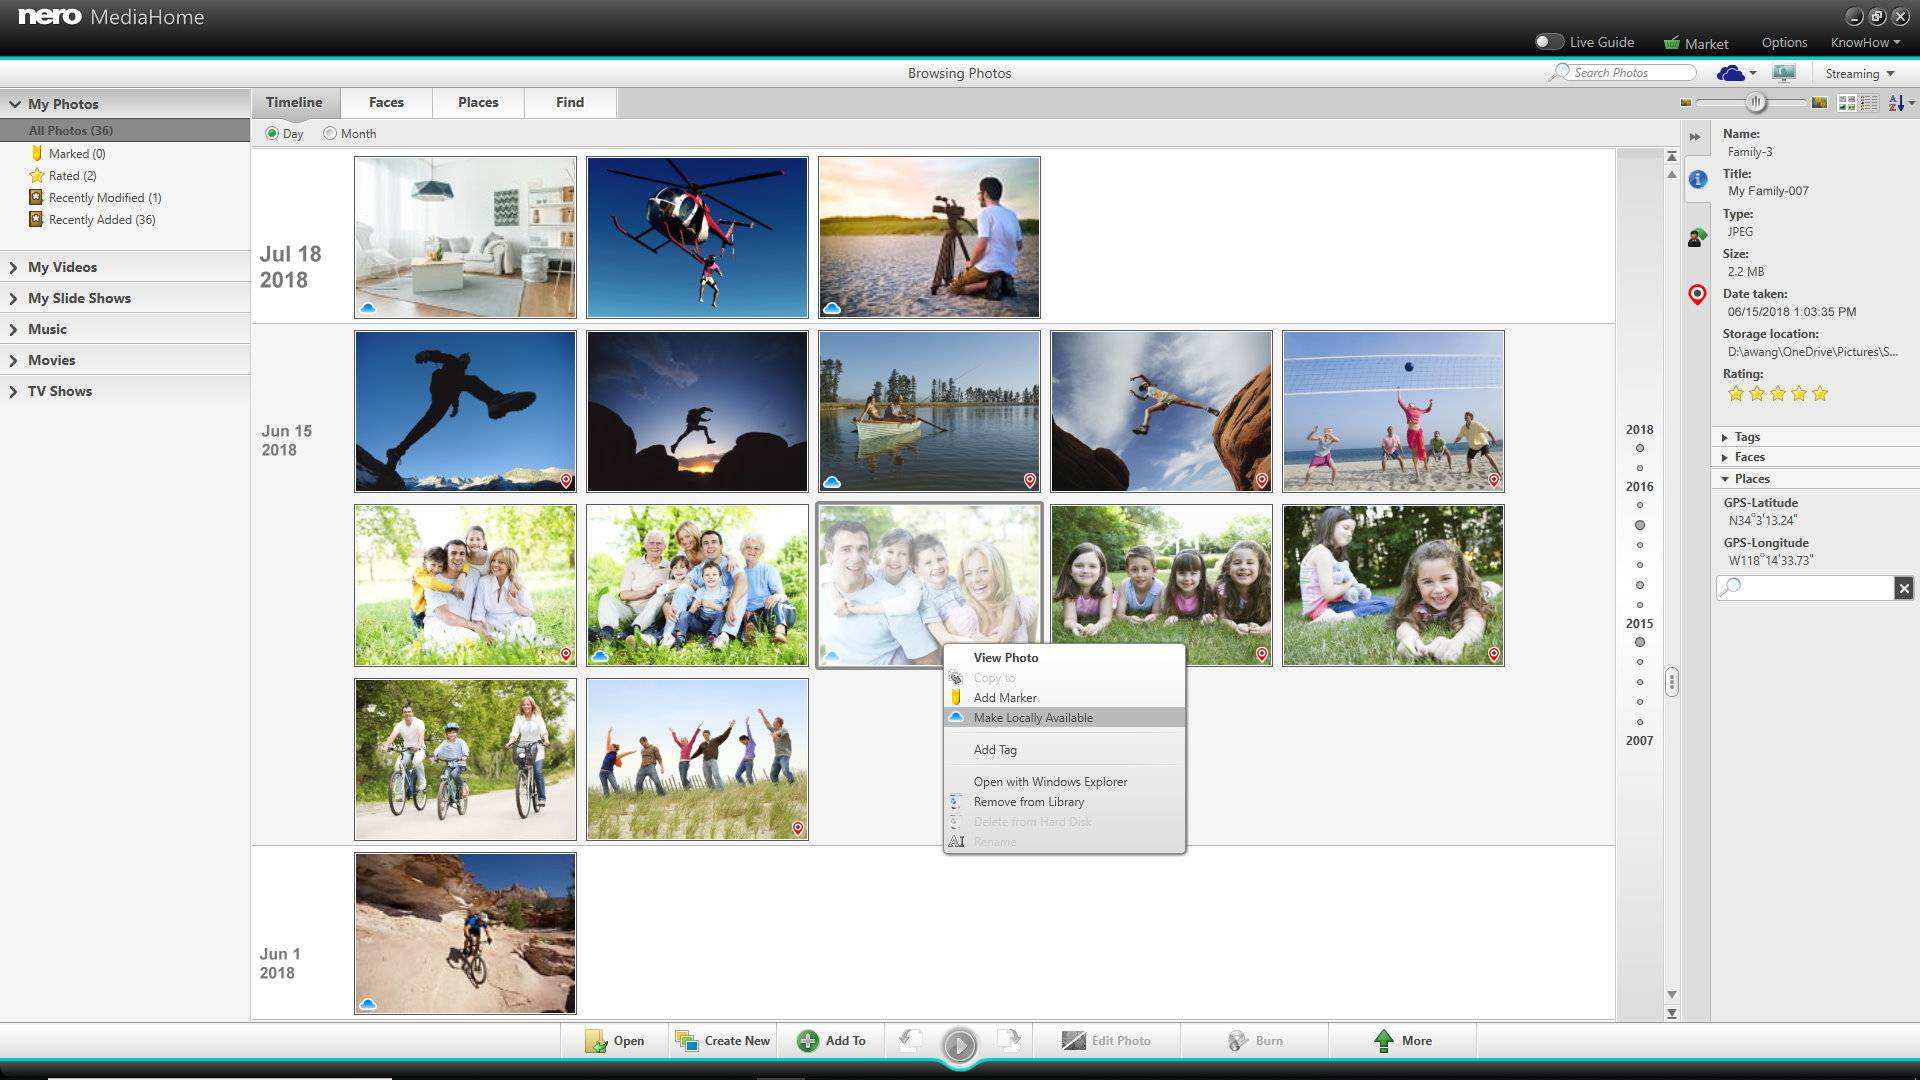
Now, you can manage and playback your OneDrive media files directly in Nero MediaHome, including your online-only files. You also can easily make them locally available via right-click mouse.

context menu

Nero KnowHow 00126

Why can’t I add my CD or DVD drive to the Nero MediaHome library directly?

When you click on the ‘Add manually…’ button in Nero MediaHome ‘Options > Library’ you will see your hard disk devices as well as all attached USB hard disks or sticks, including folders and subfolders for selection. When you add one of these folders, its content will be scanned and added to Nero MediaHome library. The browsing view will then show all your media in the relevant categories (My Photos, My Videos, My Slideshows, Music, Movies, TV Shows).

Capture

When you have a video disc or audio CD in your disc drive, Nero MediaHome can play the content directly, but it cannot add this disc content directly to the library.  In the case of an Audio CD you can import and convert your music to MP3, AAC, or lossless FLAC audio format via the CD-Ripping function.

CD Ripping

With the import function the disc content will be ripped to the location you have defined in ‘Options > Optical Discs’, and will be added to Nero MediaHome media library automatically.

Rip Audio CD

A perfect feature included in Nero MediaHome ripping is Gracenote ÂŽ Music Technology which will add album information and album covers to your songs. This way you can very comfortably browse and play your content from Nero MediaHome library, or even stream it inside of your home network.

Play Audio

Nero KnowHow 00125

Why can’t I add my Smartphone to the Nero MediaHome library directly?

When you click on the ‘Add manually…’ button in Nero MediaHome ‘Options > Library’ you will see your hard disk devices as well as all attached USB hard disks or sticks, including folders and subfolders for selection. When you add one of these folders, its content will be scanned and added to Nero MediaHome library. The browsing view will then show all your media in the relevant categories (My Photos, My Videos, My Slideshows, Music, Movies, TV Shows).

Capture

A different case applies when you have a smartphone attached via USB. This is not regarded as regular disk device, which you can add to the library. It is a mobile media device, the content of which (photo, video, music) you need to import first.  Within the import process, the content will be made compatible to your options if wanted or needed.

Options Import

After the selected content from your mobile device has been imported to the location you have defined in ‘Options > Portable Devices’, it will be added to the media library automatically.

Options portable devices

Nero KnowHow 00124

I want to install Nero on a new PC – can I take over my Nero MediaHome library?

In case you want to install your Nero product on a new PC or if you have installed new hard drives in your given system, you can move your media library to the new system. This way you will have all your media assets and Nero MediaHome projects available and can use Nero MediaHome on the new system in the same way as before. We will show you how this can be achieved, easily.

Open Nero MediaHome and go to ‘Options’, ‘Library Copy’.

Library Copy

Connect an external hard drive to your PC and click the button ‘Copy Library’.

In the copy page you get an overview which types of files you have in your media library including overall file sizes. Select the external drive that you want to copy your media library to.

library copy access

Then click ‘Copy’ and the media library will be copied to your target drive as specified. Depending on the size of your media library this may take some time.

library Copy process

After having installed Nero on the new system, attach your external hard drive to your new system, open Nero MediaHome, go to ‘Options’, ‘Library Copy’ again, and click the ‘Paste Library’ button.  In the ‘Paste’ page select your external hard drive and via ‘Paste’ copy the media library to your new location. Depending on the size of your media library this may take some time.

library paste_final_2

Once pasted, your configuration, all your media files, slideshow projects, tags, etc. are available in the same way as you were used to on your former system.

Nero KnowHow 00107

How do I need to name my ‘TV Show’ video files based on ‘Seasons’ & ‘Episode’ information so that they show up correctly under ‘TV Shows’?

As an introduction to the topic of ‘Movies & TV Shows’ in Nero MediaHome take a look at the overview FAQ.

Folder Structure and Naming

You can add folders on your PC that include Movies or TV Shows to Nero MediaHome media library via the options settings. Once done your Movies or TV Shows will be indexed and added to the browsing views accordingly.

If available, Nero MediaHome will make use additional meta data to achieve optimum results for showing correct movie names and associated film posters. Please, take a quick look at some essential naming conventions that you should apply to all your files associated to Movies & TV Shows.

In order to achieve best results we strongly recommend separating Movie and TV Show content into separate main directories.

NMH_EN_1.1

To ensure accurate matches for your TV shows in Nero MediaHome, we suggest to follow the naming conventions below.

Season/Episode type of TV Shows

To name season/episode based shows, please make use of below naming convention.

  • TV Shows/ShowName/Season xx/ShowName – sXXeYY – Optional_Info.ext

EN_2.2

Example

EN_2.3

Multi-Episode Files

If a single video file covers more than one episode, we suggest the following naming.

  • TV Shows/Show Name/Season xx/ShowName – sXXeYY-eZZ – Optional_Info.ext

[in this case YY is the first episode number covered in the file, ZZ is the last episode number covered in the file]

Nero KnowHow 00092