How can I burn a SecurDisc 4.0 with Nero Express?

Burn safe and reliable discs with Nero ‘SecurDisc’. Version 4.0 available in Nero Express supports highest security standards with ‘256 bit encryption’.

Nero SecurDisc is available in Nero Burning ROM and Nero Express. This FAQ shows you how to access and use SecurDisc in Nero Express.

If you are looking for using the feature in Nero Burning ROM, please check

Nero KnowHow 00053

In Nero Express, select which type of disc you would like to burn.

Let’s assume you want to burn a SecurDisc DataCD, on which you may want to store some important legal documents, securely. So, just click on this type in the selection window.
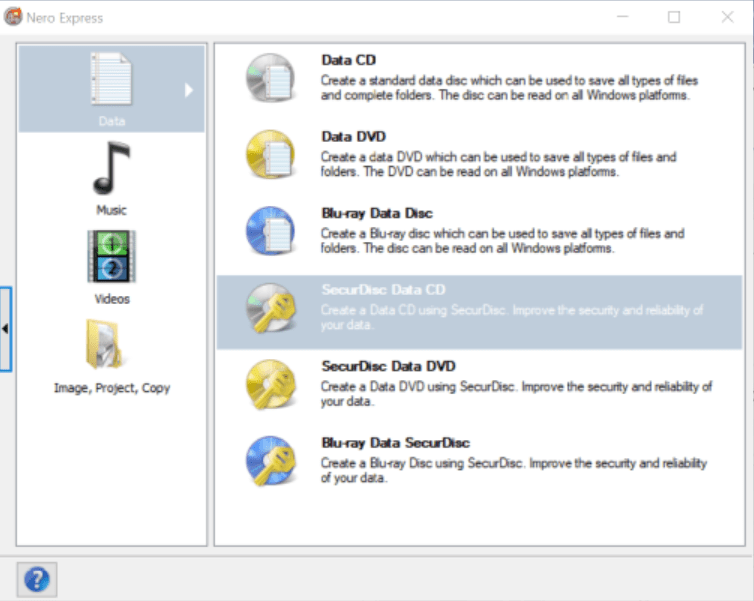
NEX SecurDisc

In the upcoming screen, select your wanted encryption level: ‘Top Secret’, ‘Secret’, or ‘no encryption’.

Encryption level

Keep the data on your discs safe from prying eyes by password protecting them.

Nero will let you know how save the selected password will be.

Note: when using ‘Top secret Encryption’ you need to enter a password with at least 32 unique characters.

Password

Click ok, and in the upcoming window click ‘Add’ to browse and add the files you want to burn securely.

In the left pane of the same window, you have further options. Get there by clicking on the arrow at the bottom left.

Added files

We recommend selecting ‘Data Redundancy’ and choosing between good and excellent. This will ensure your discs are usable even if they get scratched or damaged.

You can also select to use a digital signature.

Click next and select your recorder, then press ‘Burn’.

It will take a few minutes for your disc to burn depending on the speed of your Drive. You will be notified when the burn process is completed.

For accessing your disc you will use ‘Nero SecurDisc Player’ that was automatically added to the disc while burning.

In case you have created a digital signature, you need to be in hold of the public key in order to access the disc.

Nero Know How 00118
How can I rip Audio CDs with a customized filename format?

When I rip Audio CDs, I sometimes want to have the option to select the naming type of the ripped file, e.g. I want to have the track number first, then the title, and finally the artist.

Several Nero applications support ripping Audio CDs:

  • Nero Burning ROM
  • Nero Express
  • Nero Disc to Device
  • Nero MediaHome

Nero Burning ROM and Nero Express provide specialized settings for the wanted file naming customization option.

So, let us show how this works.

Initially you need to insert the wanted Audio CD for ripping into the optical drive of your PC.

Step 1:

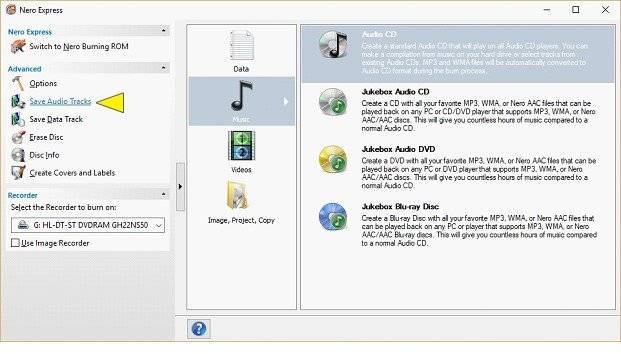
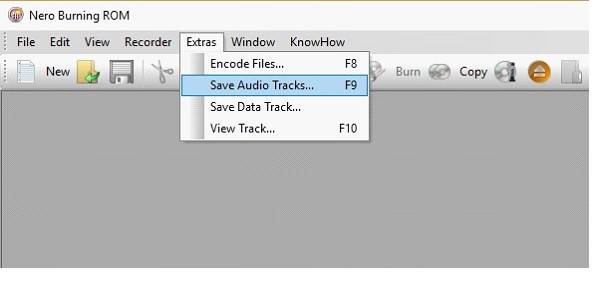
Launch Nero Burning ROM or Nero Express and from the menu select the “Save Audio Tracks to Hard Drive” option.

This is how you access it in Nero Burning ROM.

Save Audio Tracks NBR

And here you can see the access point in Nero Express.

Save Audio Tracks NEX

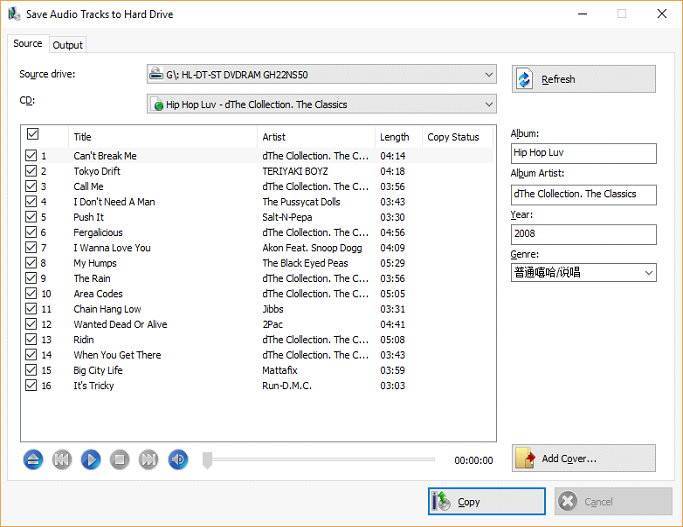
The “Save Audio Tracks to Hard Drive” window will pop up. Here you find two tabs: “Source” and “Output”. In the source tab on the right hand side you can modify the naming of “Album” and “Album Artist”, etc. if wanted.

Source Setting NBR

Step 2:

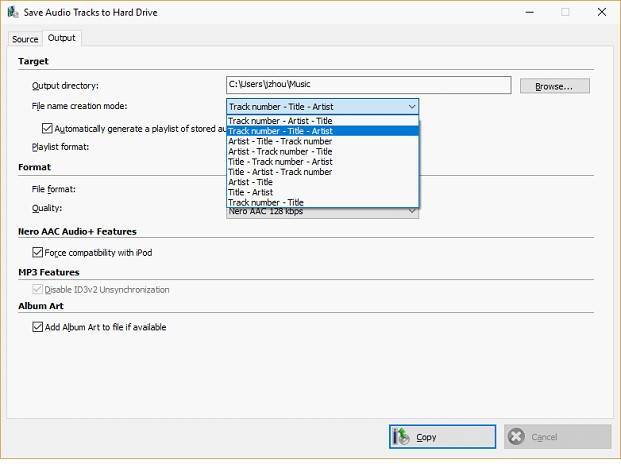
Switch to the “Output” tab  and select one filename format within the drop-down list of “File name creation mode”. Here you can customize the filename format in nine different modes.  Select the entry of your choice:  ” Track number – Title – Artist “.

Ausgabe Setting_NBR

Step 3:

After you selected one filename format option  click “Copy” to rip your Audio CD with customized file naming.

Check

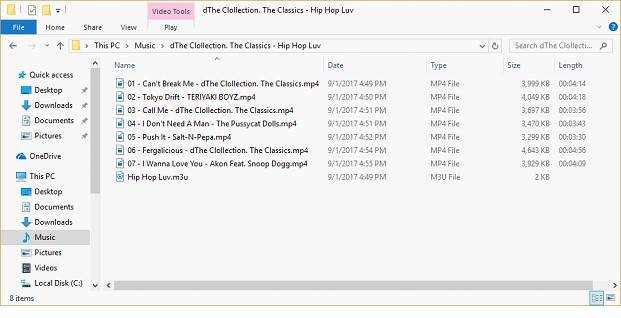
You can find your ripped Audio files in your specified output directory, with your customized folder name and filenames. Below sample shows your ripped files based on the chosen filename format.

Final

Nero Know How 00105