How to digitize your CD collection faster with Nero Burning ROM?

If you have a large collection of audio CDs, Nero Burning ROM can help you digitize them with fewer manual steps while keeping your music files organized.

With Collection Ripping and Custom File Naming, you can:

  • Automate repetitive steps — start ripping automatically, select Gracenote album information, and eject finished discs.
  • Step away while ripping — return when a disc is finished and you hear the sound notification.
  • Track ripping results — use session reports to review ripping status and errors.
  • Match your existing music library — customize file names using your preferred metadata fields, order, and separators.

1. How to start ripping an Audio CD

To get started, open Nero Burning ROM and access the Audio CD ripping feature using either of these methods:

Option 1: From the toolbar

Click Rip in the top toolbar.

Option 2: From the menu

Go to Extras > Rip Audio CD…
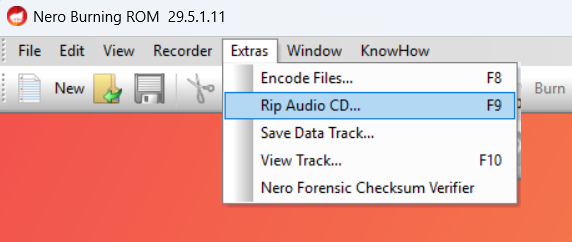
Both options open the Nero CD Ripper window, where you can configure Collection Ripping and Custom File Naming before digitizing your CDs.

2. Set up Collection Ripping for multiple CDs

Collection Ripping automates steps that previously required repeated clicks, including starting each rip, selecting Gracenote album information, and ejecting finished discs.

How to enable Collection Ripping
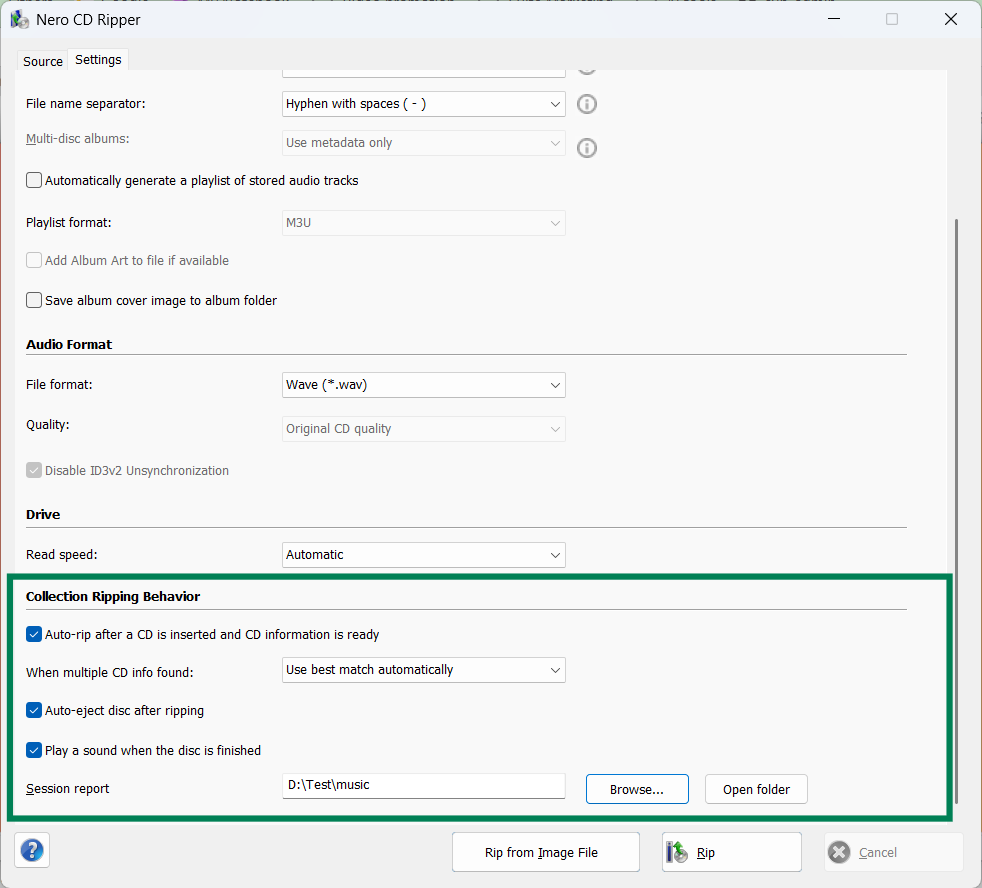
  1. In the Nero CD Ripper window, switch to Settings, find Collection Ripping Behavior.
  2. Enable Automatically start ripping after album and track information is ready.
  3. Under When multiple CD info found, choose:
    • Use best match automatically — Nero selects the best available Gracenote album information and starts ripping without asking.
    • Ask me to choose — select the correct album information yourself when multiple matches are found.
  4. Enable Auto-eject disc after ripping.
  5. Enable Play a sound when the disc is finished.
  6. Optionally, select a folder for the Session report to keep a record of ripping results and errors.

How does it work?

With automatic ripping, auto-eject, and sound notifications enabled:

  1. Insert an audio CD. Nero retrieves the album and track information from Gracenote.
  2. Ripping starts automatically when the information is ready. If multiple matches are found, Nero follows your selected matching preference.
  3. You can step away while Nero processes the CD.
  4. When finished, Nero ejects the disc and plays a notification sound.
  5. Insert the next CD to continue.

You still need to change discs manually, but you no longer need to monitor the ripping process or repeatedly click Rip and Eject.

Tip: Choose Use best match automatically for fewer interruptions. If multiple album matches are found and you prefer to verify the information, select Ask me to choose.

3. Customize file names to match your music library

If you already have a digital music collection, you may want newly ripped files to follow the same naming conventions.

With Custom File Naming, you can define how metadata is combined in file names, rather than relying on preset formats or manually renaming files after ripping.

How to customize file naming

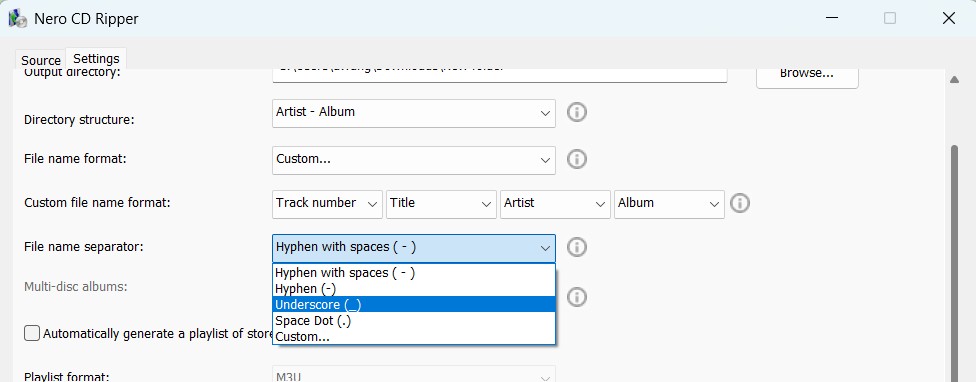
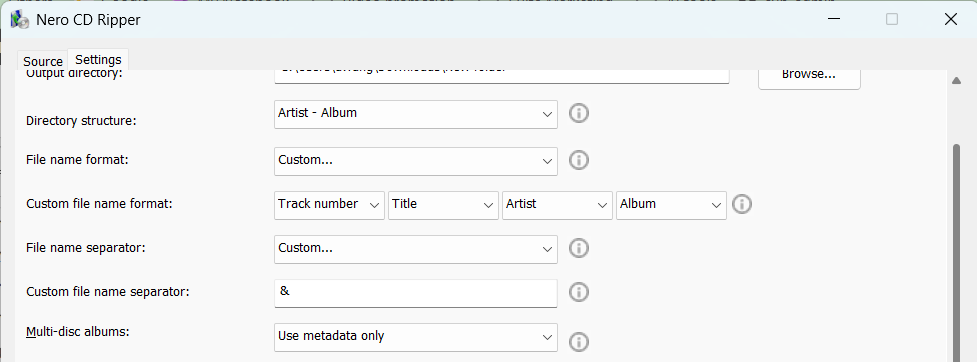
  1. In the Nero CD Ripper window, switch to Settings, find the file naming settings.
  2. Under File name format, select Custom…
  3. Under Custom file name format, select the metadata fields you want, such as Artist, Album, Title, or Track Number.
  4. Arrange the fields in your preferred order.
  5. Under File name separator, choose a separator such as - or _, or select Custom… to enter your own.
  6. Start ripping. Nero will apply your naming format to the output files.
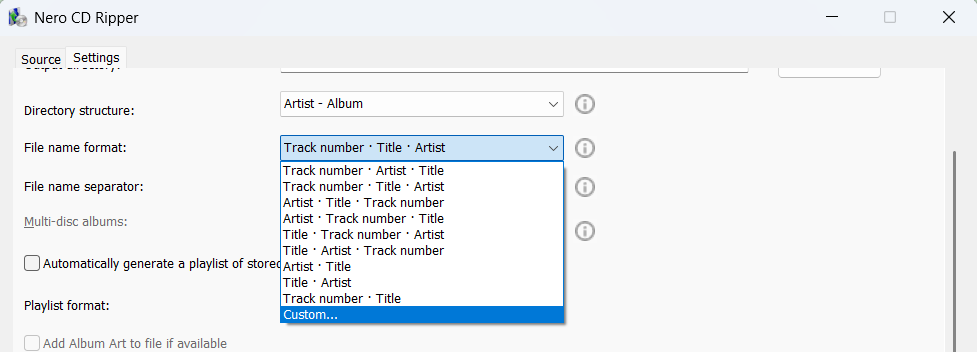
Example: Match your existing file naming style

Suppose you’re ripping a track with this information:

  • Artist: Queen
  • Album: A Night at the Opera
  • Title: Bohemian Rhapsody
  • Track Number: 11

You can choose a format that matches your existing music library:

File naming formatExample output
Artist – TitleQueen – Bohemian Rhapsody.mp3
Track Number – Title11 – Bohemian Rhapsody.mp3
Artist – Album – TitleQueen – A Night at the Opera – Bohemian Rhapsody.mp3
Artist_Album_TitleQueen_A Night at the Opera_Bohemian Rhapsody.mp3

You can combine metadata fields in different orders and use your preferred separators.

Tip: Configure file naming before ripping a large collection to keep your new files consistent with your existing library and avoid renaming them afterward.


Quick tip

For large CD collections, enable automatic ripping, auto-eject, and sound notifications together. This lets you step away during each rip and return when the next CD needs to be inserted.

Set your custom file naming format beforehand so the resulting files are organized consistently from the start.
Why do I get the message “One or more files could not be added to a compilation …”

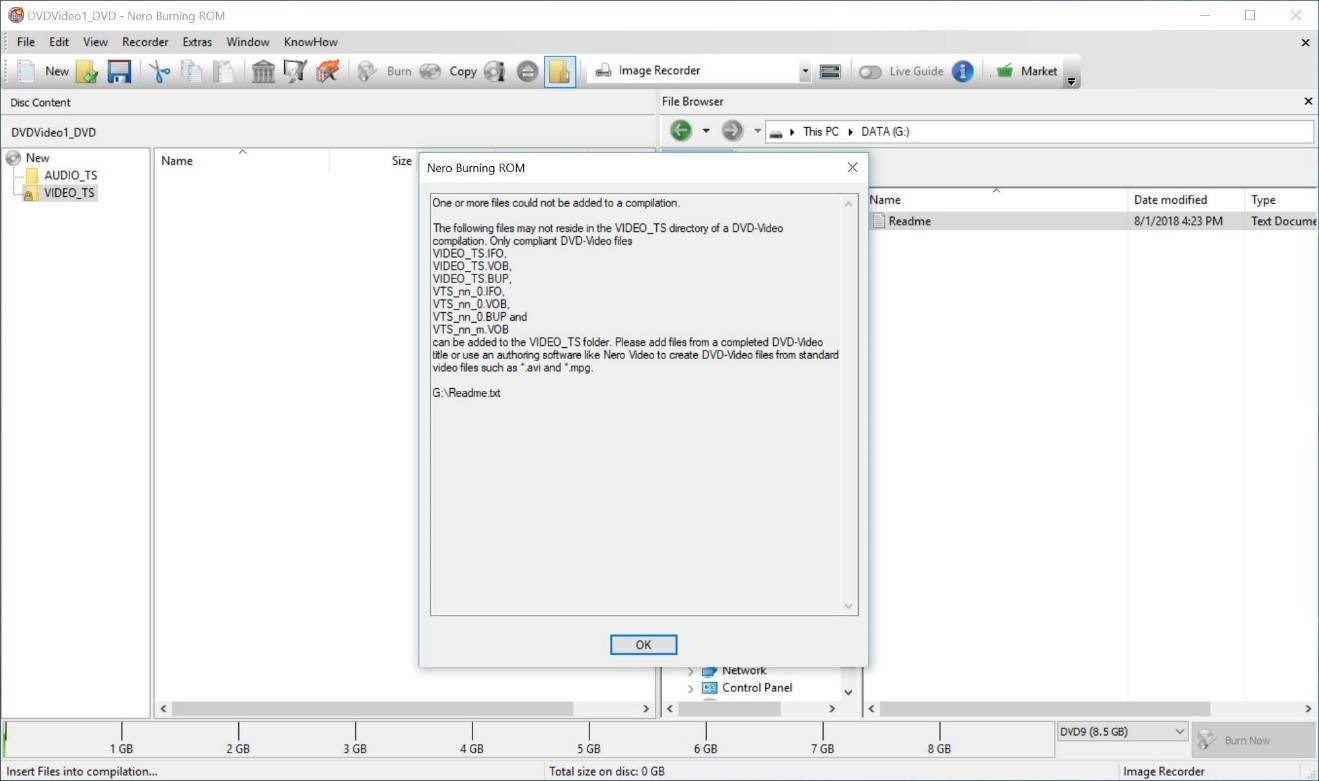
When editing disc compilations, Nero Burning ROM checks if files added to the disc compilation are available and comply with the given disc compilation type. If the files are not compliant with the selected disc compilation, they cannot be added. For example, if you add a .txt file into the DVD Video Disc folder “VIDEO_TS”, the below message dialog will pop up, and only the compliant files will be added to the disc.

new

The below typical types of compilations will check for compatible files:

  • Audio CD
  • CD EXTRA
  • DVD-Video
  • AVCHD(TM)-VIDEO for DVD Disc
  • BDMV-Video
  • AVCHD(TM)-VIDEO for Blu-Ray Disc

What can I do if such message dialog pops up?

  • Check the information in the message box. It will show details about the compliant files or folders for the disc
  • In the bottom of the message dialog you will see the file path list for non-compliant files and folders
  • Save and exit the compilation editing. This can help you continuing the compilation editing next time
  • Create disc compliant files, first by using other Nero applications like Nero Video, Nero Recode, etc.

Nero KnowHow 00134


Why do I get the error ‘Burn process failed …’ while Burning a Disc and how to fix the Issues?

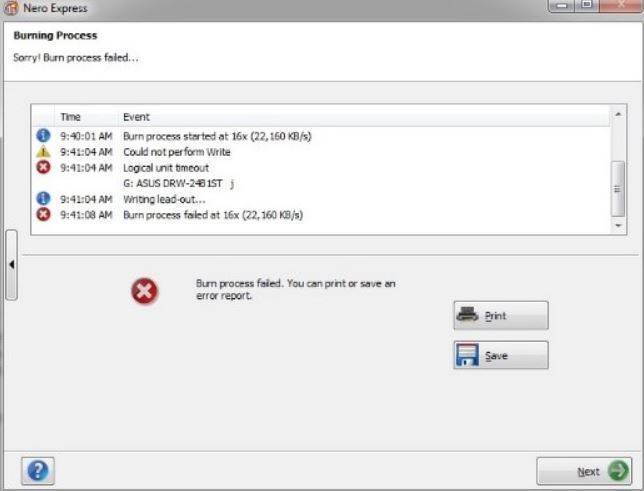
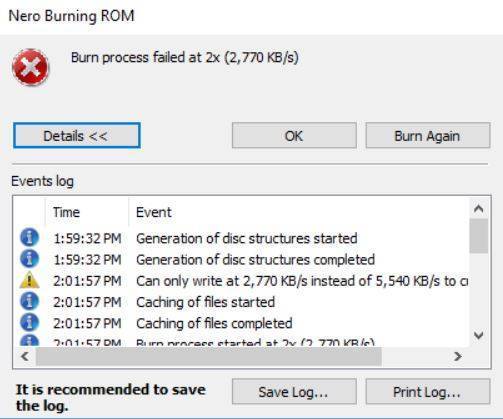
While using Nero Burning ROM or Nero Express for burning content to a disc, you may come across the error message ‘Burn process failed …’.

So, what does these errors mean and how to fix the related issues?

In the whole burning process of Nero Burning ROM or Nero Express, the given application will do different checks to make sure that the burning related operations do not fail. These will be:

  • checking device(s)
  • checking the medium
  • checking disc erase or similar operations

If any critical error happens (like the disc/medium is broken, the disc recorder cannot be accessed, etc.) and the application cannot fix or recover the given issue, such an error dialog will pop up in the application.NBR

As the dialog will indicate and show in detail within the message box, most of the typical cases are related to the fact that the disc/medium is broken or the disc speed for burning is not working correctly.  So, in many cases putting a new disc into your disc recorder and clicking the button “Burn Again” will solve your issues. The disc speed issue can probably be solved by updating your firmware.

NEX

Still there are some situations when the above mentioned solutions cannot resolve your issue. For such cases it is meaningful to do a deeper check via the application log file.

For creating a log file, in Nero Burning ROM please click the button ‘Save Log…’ or ‘Save’ in Nero Express, within the respective message box .

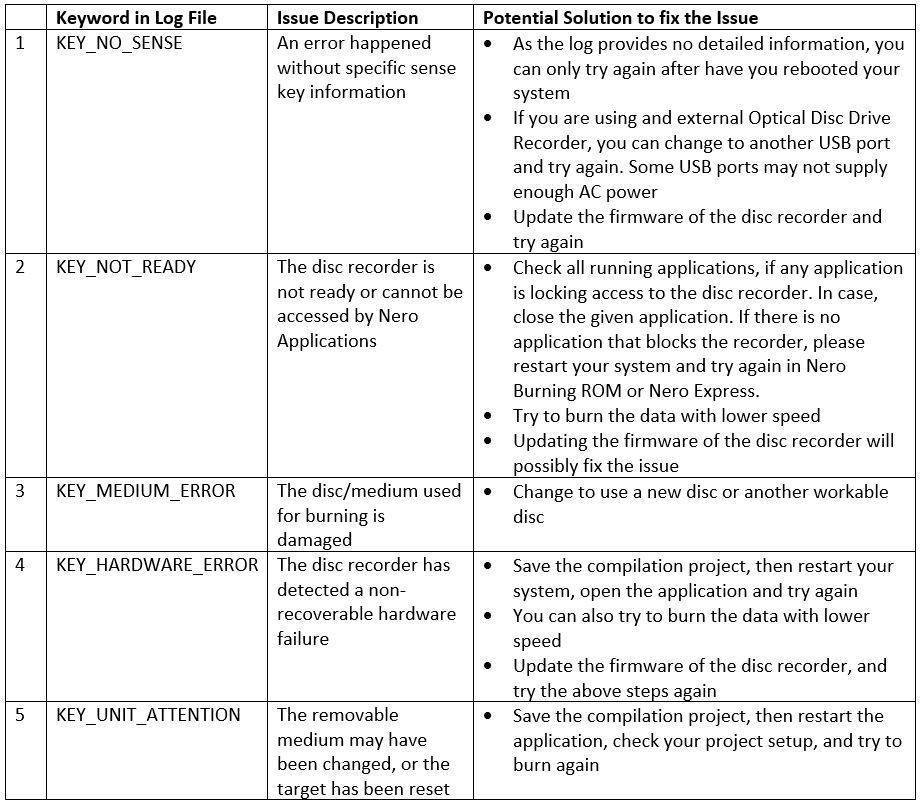
In the exported log files, you can find some keywords.

Below table lists some of the most important keywords that you can check based on the provided solutions, here. This may help fixing your issue.Error Table

Nero KnowHow 00150

Why do I get the message ‘Please insert an empty disc…’ or similar when trying to burn?

If your Nero application shows this message in one or the other form, the following overview shows potential problem scenarios and possible solutions.


Problem 1

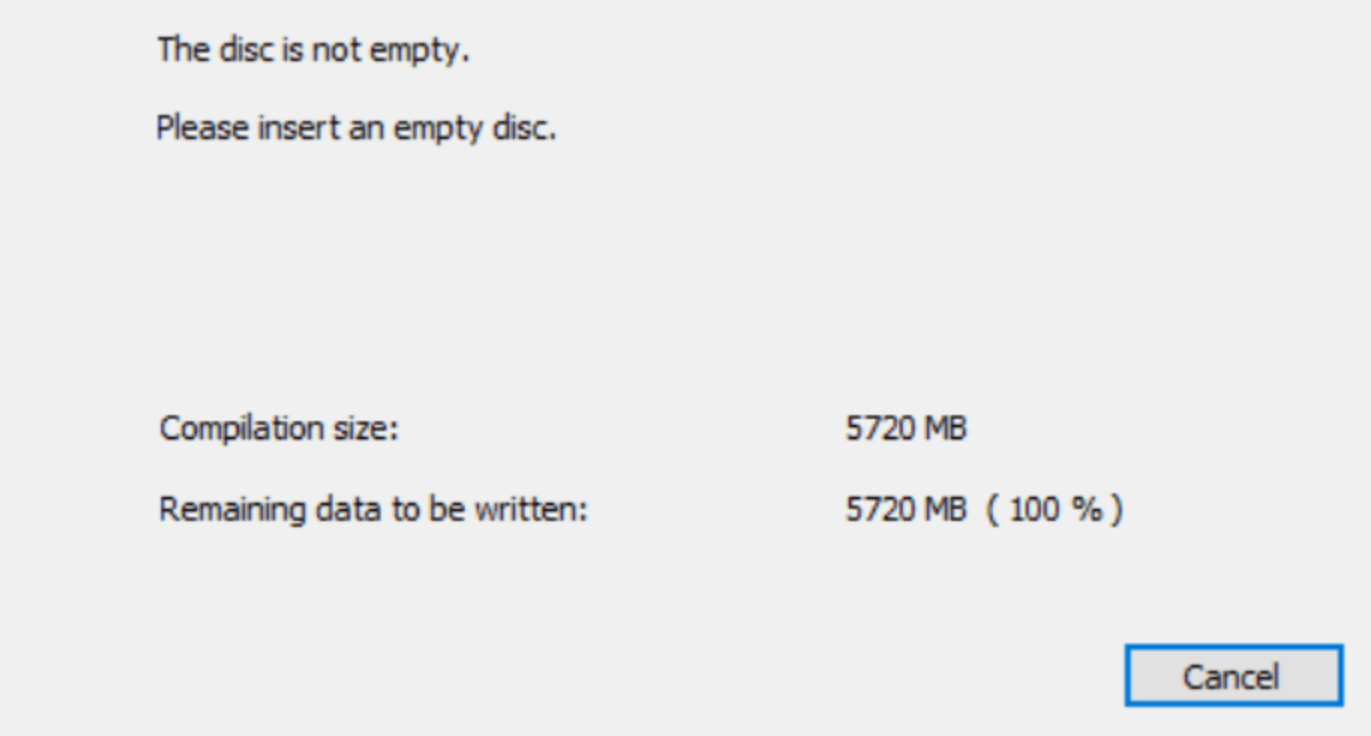
  • Your disc is not empty

1


Solution

  • It might have happened that you inserted a disc into your drive, which is not empty, i.e. burned data already exist on this disc
  • Please put an empty disc into your disc recorder drive
  • The compilation size gives you a reference

Problem 2

  • a) You have selected to burn more than one copy at a time
  • b) You are burning a disc with Nero DiscSpan

empty disc_2Solutions

  • a) If you have selected burning several disc copies with one recorder, Nero will ask you to insert a disc into your drive, each time one disc burning is done
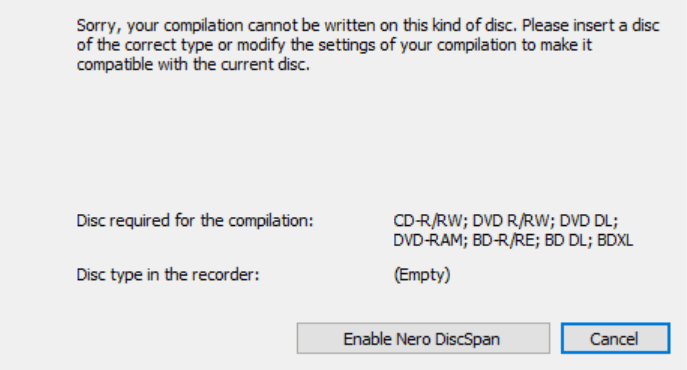
  • b) This message will also show when using Nero DiscSpan in Nero Burning ROM, which allows you to burn large projects over several discs – even different types of discs – in sequence
  • Within the burn process, Nero Burning ROM will pop up this message ever so often in order to burn to the next disc

Problem 3

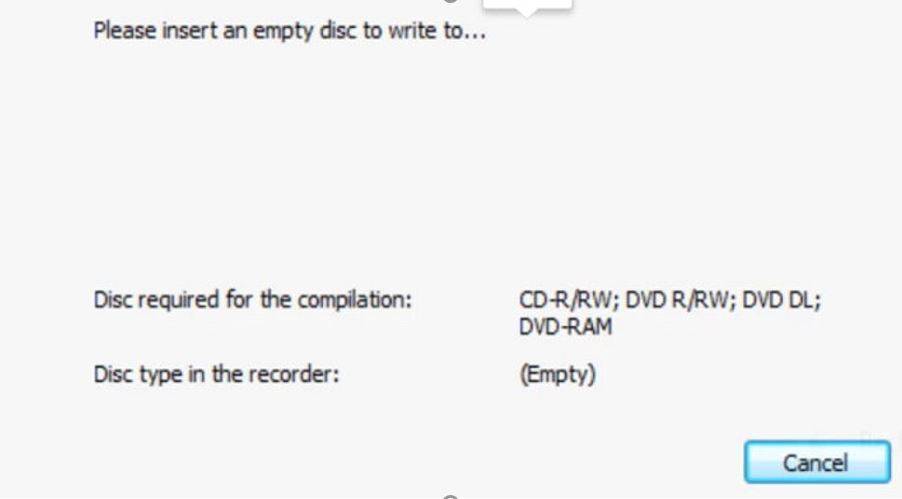
  • a) Your disc does not comply to the type of compilation (disc project) that you have chosen initially
  • b) You have more than one disc recorder in your PC or attached to your PC externally

3

Solutions 

  • a) Make sure that the type of disc project you have selected complies with the type of disc in your disc drive. For example: If you have selected an Audio-CD project, put an empty CD-R or CD+R into your disc recorder
  • If you want to burn a DVD-Video disc, insert and empty DVD-R or DVD+R disc into your disc drive
  • b) In a normal case, you want to burn your disc just once, with one disc recorder. In this case make sure to put the disc into the recorder drive that you have selected for burning
  • If you have selected burning to multiple disc recorders please make sure to have a disc inserted into each recorder, so that the message will not pop up

TIP! for more details on disc types check Nero KnowHow Glossary

Nero KnowHow 00121

How can I burn an MP3 Disc or Jukebox Disc in Nero Express?

Nero Express provides many options for you to burn your MP3 files and other music files to disc.

You can burn MP3-CDs, MP3-DVDs, and even MP3-Blu-ray Discs.

Given your devices support this, you can have hours of music stored on your disc to play back comfortably with devices like your car stereo, standalone DVD player, or Blu-ray Disc player.

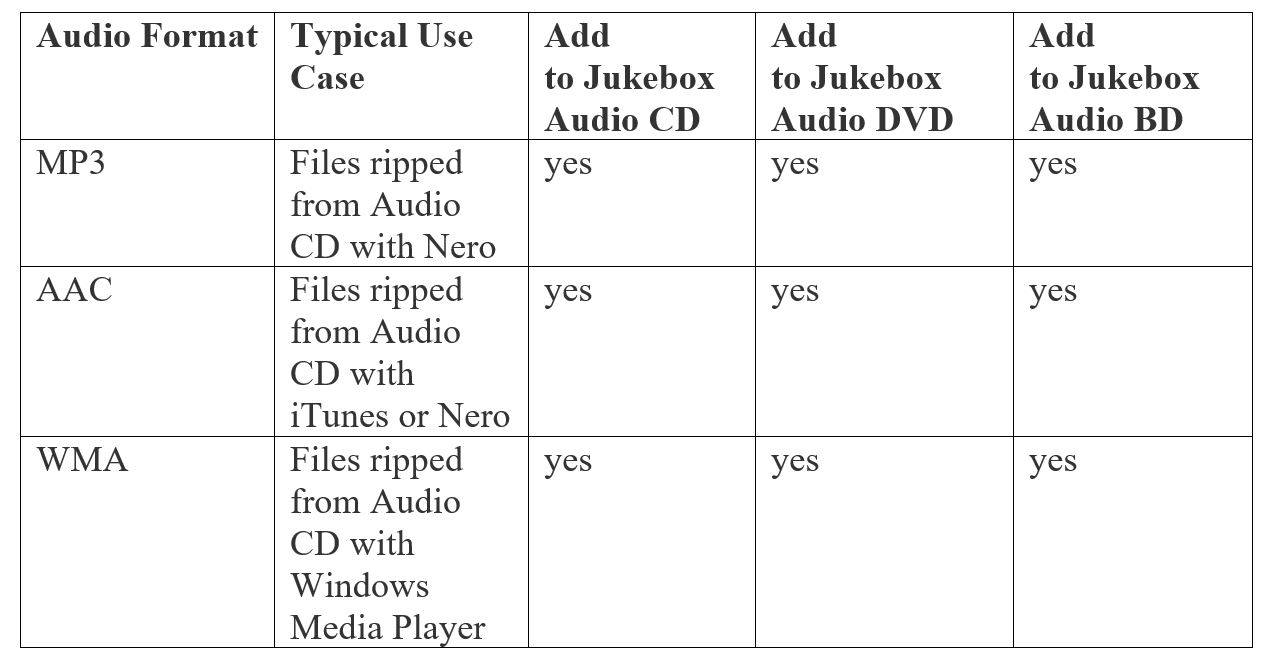
What’s even better: you can have mixed format CDs, DVDs, and Blu-ray Discs combining different typical audio formats like MP3, AAC, and WMA. Nero calls this Jukebox Audio Disc and below table shows an overview.

Jukebox Table EN

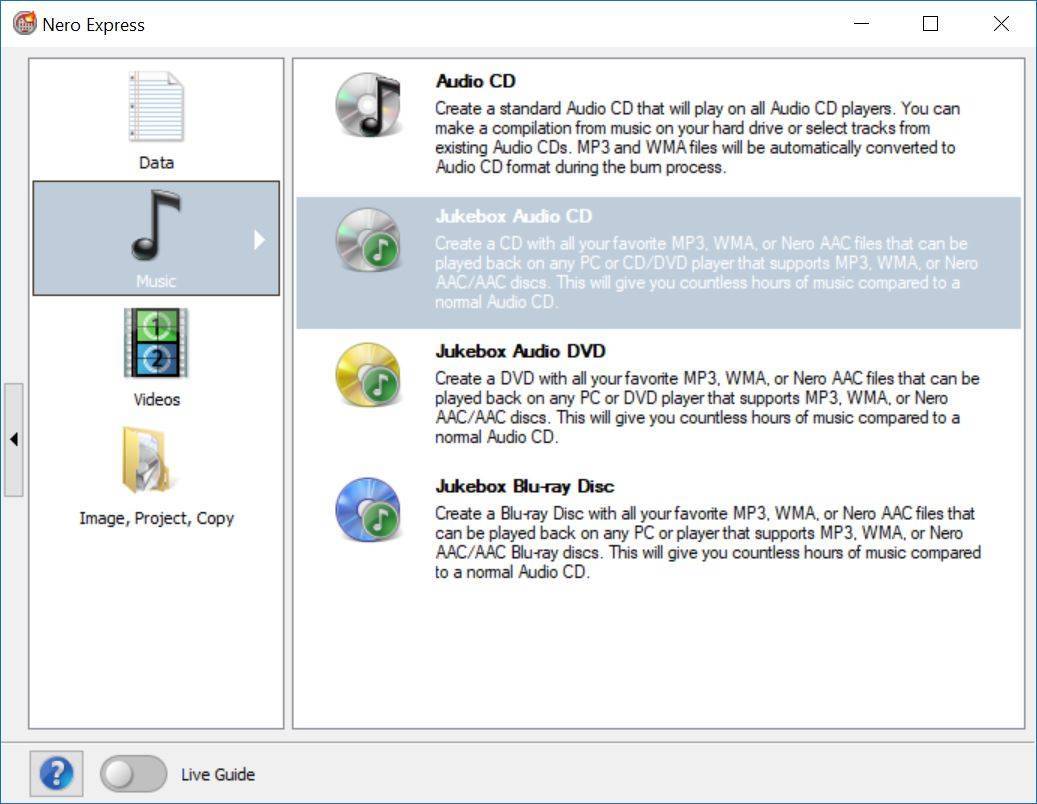
In Nero Express you can create such discs comfortably by clicking on of the Jukebox Disc buttons for CD, DVD, or Blu-ray Disc. Let us take the example of a Jukebox Audio CD. Klick on ‘Music’ in the left pane and then ‘Jukebox Audio CD’.

Start Jukebox Disc

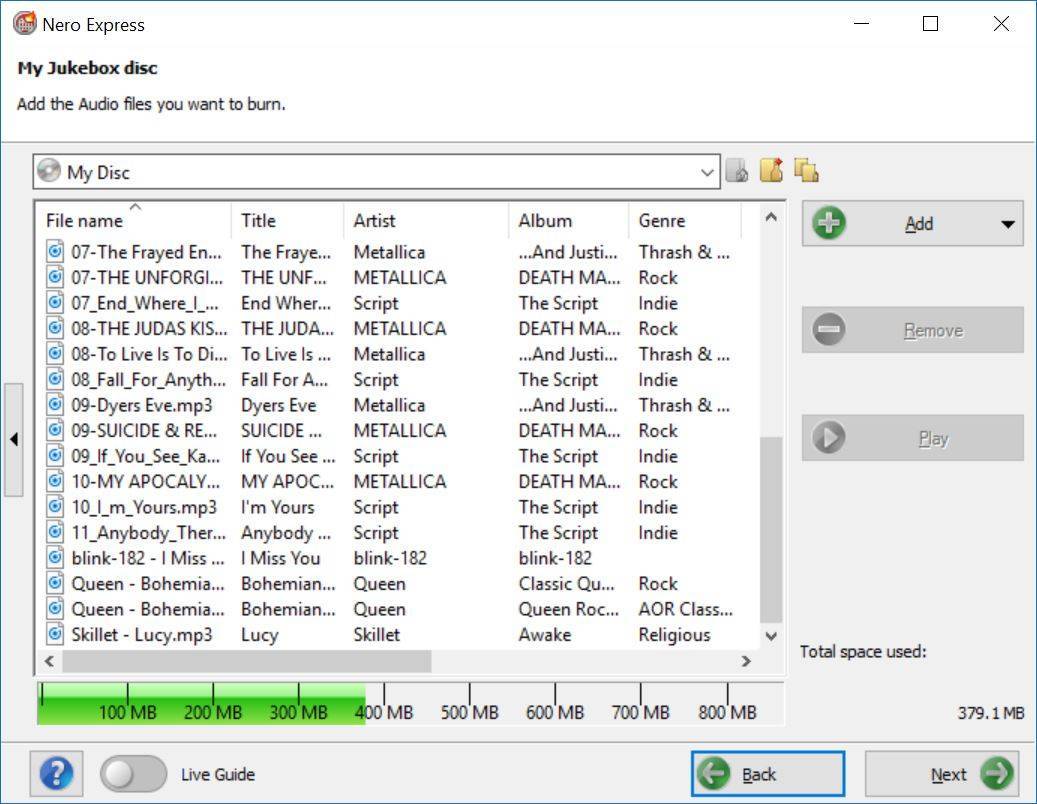
Add your music files by clicking the ‘Add’ button. You can do this by using Windows Explorer via clicking on ‘Files…’.

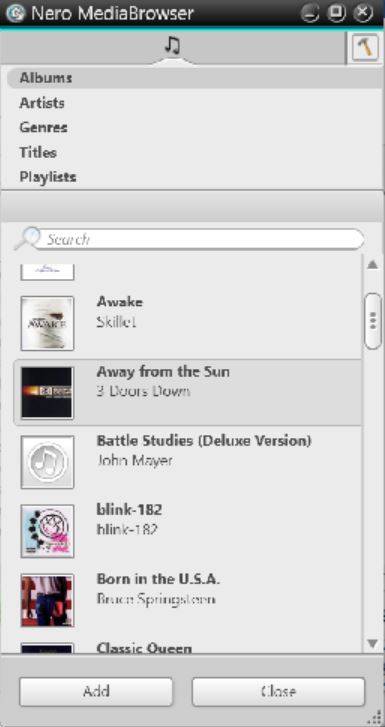
However, the much more comfortable way of doing this here, is clicking on ‘Nero MediaBrowser’, which shows your albums and album files with cover art. Nero applications include state of the art Gracenote® Music Technology, providing album title, genre, album covers, and more within your files.

NMB

add

When you have added all files to your track list click ‘Next’, select your recorder, type in a name for your disc, and  press ‘Burn’.

It will take a few minutes for your disc to burn depending on the speed of your drive. You will be notified when the burn process is completed.

If your original files were ripped or edited with Nero applications, your Jukebox Disc will have album information and album art included in the music files. This way it is extremely comfortable to navigate and search for titles.

Nero Know How 00119