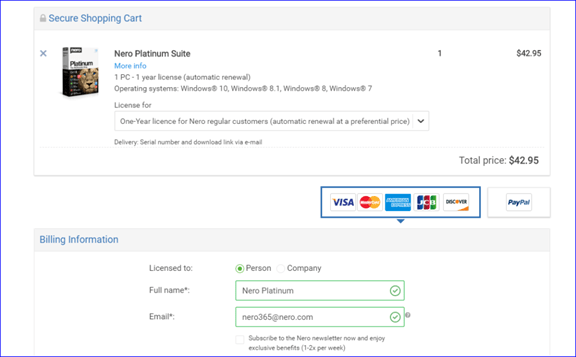
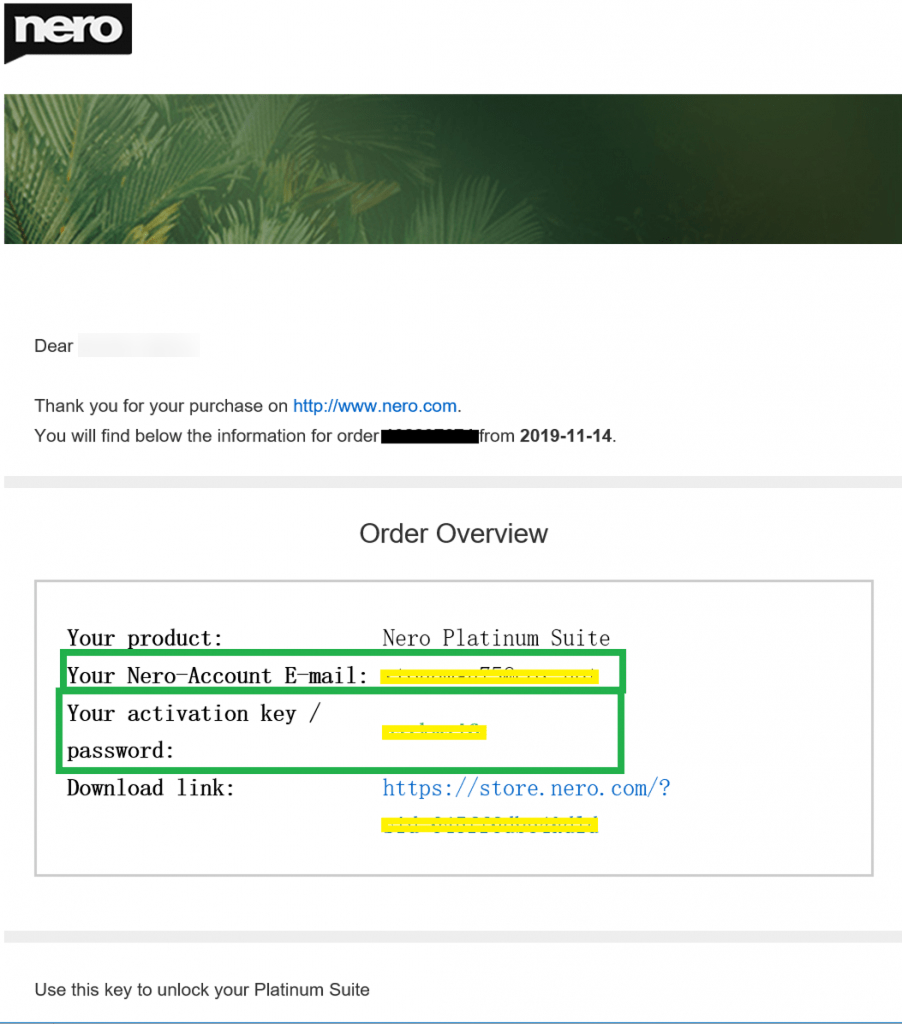
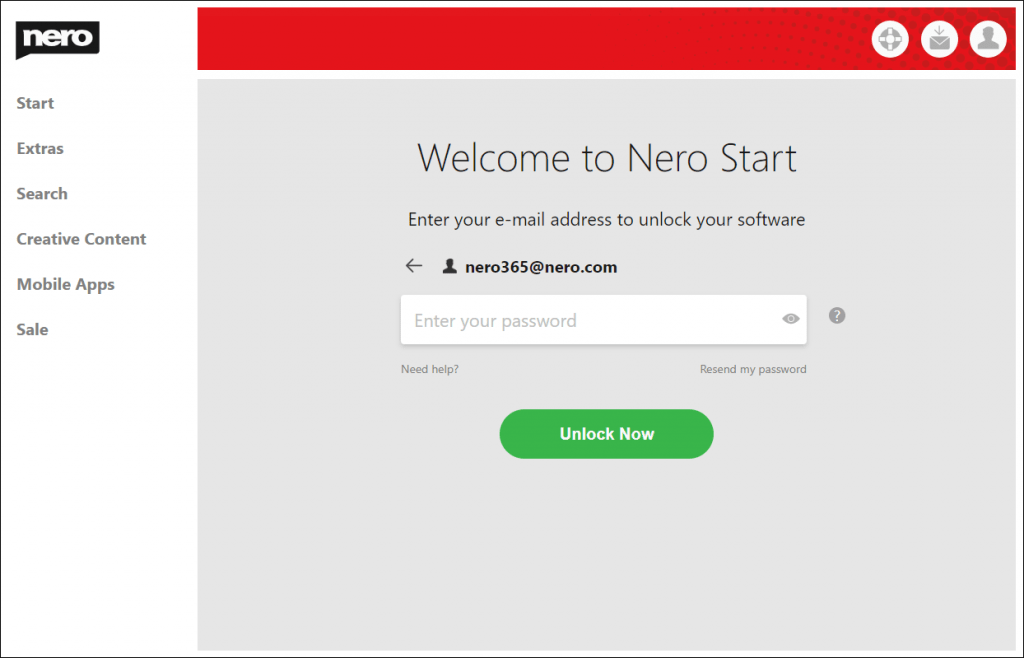
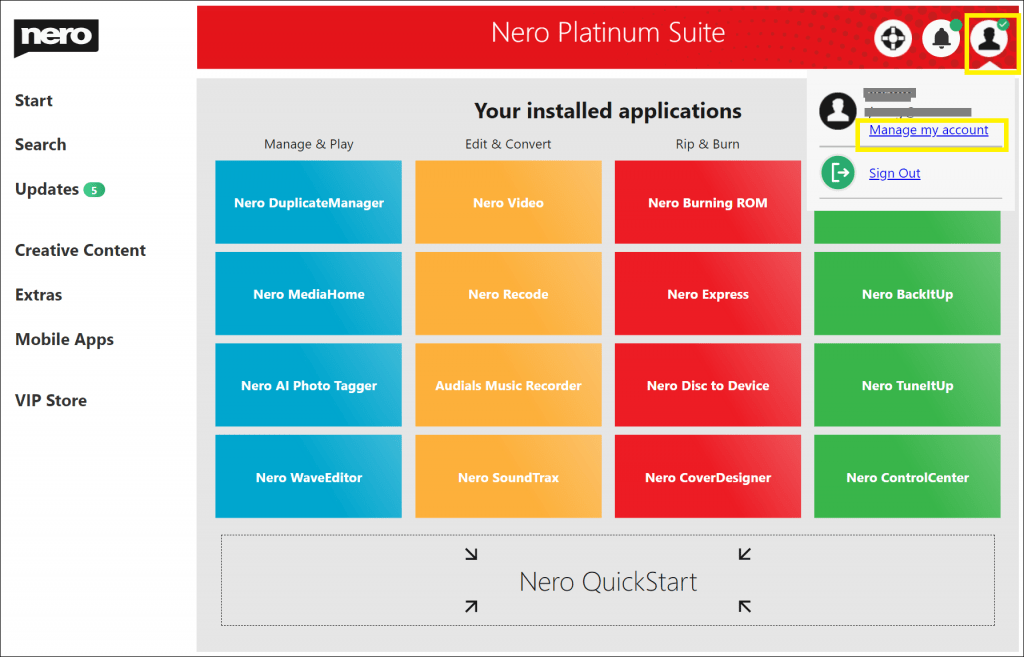
In Nero Start, have you logged in with your Nero Account correctly? If you bought Nero product via Nero.com, you need to log in with the email address which you entered during purchase. If you log in with other email, you could not unlock your Nero product. See how to log in here.
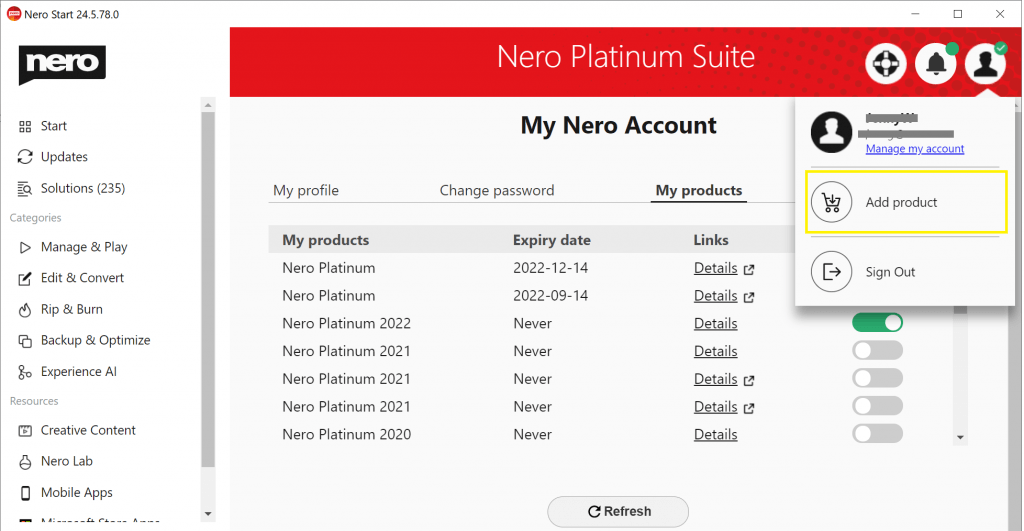
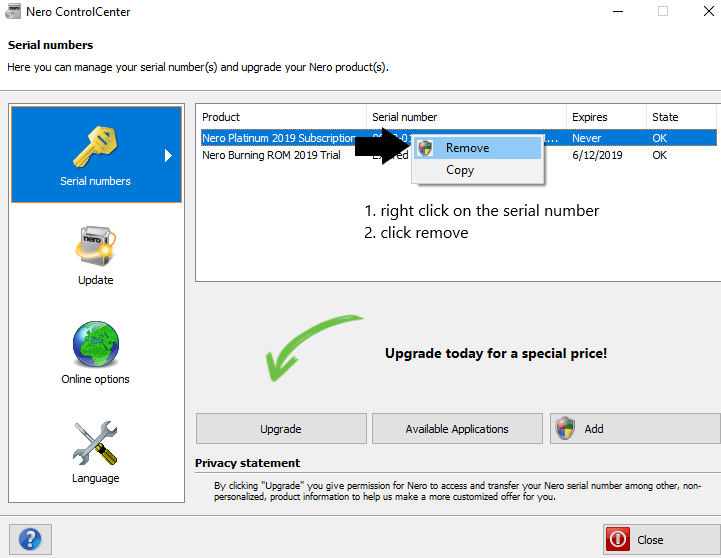
If you have already log in correctly with your Nero Account, but Nero is still a Trial. In this case, the reason is what you bought is Nero Platinum 2021 permanent license (‘pay once, forever use’ version), but what you installed is 1-year license subscription version. Please follow below steps:
1. Go to Windows Control Panel -> Program and Features. Is there Nero Platinum? If yes, please uninstall it.
2. Restart your PC as soon as uninstallation finished.
3. Download Nero 2021 Unlimited to your PC: https://www.nero.com/download.php?id=npla2021_full_installer
4. Close all Nero program which is running on your PC. Turn off anti-virus software temporarily. Install with the offline installer.
5. After installation, please run Nero Start, login with your email and password
6. After activate your Nero 2021, please continue to download and install 3 Content Packs if they are not installed yet. They could be installed in any order:
- https://www.nero.com/download.php?id=ncontent1_full_installer
- https://www.nero.com/download.php?id=ncontent2_full_installer
- https://www.nero.com/download.php?id=nlifethemespro_full_installer
Nero KnowHow 00310