Nero Video authoring module has three access points that help you checking the playback order of your titles.
1. The content screen allows you to import and sort the order of video titles on your disc. Via drag & drop or context menu, you can modify the playback order.

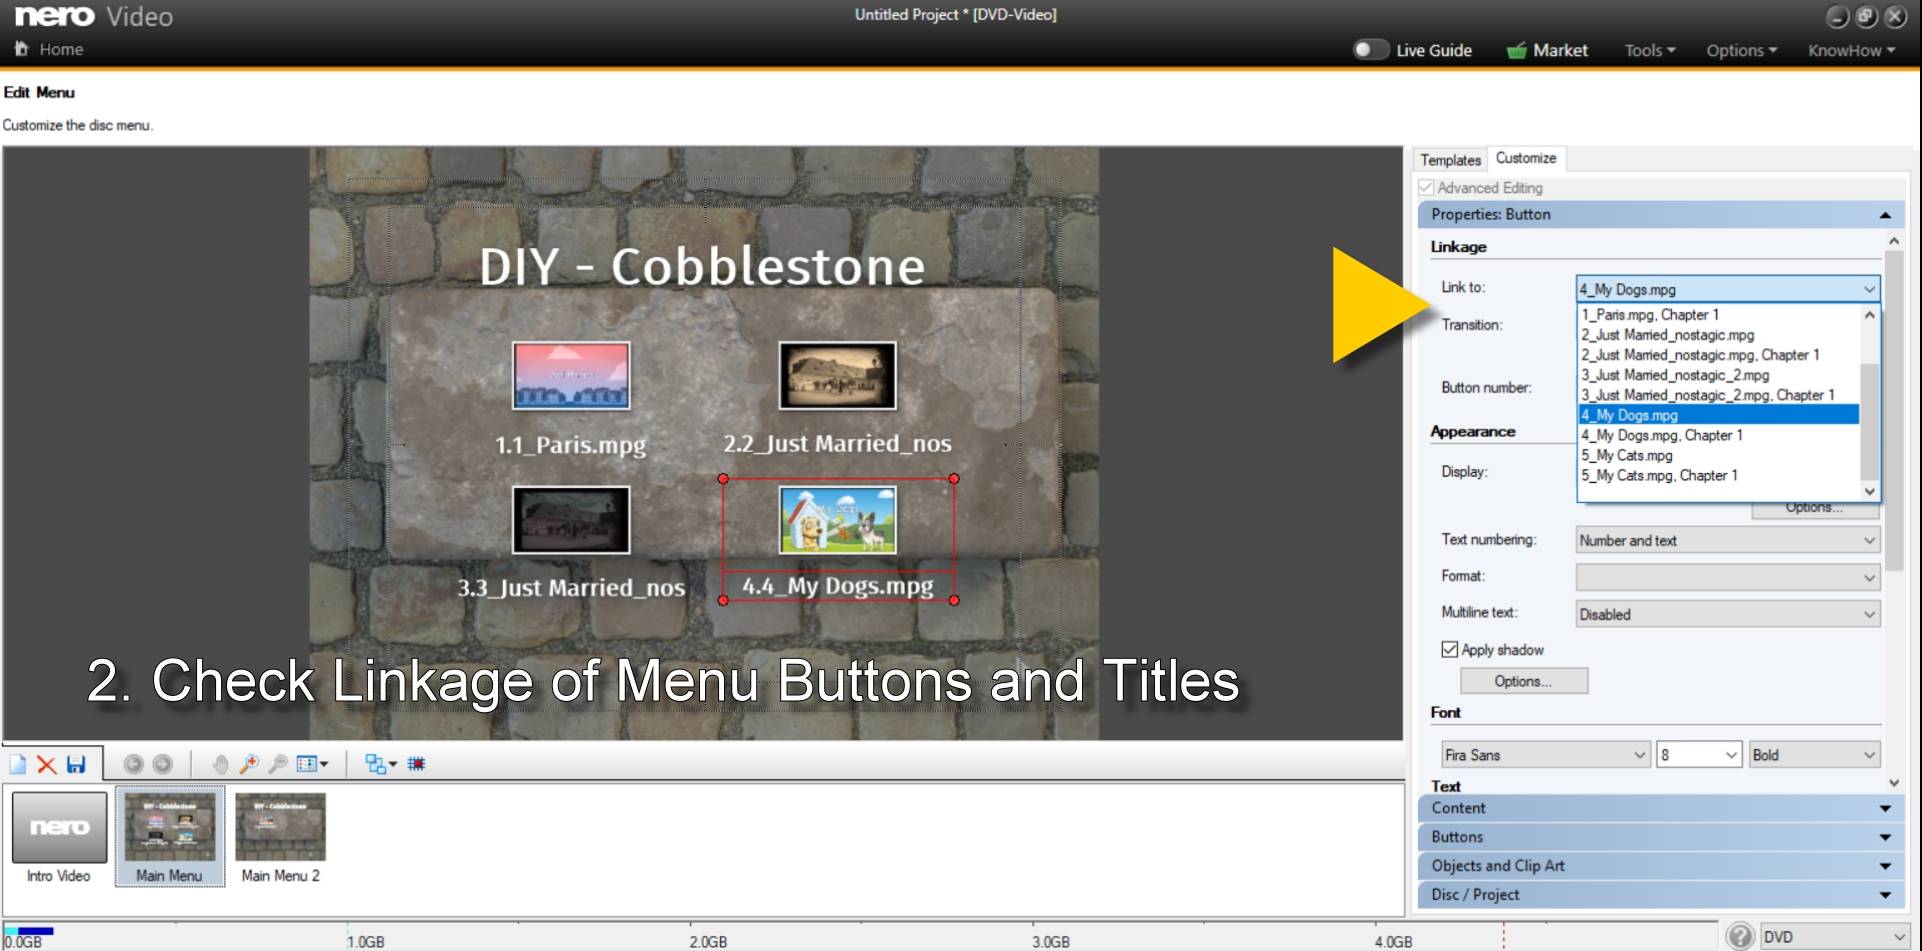
2. Within the menu selection screen via “Customize” and “Advanced Editing”, please check the order and linkage in “Poperties: Button” and the dropdown menu under “Link to”.
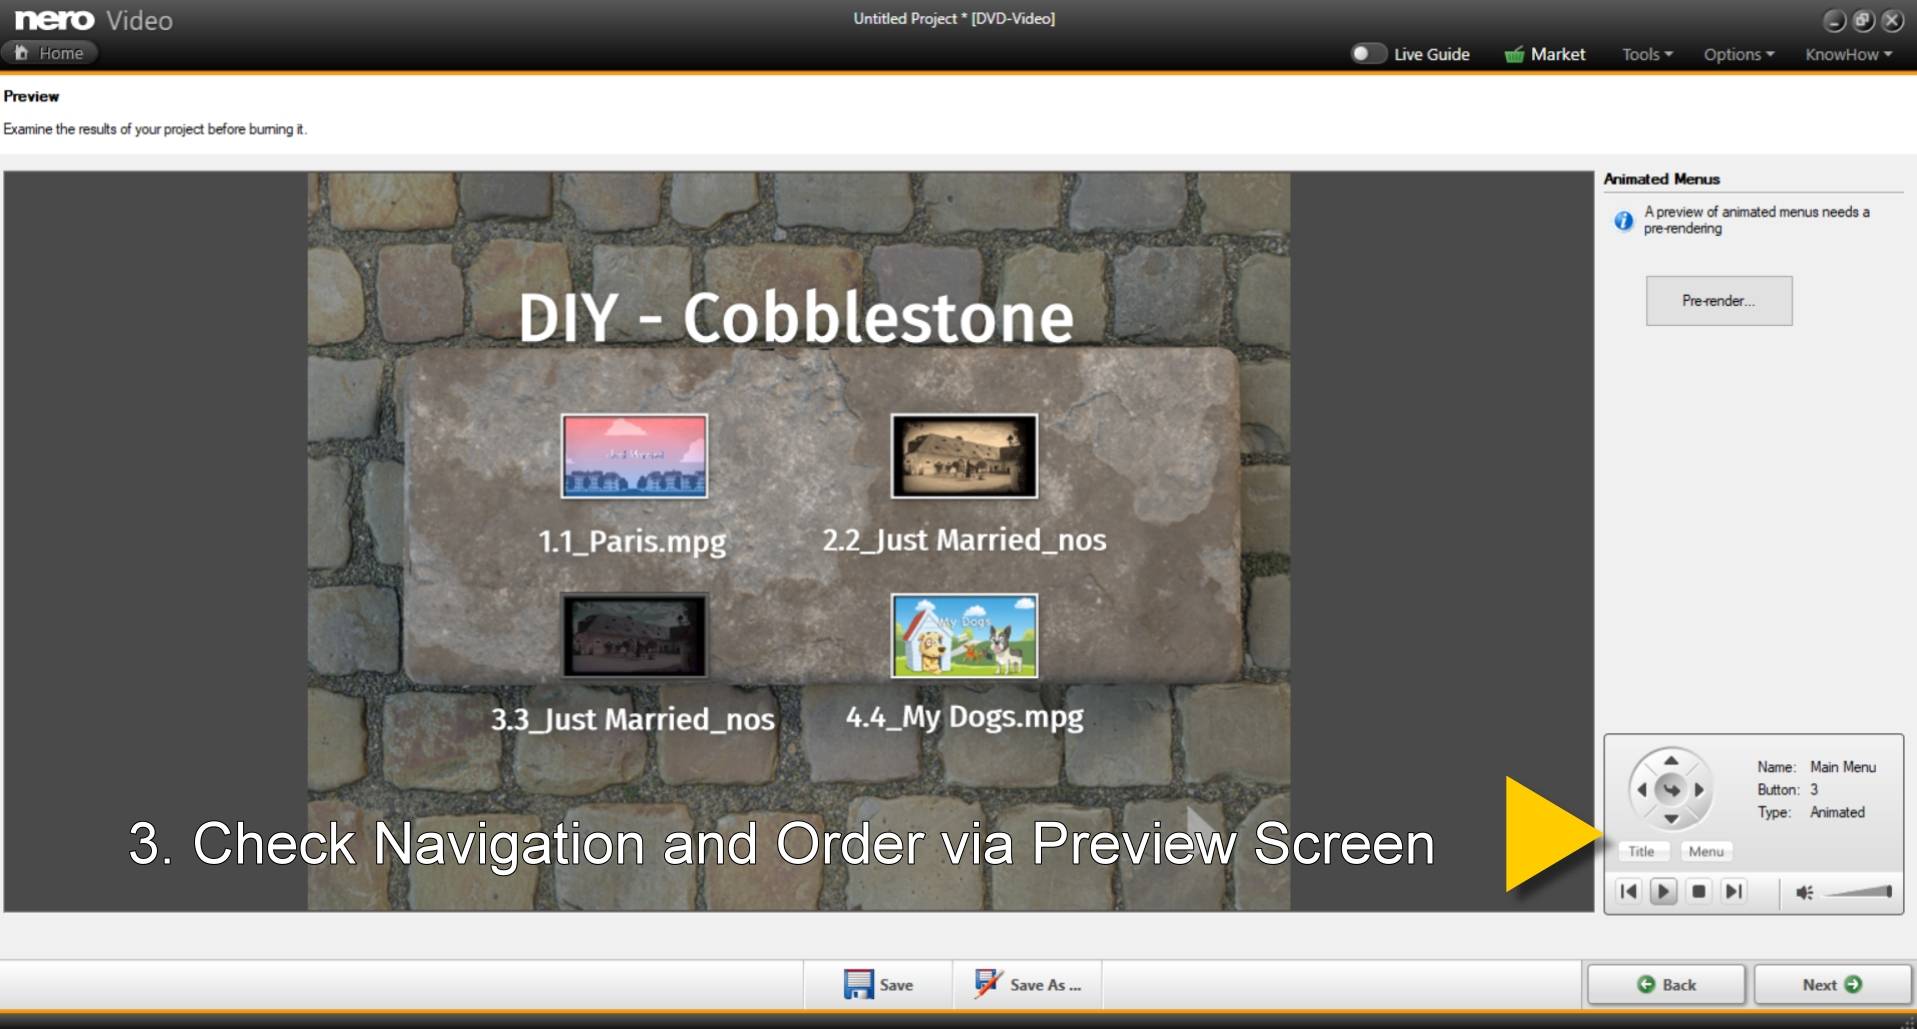
3. Finally, the preview window allows you to verify navigation and playback of titles in your disc menu, just like they will be played back on the DVD Player in your living room. If you find any mismatches here, please go back for modifications under #1 or #2.
Nero KnowHow 00175