Nero BackItUp is a great tool for doing regular backups of all your valuable files.
If you do not want to do a typical local copy (click here to check out Nero KnowHow 00054), a case for you might be synchronizing two folders in two different drives on a regular basis.
Imagine you want to have the Windows library folders for Photos, Music and Videos in your PC backed up every now and then to a dedicated external storage location, say a hard disk, or a USB stick, which has the same folders. Your typical case is to have these folders always in a ‘fresh’ state on the hard disk or USB stick, i.e. the same way they exist on your PC. Having these attached to your TV set, you can always enjoy your latest media in the living room.
A regular backup should be very meaningful for you, in order to have all your files associated to the three folders available in a synchronized state on the external drive. This way you can just use the second drive as your playback device while the PC remains the general archive for all your sources.
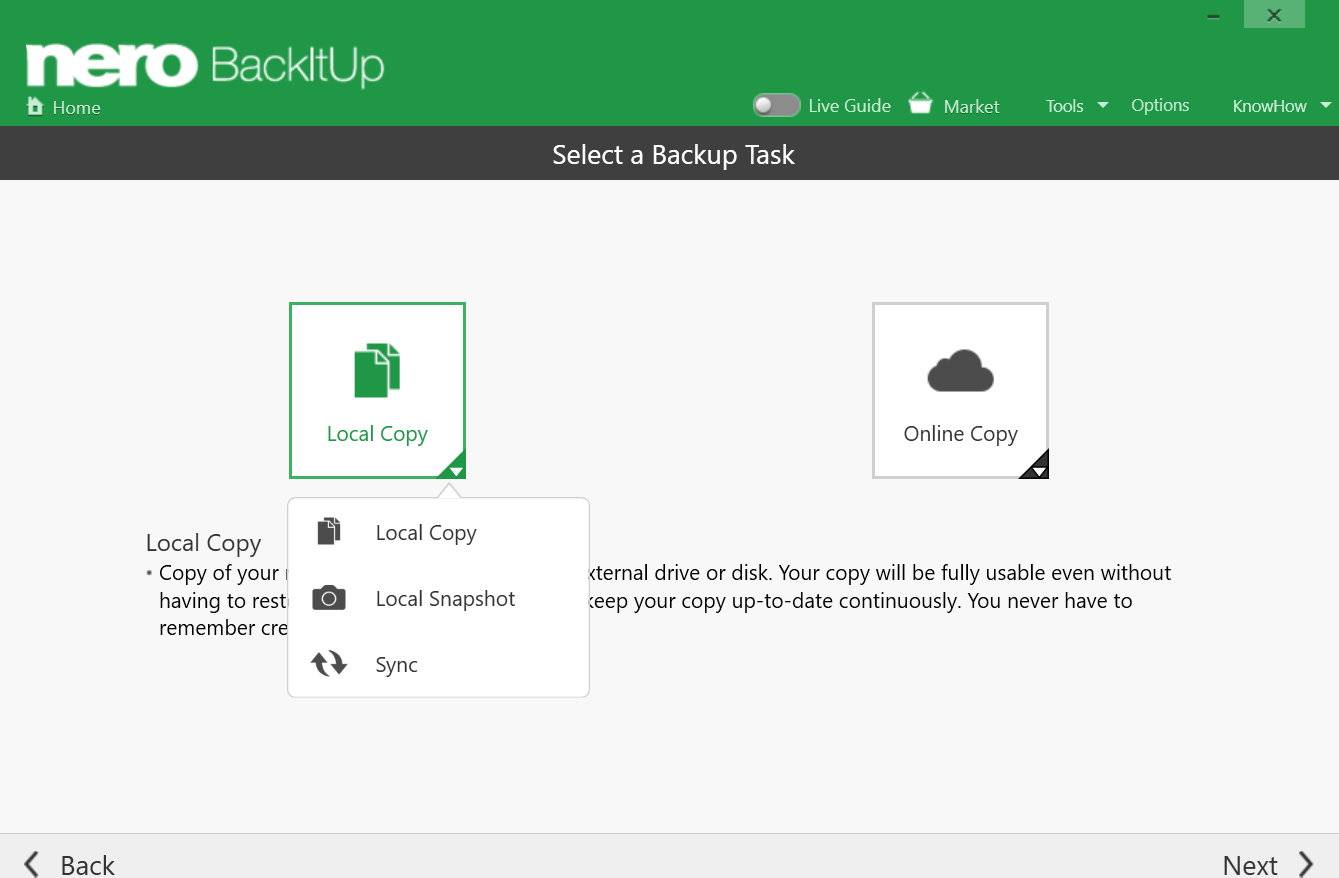
Nero BackItUp has an easy ‘Sync’ function allowing you doing backups between two storage folder locations in two different ways.
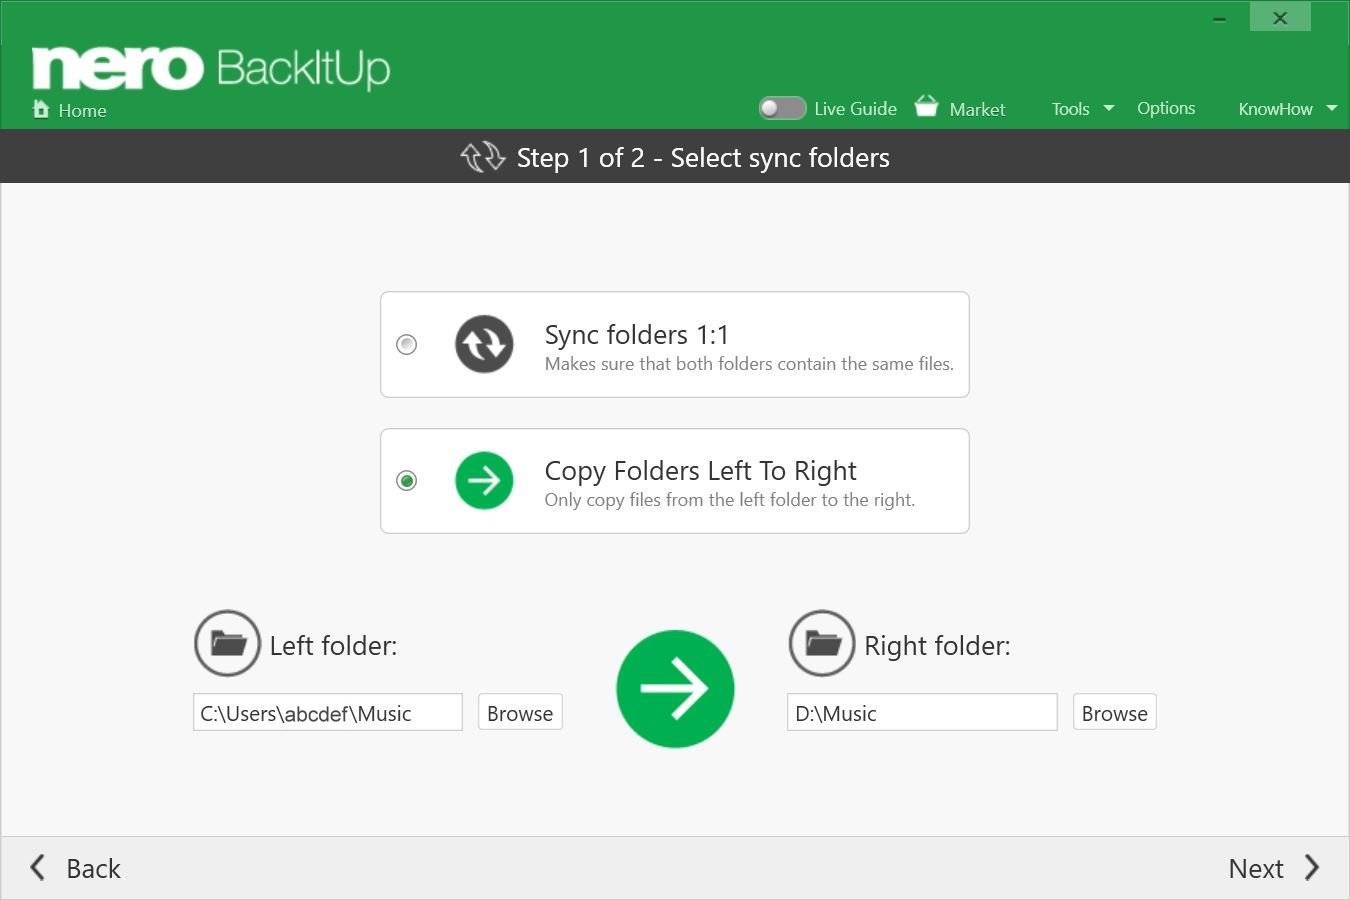
If you select ‘Sync folders 1:1’ Nero BackItup will make sure that each of the two folders on the two drives is always kept synchronous, i.e. identical. This is meaningful when you sometimes add files to this drive, or also the other drive.
In your described case, it makes more sense to use the second option, which is ‘Copy folders left to right`. As you always put all your media to the internal PC folders first, it makes perfect sense to use this scenario and have incremental backups of your three folders ever so often.
Incremental means that after Nero BackItUp did a first backup, going forward, it will only copy the new or modified files compared to the last backup. In fact, this saves a lot of time.
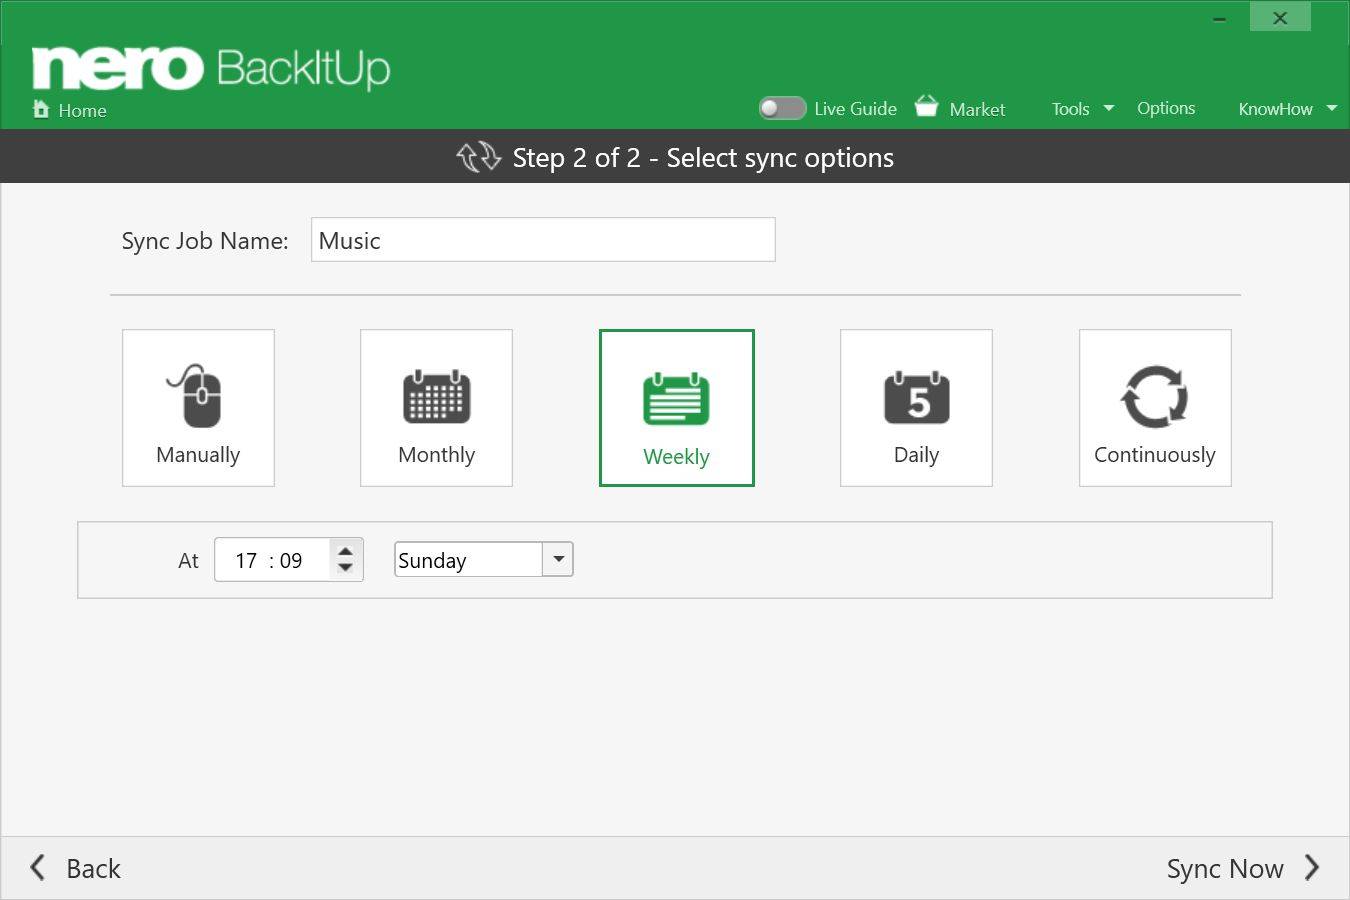
So, select ‘Sync folders 1:1’ and start a new job by clicking on ‘Add Backup’, then browse your PC drive for the music folder under the library, and Nero BackItUp will add the path C:\users\yourname\Music to the left. Do the same for your attached drive. Make sure you have created three empty folders there first (Music, Videos, Photos). Add one job for each folder. Now, you only need to decide if you want to do this manually each time or if you want to add a scheduled backup. Scheduled backups should be your preferred option. Click ‘Sync now’ and the initial backup will start right away.
Backup multiple Folder Jobs between two Drives over Time via ‘Local Copy’
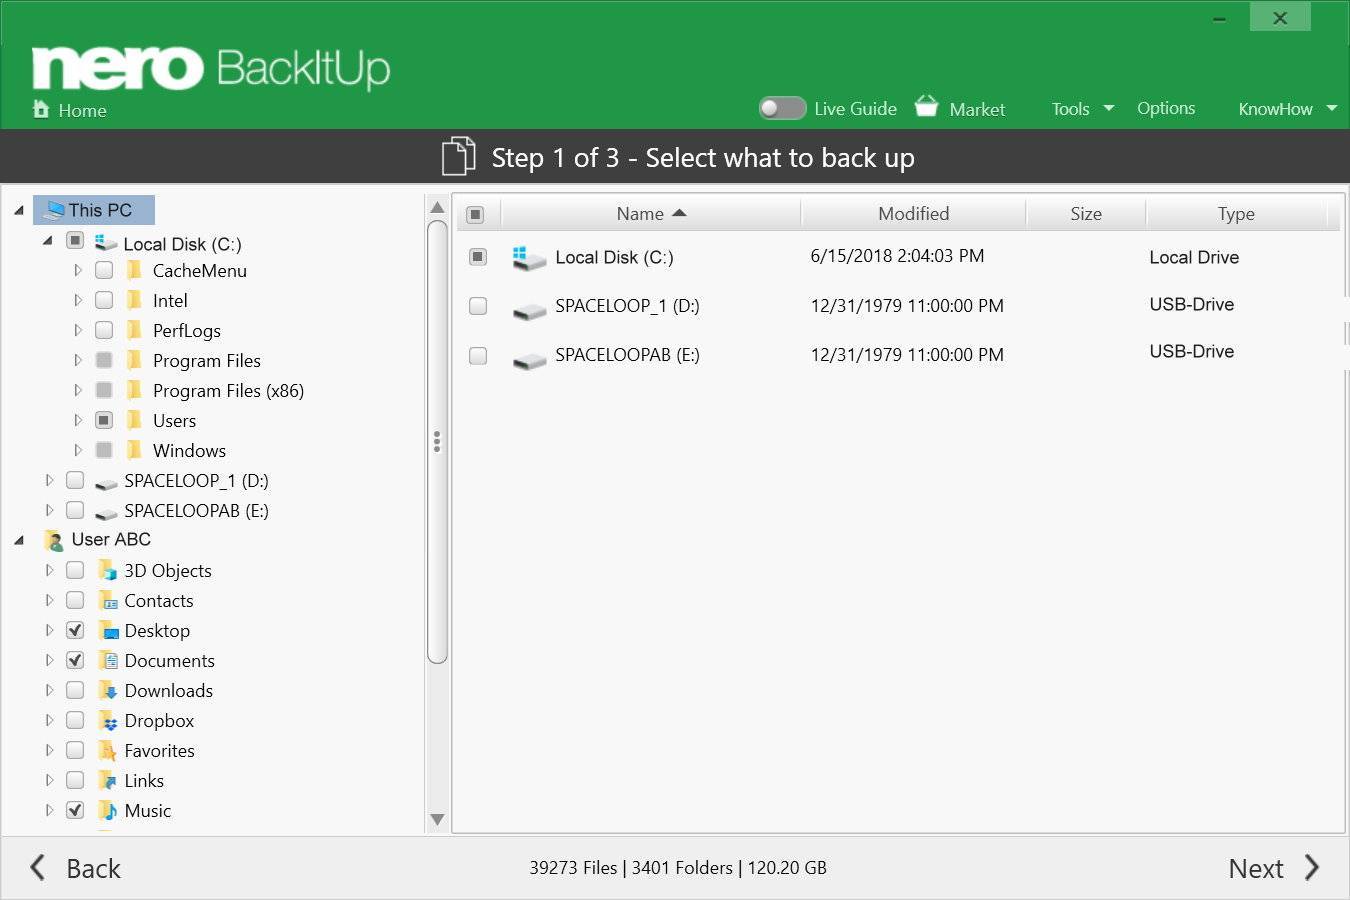
When you want to back up a larger amount of dedicated folders between two drives over time, it is easier to make use of ‘local copy’, and select the wanted folders within the customization page of Nero BackItUp. This way you will achieve the backup results via one job, only.
Try it out: it is easy, fast, and gives this great feeling of having all your valuable media files backed up over time in a safe place.
Nero Know How 00123
 Solutions