Once ‘Music Recorder’ was installed with your Nero Platinum product and you open ‘Music Recorder’ you will see ‘Enter activation code’ at the bottom of the user interface. Type in your activation key here and ‘Music Recorder’ will automatically become ‘Music Recorder Premium’ with all Premium features enabled.
If you have an earlier version of Nero Platinum that already included ‘Music Recorder’ installed on the same PC, and your ‘Music Recorder Premium’ account is already activated, you do not need to do this again for a later version.
In some cases it may happen that ‘Music Recorder’ will still show ‘Music Recorder Premium’ advertising. In this case please proceed with the following steps.
Click the ‘Upgrade’ button within ‘Music Recorder’ user interface. An upgrade page will open
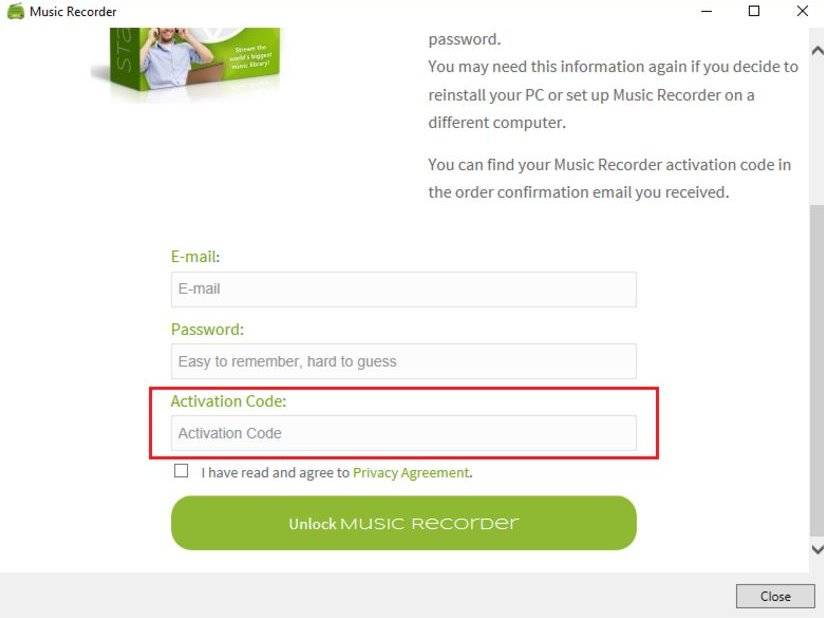
On this page click the link ‘I purchased Nero Platinum and have a Music Recorder activation code’. The ‘Unlock Music Recorder now’ page will open
Enter your e-mail address and password to register the activation code
Now, enter your activation code into the ‘Activation Code’ box
Then, click the ‘Unlock Music Recorder’ button to connect ‘Music Recorder Premium’ to your e-mail address.
Once you unlocked ‘Music Recorder’ will automatically become ‘Music Recorder Premium’ with all Premium features enabled.
In case the auto-login does not work, simply sign in manually, using the same e-mail address and password you provided to register your activation code.
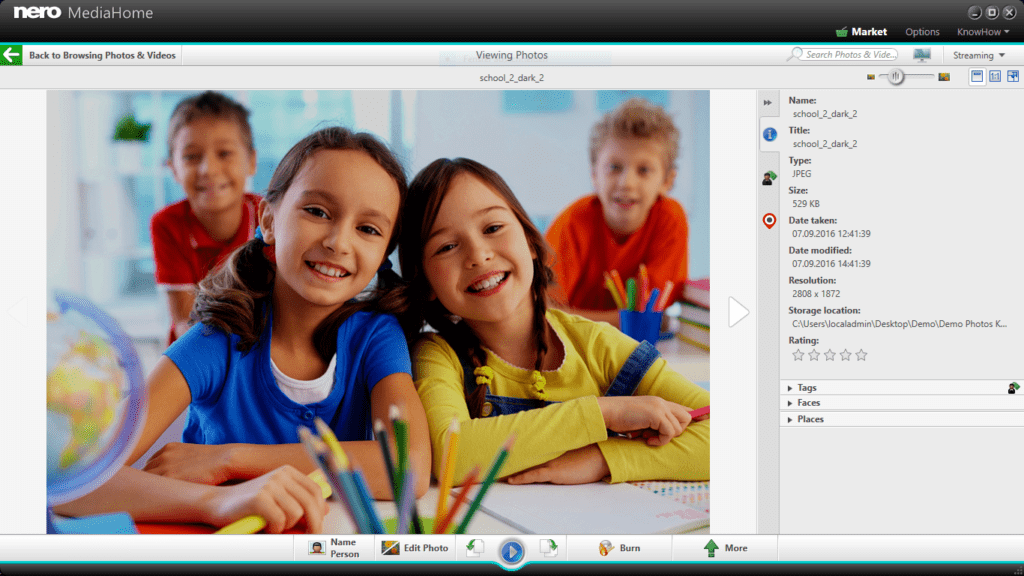
Open ‘Nero MediaHome‘ and attach your smartphone, DSC or USB stick to your PC. ‘Nero MediaHome‘ will detect your device and show files on your device that you can select for importing. If your photos are already availabe on your PC, ‘Nero MediaHome’ will probably already have scanned your system and will show the in images in ‘timeline view’, ‘faces view’, or ‘places view’. You can also add folders manually to ‘Nero MediaHome watched folders or drives ‘ by clicking ‘Options‘ > ‘Library‘.
Now select a photo in browsing view and double click on it. Your photo will open in full screen view. In the bottom panel click ‘Edit Photo‘.
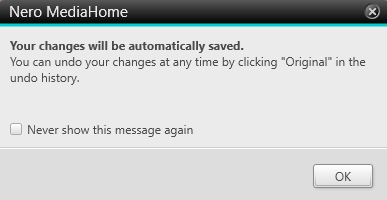
A message box appears telling you that all changes you are to apply in any part of the image editing will be stored in history for an ‘undo‘ at any point later. It is also very convenient that you do not have to save any of the changes applied. Check the box ‘Never show me again‘ and proceed via ‘ok’.
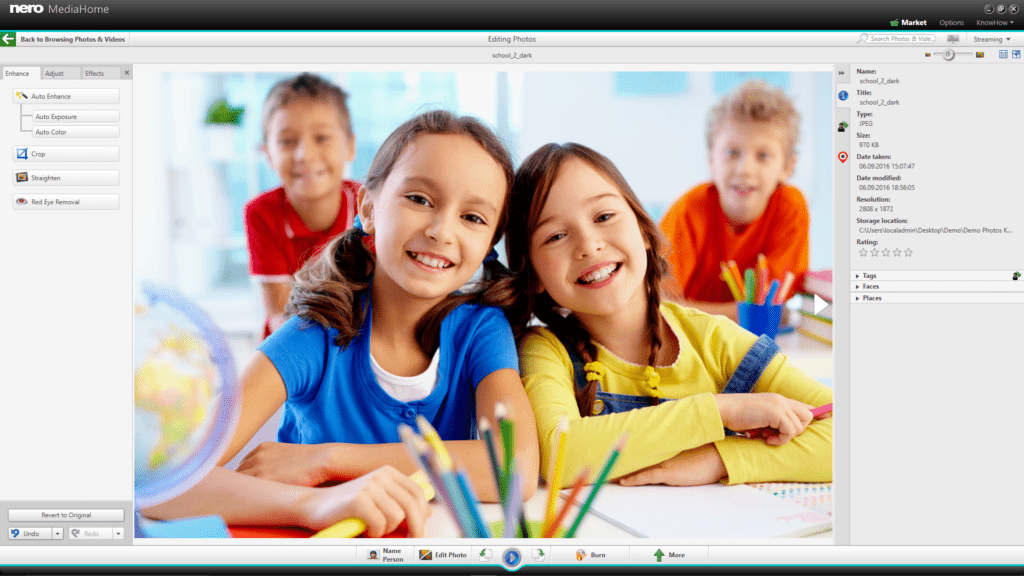
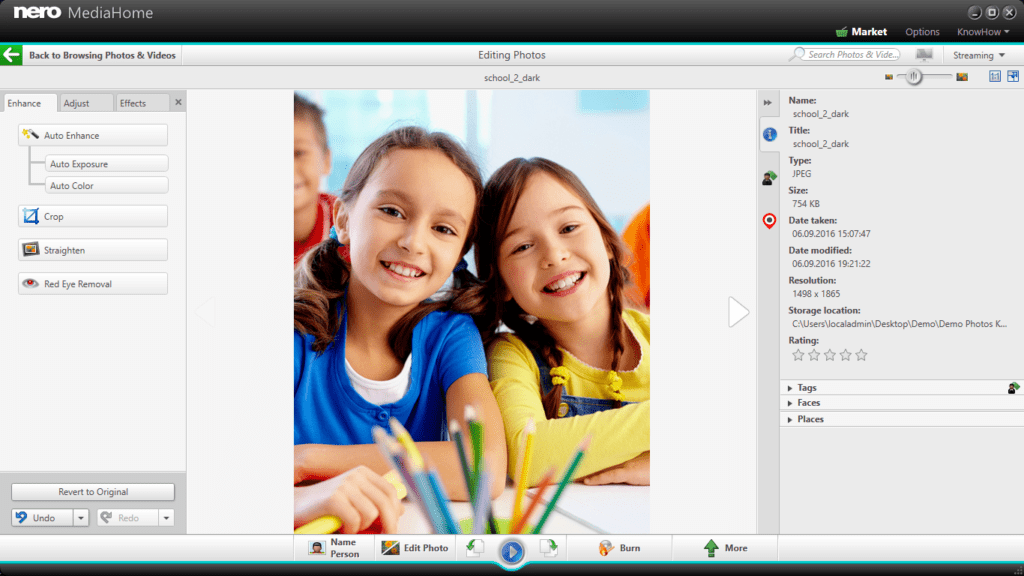
Now the left hand image editing menu opens. Click on ‘Auto Enhance‘ for one click image fixing, or click ‘Auto Exposure‘ and ‘Auto Color‘ to auto enhance these two values individually. In our example we just clicked
‘Auto Exposure‘ to brighten up the image while color already looked great.
Under ‘Adjust‘ you will find more options for manually fine tuning your images, if wanted.
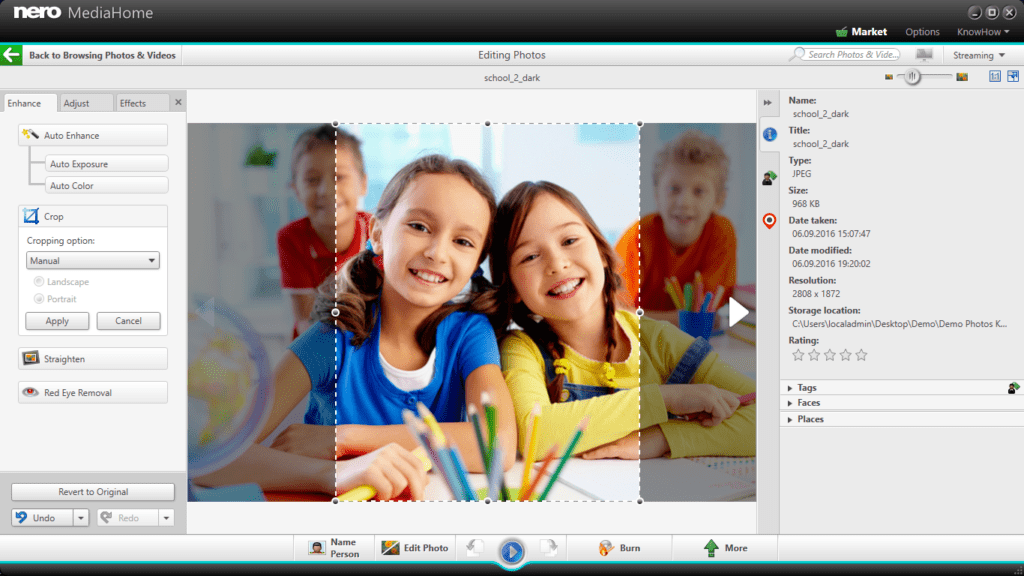
You can also crop and straighten your images, or remove red eyes. Let us take a look at the crop functions.
As you can see you have handles top, bottom, left, and right to easily crop your image to the wanted dimensions. Click ‘Apply’ for using the selected dimensions. Under ‘Manual‘ you will also find typical useful template sizes to auto-apply (post card sizes, A4, 16:9, 4:3, and more).
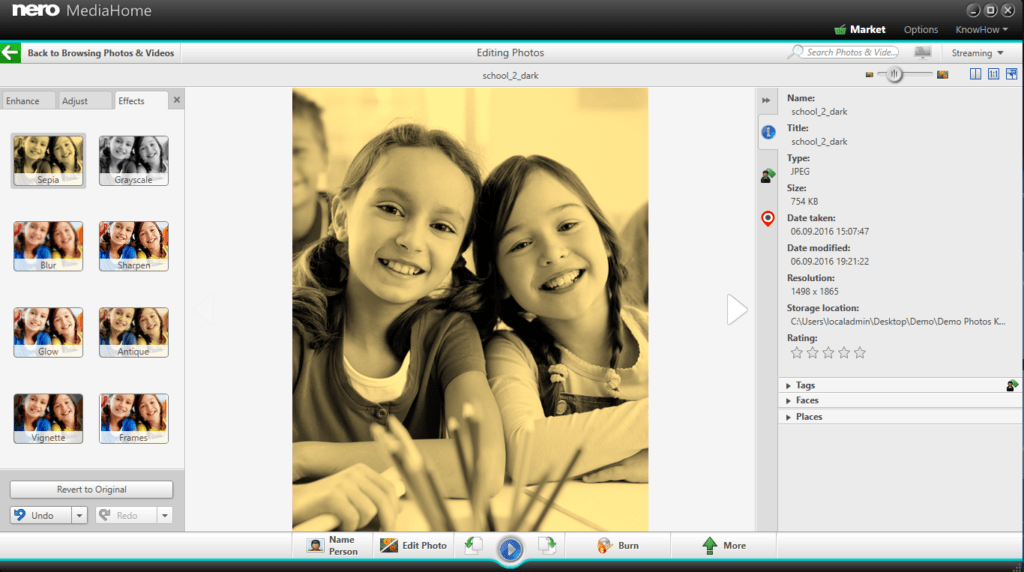
Now, let us also take a look at the nice image enhancing effects. You have got a number of vintage photo effect templates here. Just put the mouse over one of the effect templates and you will see a preview immediately. Then just click on the wanted effect template and it will be applied automatically. In our example we used a sepia effect.
That’s how easy it is to enhance your images with ‘Nero MediaHome‘ applying just one or two clicks.
By the way: you can also make use of these easy image enhancing functions when you have a series of images inside of a slideshow project – you don’t even have to leave your project for applying image enhancement.
Please open Nero MediaHome via Nero 2017 launcher screen.
Background Information:
In former versions Nero MediaHome used to be a standalone product that was version independent from Nero Suite product releases. A new version or an update of Nero MediaHome would have just updated any version of Nero MediaHome on the same system and overwritten the former version.
Starting with Nero 2017, Nero MediaHome 2017 like any other application of Nero Suite was changed to be version dependent with Nero Suite releases. There is also no feature reduced free version of Nero MediaHome available any longer. Due to these modifications the new product can be better positioned in the market and you as a paying customers can benefit from an extended feature set. Moreover, there is no disadvantage or risk of data loss against older versions. Any asset of the media library of an existing product will be automatically taken over to the new Nero Media Home 2017.
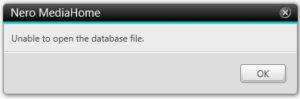
Same as before, only the latest available Nero MediaHome on an end-user system is allowed to access the media library. Different than before now an older version can exist side by side with new Nero MediaHome 2017 on the same system. In such a scenario – if you try to open a former version of Nero MediaHome (which by design does not include the media library any longer) it will fail to launch with the message: “Unable to open the database file.” This is the expected behavior and you can safely uninstall the older version.
Also, if you are using the text search from Windows start menu to launch Nero MediaHome possibly an older version might be executed and you will run into the same issue. In this case you can safely uninstall the older version of Nero MediaHome, too.
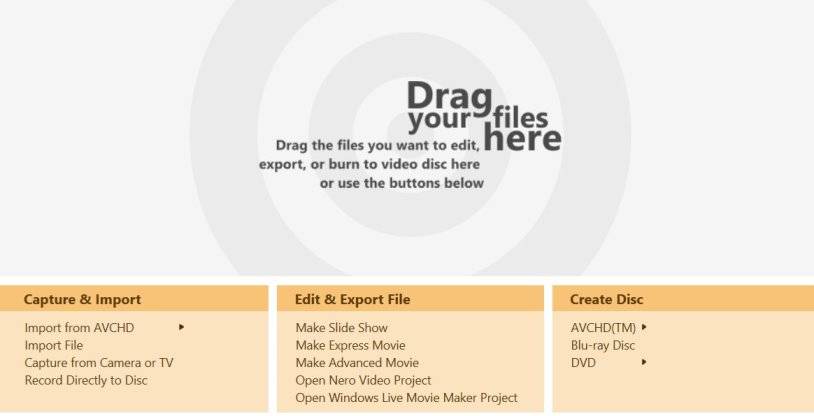
You have the choice of selecting ‘Make Express Movie’ or ‘Make Advanced Movie‘ within ‘Nero Video‘ ‘Home Screen‘ as well as in the project itself.
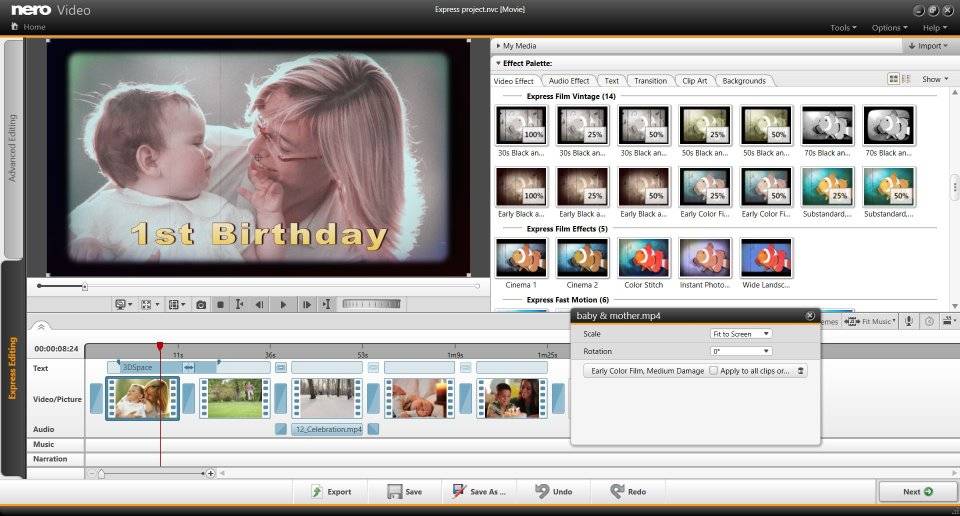
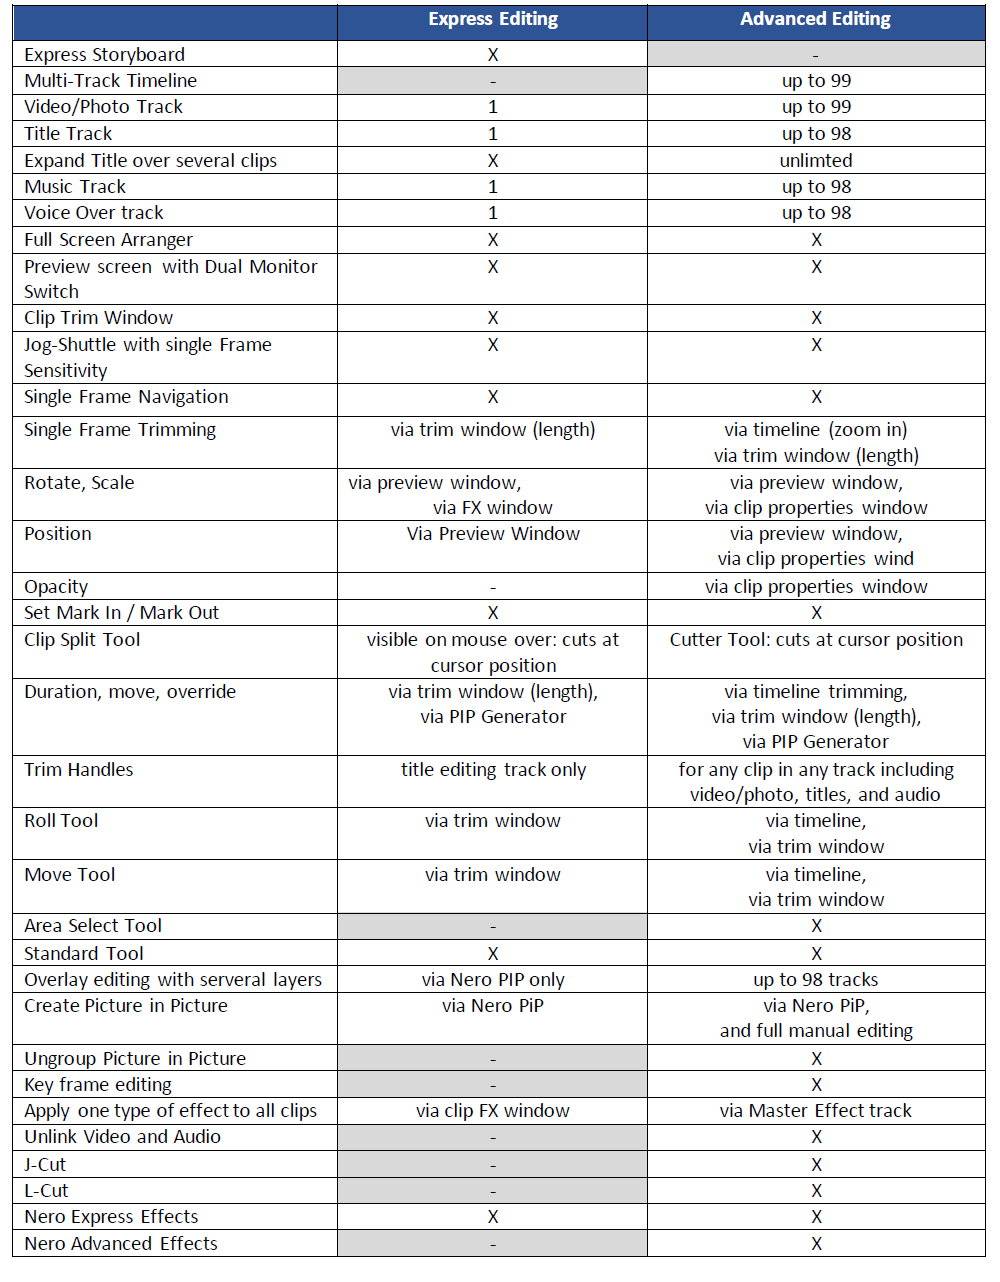
‘Express Editing‘ is optimized for quick results. ‘Nero Video‘ express mode is very easy to use, still you will realize that probably 90% of your jobs can already be done here. Compared to ‘Advanced Editing’ you have some limitations: no multi-track editing, no aditional trimming options, no keyframing, no advanced video and audio filters.
Also for users with higher ambitions Nero Video ‘Express Editing‘ is the perfect choice for rough cuts and quick trimming. You also have dedicated preset ‘Nero Express Video Effects‘ templates that you just drag and drop to your clip.
Starting with Nero 2017 you also have a great function called ‘Multi Export‘ in ‘Express Editing‘. This allows you to export individual clips within one project in only one export process. This way you save a lot of time.
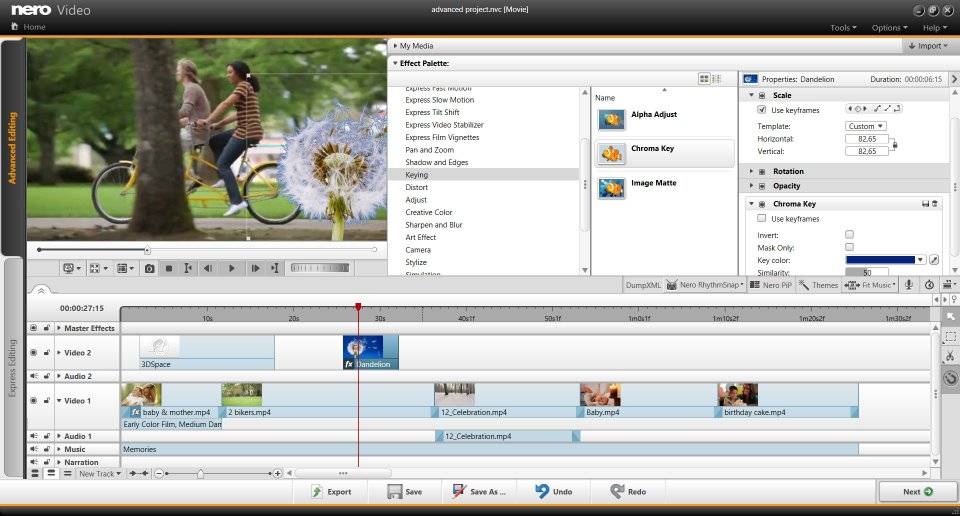
Nero Video ‘Advanced Editing‘ comes into place when you want to create video projects with all the bells and whistles of a pro movie. ‘Advanced Editing’ gives you timeline based multi-track editing with numerous layers, a higher varitety of trimming tools, more video and audio filters. A key differentiator is the availability of keyframe editing that you can utilize for moving path animations, picture in picture overlays, and also for almost all of the advanced video effects. In here you also have the option of customizing video effects and save them as your personal drag & drop effect template for frequent re-use. Such newly created personal drag & drop effect templates will also work in your ‘Express Editing‘ projects.
Once started a project you also have the option of hot switching from ‘Express Editing’ to ‘Advanced Editing’ so that you can further fine tune your project started in ‘Express Editing‘.