Yes, you can upgrade existing Nero Volume Licenses for a special price, and additional conditions for new seats can be discussed.
Please refer to the two examples below that relate to the different scenarios of your question.
Example 1
I have Nero Volume Licenses for one thousand seats, which I am using on one thousand PCs.
Now I have bought five hundred new PCs and want to extend the given Nero product licenses to one thousand five hundred seats.
Please contact your Nero sales representative and he will offer you a special price for your individual scenario.
Example 2
I have Nero Volume Licenses for one thousand seats, which I am using on one thousand PCs.
Now, I have bought five hundred new PCs and want to extend the given Nero product licenses to one thousand five hundred seats with the latest Nero product version.
Please contact your Nero sales representative and he will offer you a special price for your individual scenario.
Nero Volume Licenses are available in two different components:
The license itself, i.e. the regular Nero Volume Licenses per seat
An optional Maintenance License per seat on top of a regular Nero Volume License
Regular Nero Volume Licenses per seat
Nero Volume Licenses are perpetual, i.e. they continue without limitation or termination, and allow you to use your product as long as you want under the two conditions below:
You can only use it for the specified Nero product
The licenses are only valid for the given number of seats as specified on your certificate (see example)
Example:
I have Nero Volume Licenses for one hundred seats, which I am using on one hundred PCs.
Now, I have bought twenty new PCs. How can I handle this without buying a new license?
If you do not intend to upgrade your Volume Licenses and just use it as normal, you could uninstall your Nero Volume License software product on twenty of your old PCs and install your Nero Volume License software product on the twenty new PCs, instead. This way the number of active seats will not change and you will comply with your purchased licenses.
General rule for this case: please make sure that the number of active PCs running Nero software never exceeds the bought number of seats per Nero Volume License.
Nero Maintenance License per seat on top of a regular Volume License
In addition to a given regular Nero Volume License, you can buy an optional Maintenance License for the duration of one, two, or three years. The selected Maintenance ends on the expiry date shown on your Maintenance Certificate. A Maintenance Certificate is not auto-extended.
A Nero Maintenance License includes the following services and benefits:
When you want to create a DVD that plays on your DVD player you initially need to understand which kind of format needs to be present on your DVD disc.
There is a fundamental difference between a DVD data disc and a DVD-Video disc.
A DVD data disc can be filled with any kind of data content whereas a DVD-Video disc consists of a defined disc format structure that lets you navigate through DVD disc menus and lets you play your files via these disc menus. Also the video file formats that you use (in your case mp4 and .avi) need to be made compatible as a DVD-Video disc only accepts MPEG-2 video codecs*.
*For more details check the Glossary in Nero KnowHow
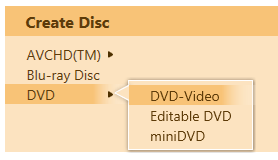
Step 1 – Select the DVD-Video creation option
Nero Video is the application of choice within Nero Suite that provides easy yet powerful high-quality DVD-Video creation.
Launch Nero Video
On the start screen (“Home”) select “Create Disc > DVD > DVD-Video”
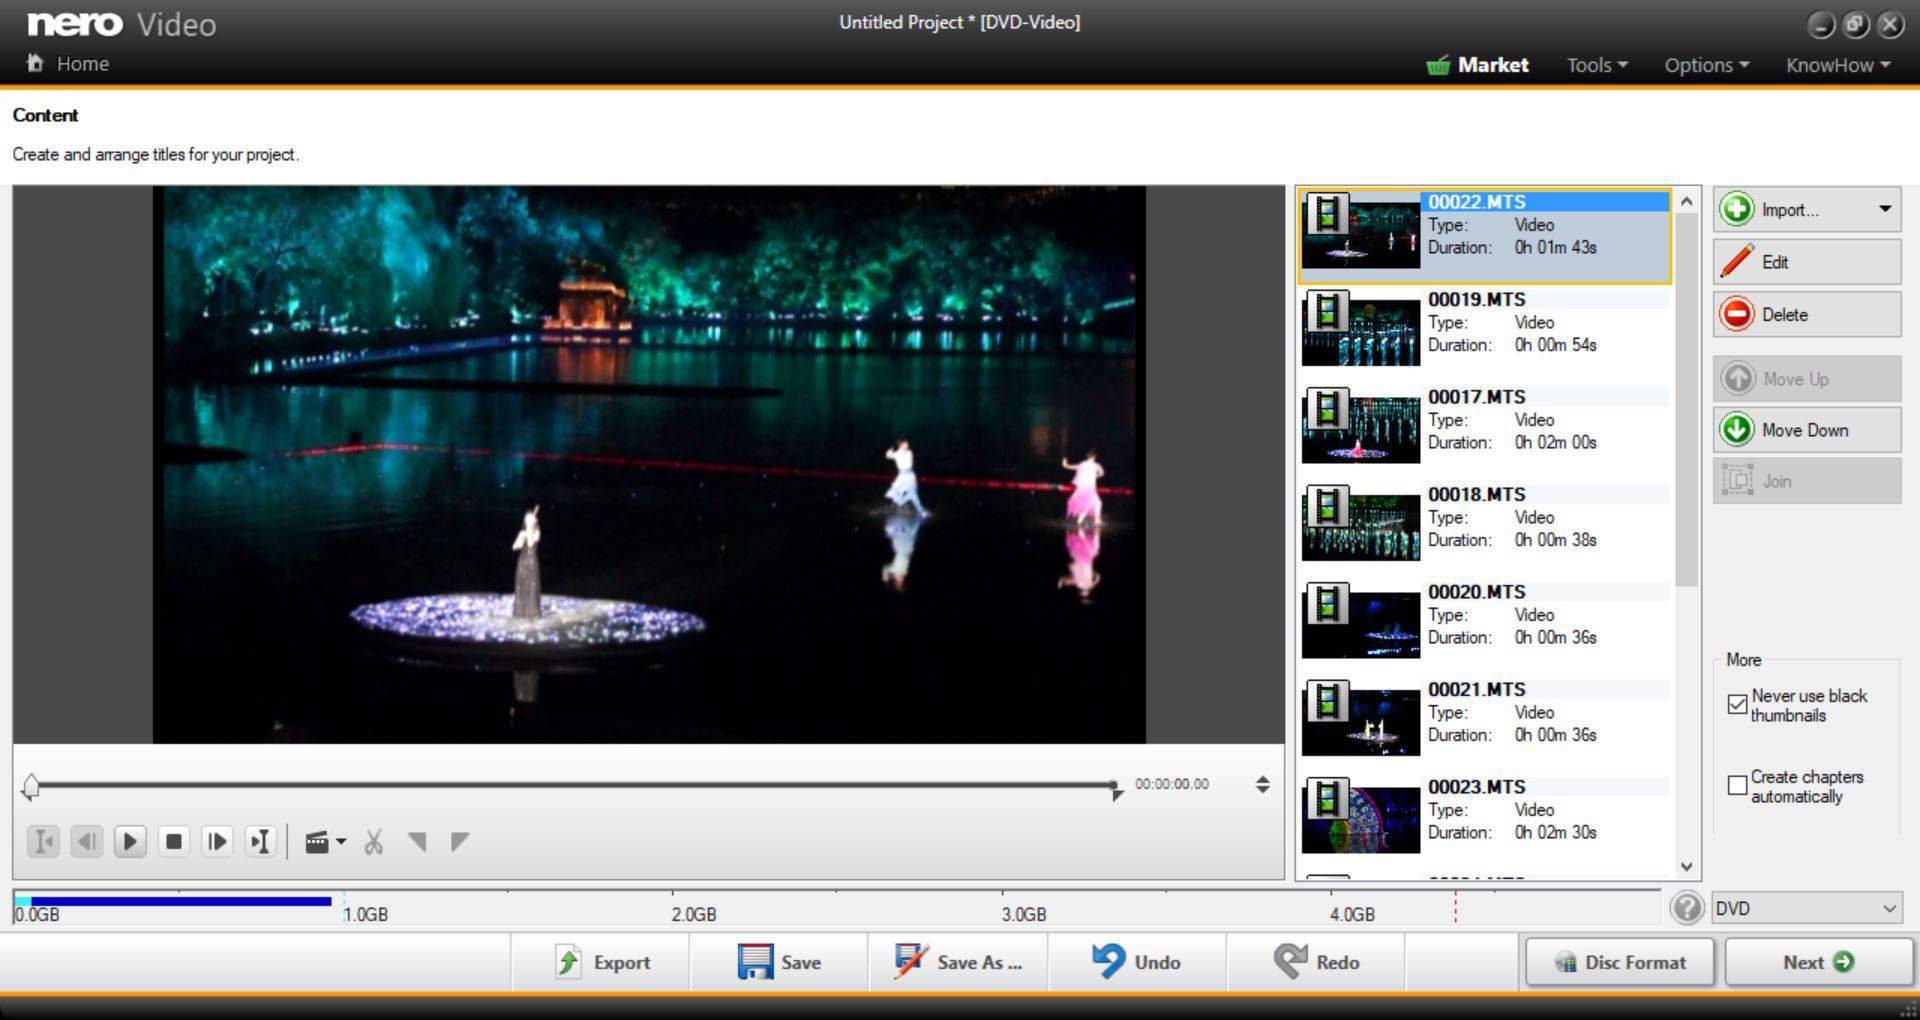
Step 2 – Import and sort your content
You will see the content screen for your disc project, now
Click on “Import > Import files” to add your video files to your disc project
Within the explorer view browse and select the videos you want to add, and press “Open”
The videos will be imported and listed
Note that the videos will be listed in the given order from top to bottom, and this will also translate into the order of clips being shown in your DVD menu
If you want a different order, just drag and drop the clips to the corresponding position within in the window (in the screenshot you can see that clip 00022 and 00019 have been dragged to the top of the list)
when all is good, click next
TIP: You cannot insert images or image sequences directly into a DVD-Video project. If you plan to do so, make sure that you have none of your video clips in the actual list selected. Then click ,Edit’. Within the editing mode simply drag the wanted images to the timeline and click ‘Next’. Your image sequence will now be present as an individual video within the clip list of your DVD project and be available as a regular video for playback via your DVD-Video disc navigation menu.
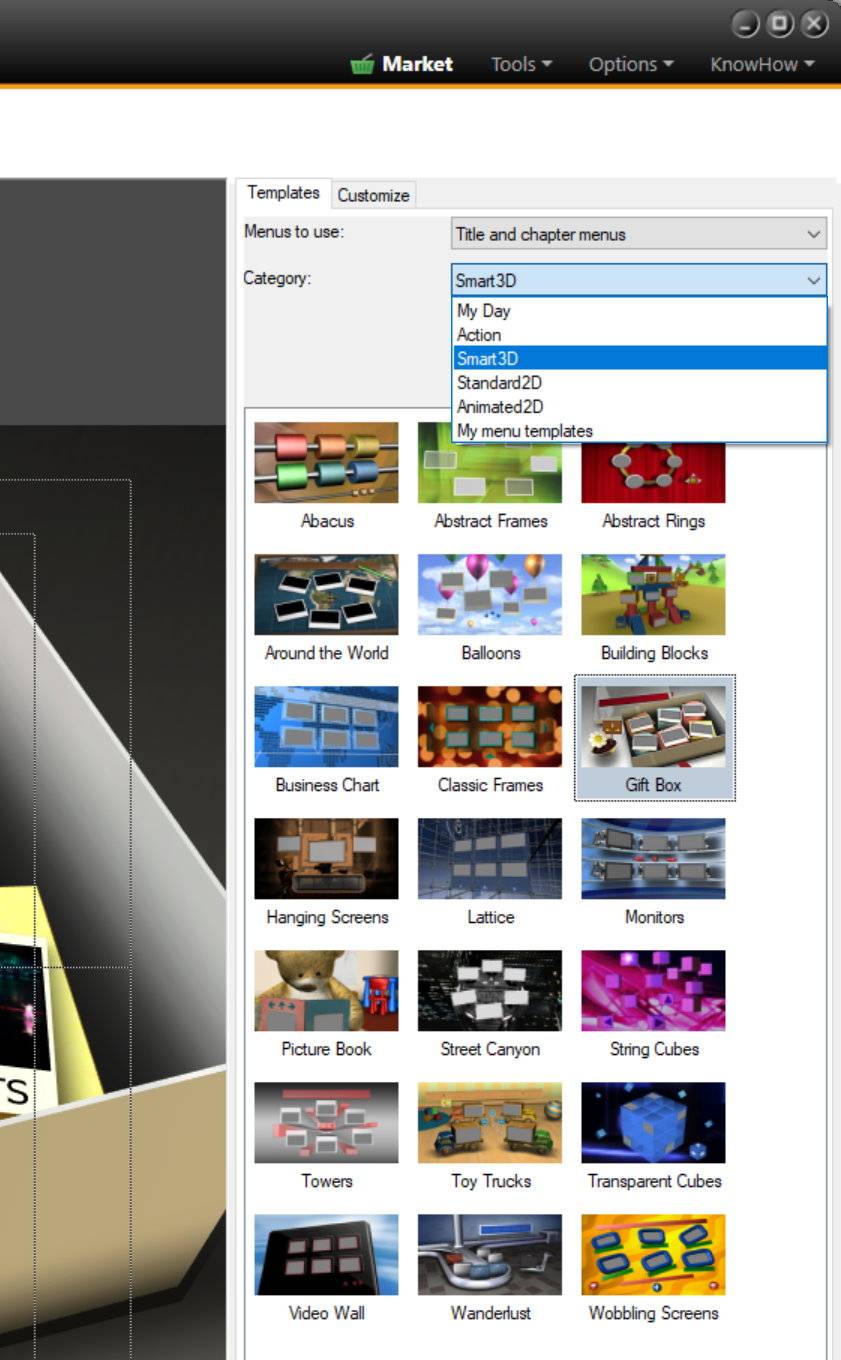
Step 3 – Select a suiting disc menu
In this screen you can select between a number of categories and numerous templates inside of the individual categories. As you can see in the screenshot, we have selected a disc menu template from the ‘Smart 3D’ category.
Click “Next” to get to the preview function.
TIP: You can also customize DVD-menus and create your very own templates to use over and over gain. For more details on how to customize disc menus in Nero Video check Nero KnowHow 00033
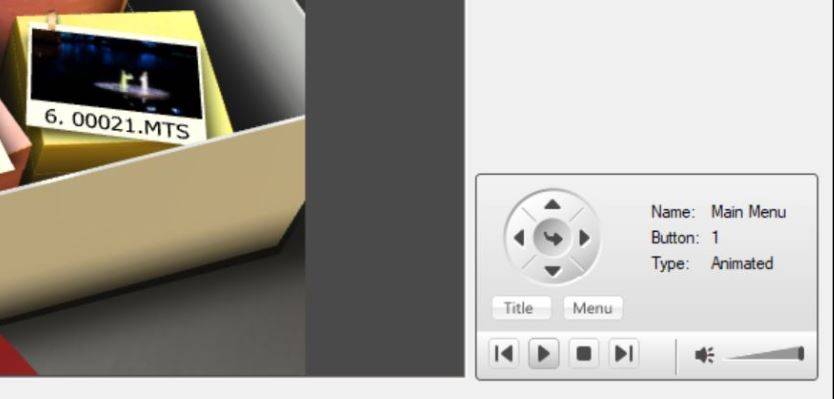
Step 4 – Preview your disc
In this screen, you can realistically preview your disc with all menus and all pages in exactly the same way your DVD player will show it. Give yourself some time for checking before you click on ”Next”.
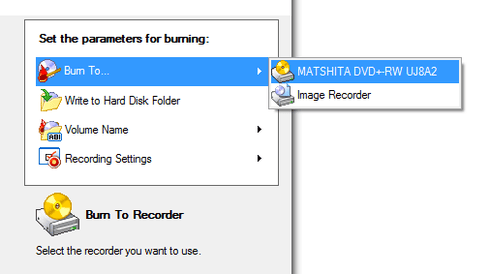
Step 5 – Burn your DVD-Video disc
Within this screen select your recorder under “Burn to…”
Insert a blank DVD disc into the recorder (DVD±R or DVD±RW or DVD±R DL)
Click “Burn”
Now, a windows opens showing you the status of the final processing – initially rendering of the disc menus and the video titles, before switching over to the status of the final burning process. No further action is required here.
You will be notified when the burning is finished.
TIP: There is a dependency between the content that fits onto your disc and the quality setting within ‘Recording Format Options’. Find more on that topic under NeroKnowHow 00022